Build the weekly schedule
The Schedule (under Team → Schedule) is a weekly planner where you assign shifts to your staff. You build the week as a draft, then publish it so your team sees their shifts in the staff app.
How the grid works
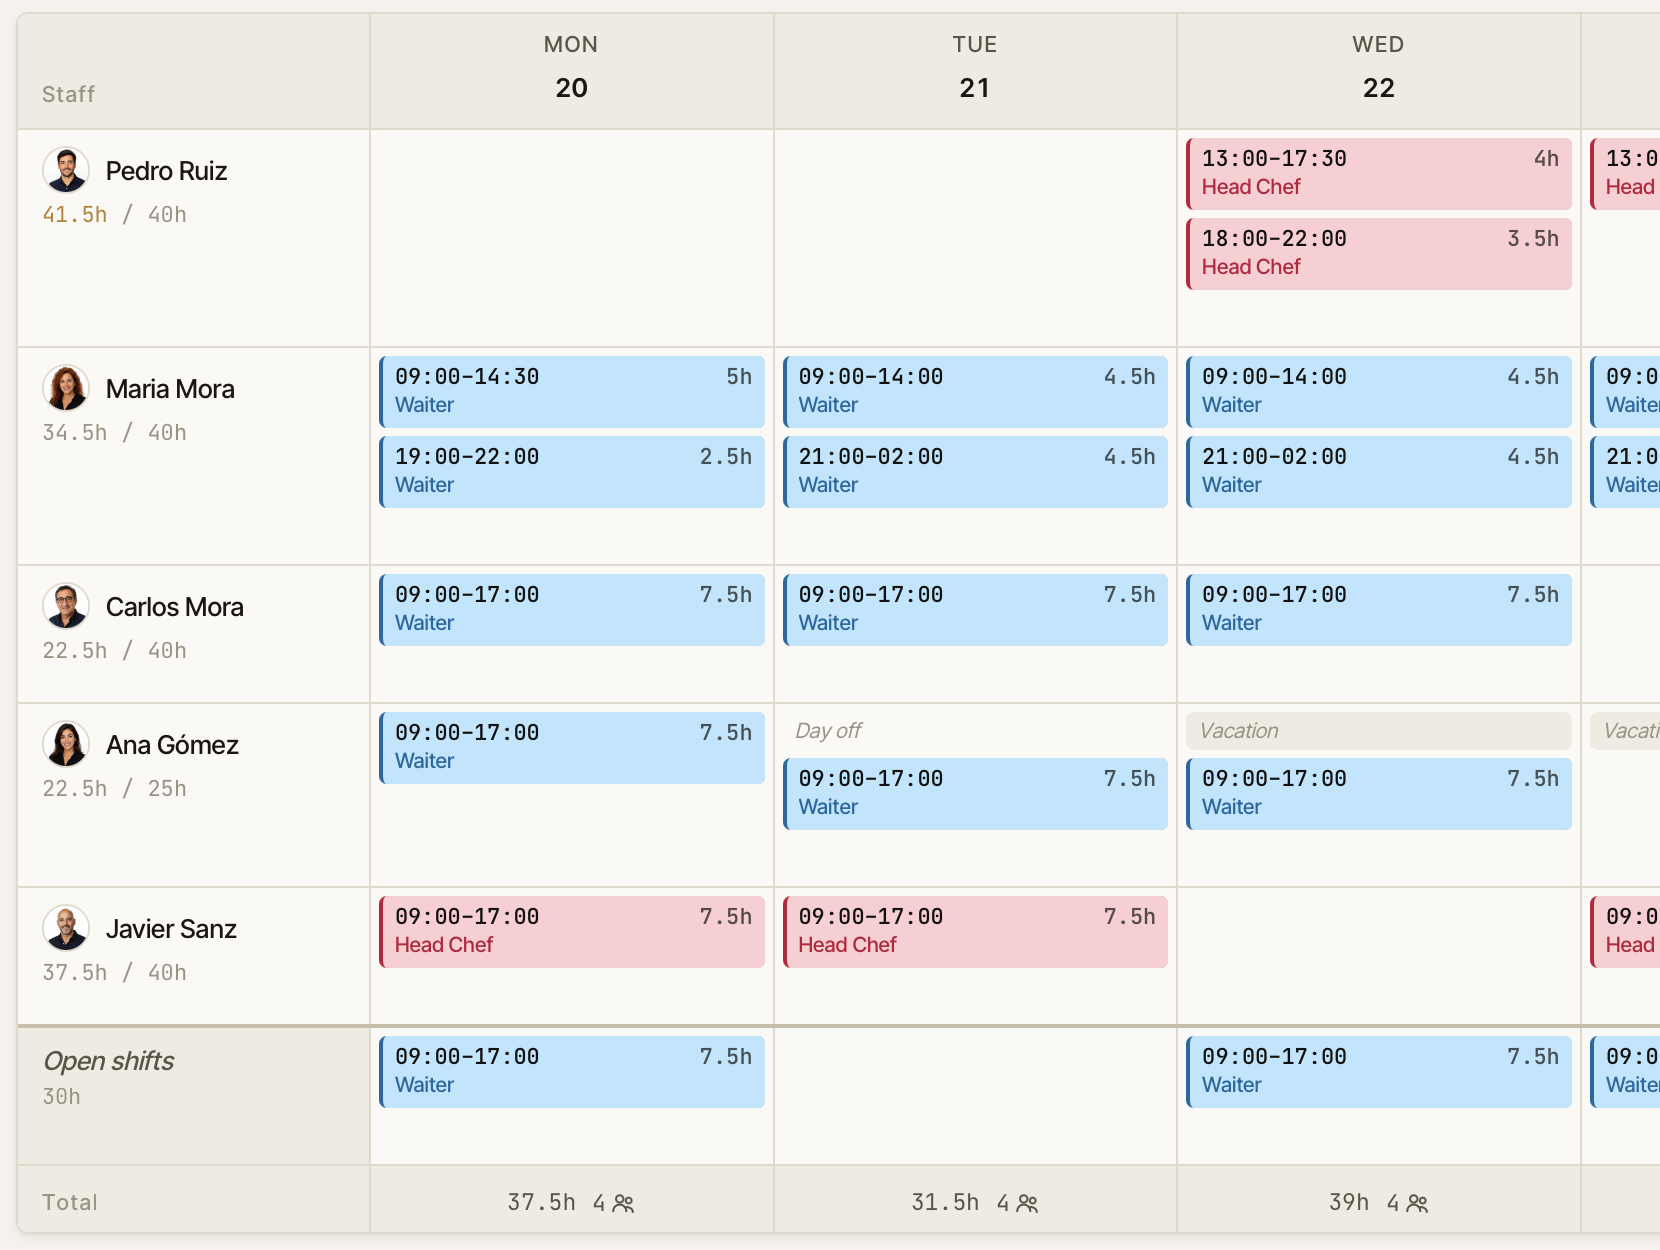
The schedule is a grid: one row per staff member, one column per day of the week.
A shift shows as a coloured block with its time and length (for example
09:00–17:00 · 8h); the colour comes from the position. Each staff row shows their
total scheduled hours for the week next to their contracted hours, so you can see at a
glance who's over or under.
At the top you can move between weeks with the ‹ and › arrows, jump back with Today, and switch between Schedule (the plan you're building) and Actual (the plan compared with hours really worked — see below).
The last row, Open shifts, is for shifts you haven't assigned to anyone yet. Staff can claim these from the staff app.
Add a shift
- Click an empty cell in the row of the person and the day you want.
- In the dialog, set:
- Start and End times. If the end is earlier than the start, you'll see "Ends the next day" — that's how you schedule an overnight shift.
- Position — which role they're working.
- Planned break (minutes) — the break you expect them to take.
- Also apply to… — optionally tick other days to create the same shift on them too, in one go.
- Press Save.
To create an unassigned shift, set the Assignee to Open shift (unassigned). To change or remove a shift later, click it and edit or press Delete.
Move and copy shifts by dragging
Drag a shift block to another cell. As you drag, the target cell splits into two zones:
- Drop on Move to move the shift there (to another day, or another person).
- Drop on Copy to leave the original where it is and place a copy at the target.
This is the quick way to shuffle a rota or repeat a shift across people.
Reuse a week: templates and copy
You rarely build a week from scratch. Two tools help:
- Copy previous week (top of the page) brings last week's shifts into the week you're viewing, as drafts you can adjust.
- Templates let you save a whole week's shape and reuse it any time. Press Templates, then Save this week with a name. To reuse it, open Templates, find it in the list, and press Apply — choosing either Add on top (keep what's there) or Replace draft shifts (clear the week's drafts first, then apply the template).
Everything these tools create arrives as draft shifts — nothing reaches staff until you publish.
Availability and warnings
Chequo checks your schedule against each person's availability and your working-time rules, and warns you — it never blocks you.
- If you schedule someone outside their available hours or on a day off, you'll get a prompt like "Alice is not available (day off)" and can choose Schedule anyway.
- A Compliance warnings panel above the grid lists softer issues: not enough rest between shifts, a missing break, too many weekly hours, or a shift landing on someone's approved time off. These are advisories to review — they don't stop you publishing.
Publish the schedule
Draft shifts are visible only to you. When the week is ready, press Publish (the button shows how many draft shifts are waiting). Published shifts turn solid green on the grid, and each affected staff member is notified — they'll see the shifts under My shifts in the staff app. Re-publishing later only notifies people about new changes, not shifts they've already seen.
Open shifts, claims and swaps
- Open shifts you publish appear in the staff app for staff to claim.
- Staff can also ask to swap a shift with a colleague.
Both come to you for approval. When a request is waiting, a Shift requests panel appears above the grid showing who's asking and any warning the change would cause. Press Approve or Deny.
See planned vs actual
Switch the toggle at the top from Schedule to Actual to compare what you
planned with what really happened. Each cell shows planned / worked hours, with
badges for Late, No-show and Unscheduled, plus a scheduled-vs-actual cost
summary. The worked hours come from staff clocking in and out.