In questo documento
Taking an order
This guide covers taking an order at a table: opening a check, adding items, sending them to the kitchen, and running more than one check on a table. You need to be signed in first.
Open a check on a table
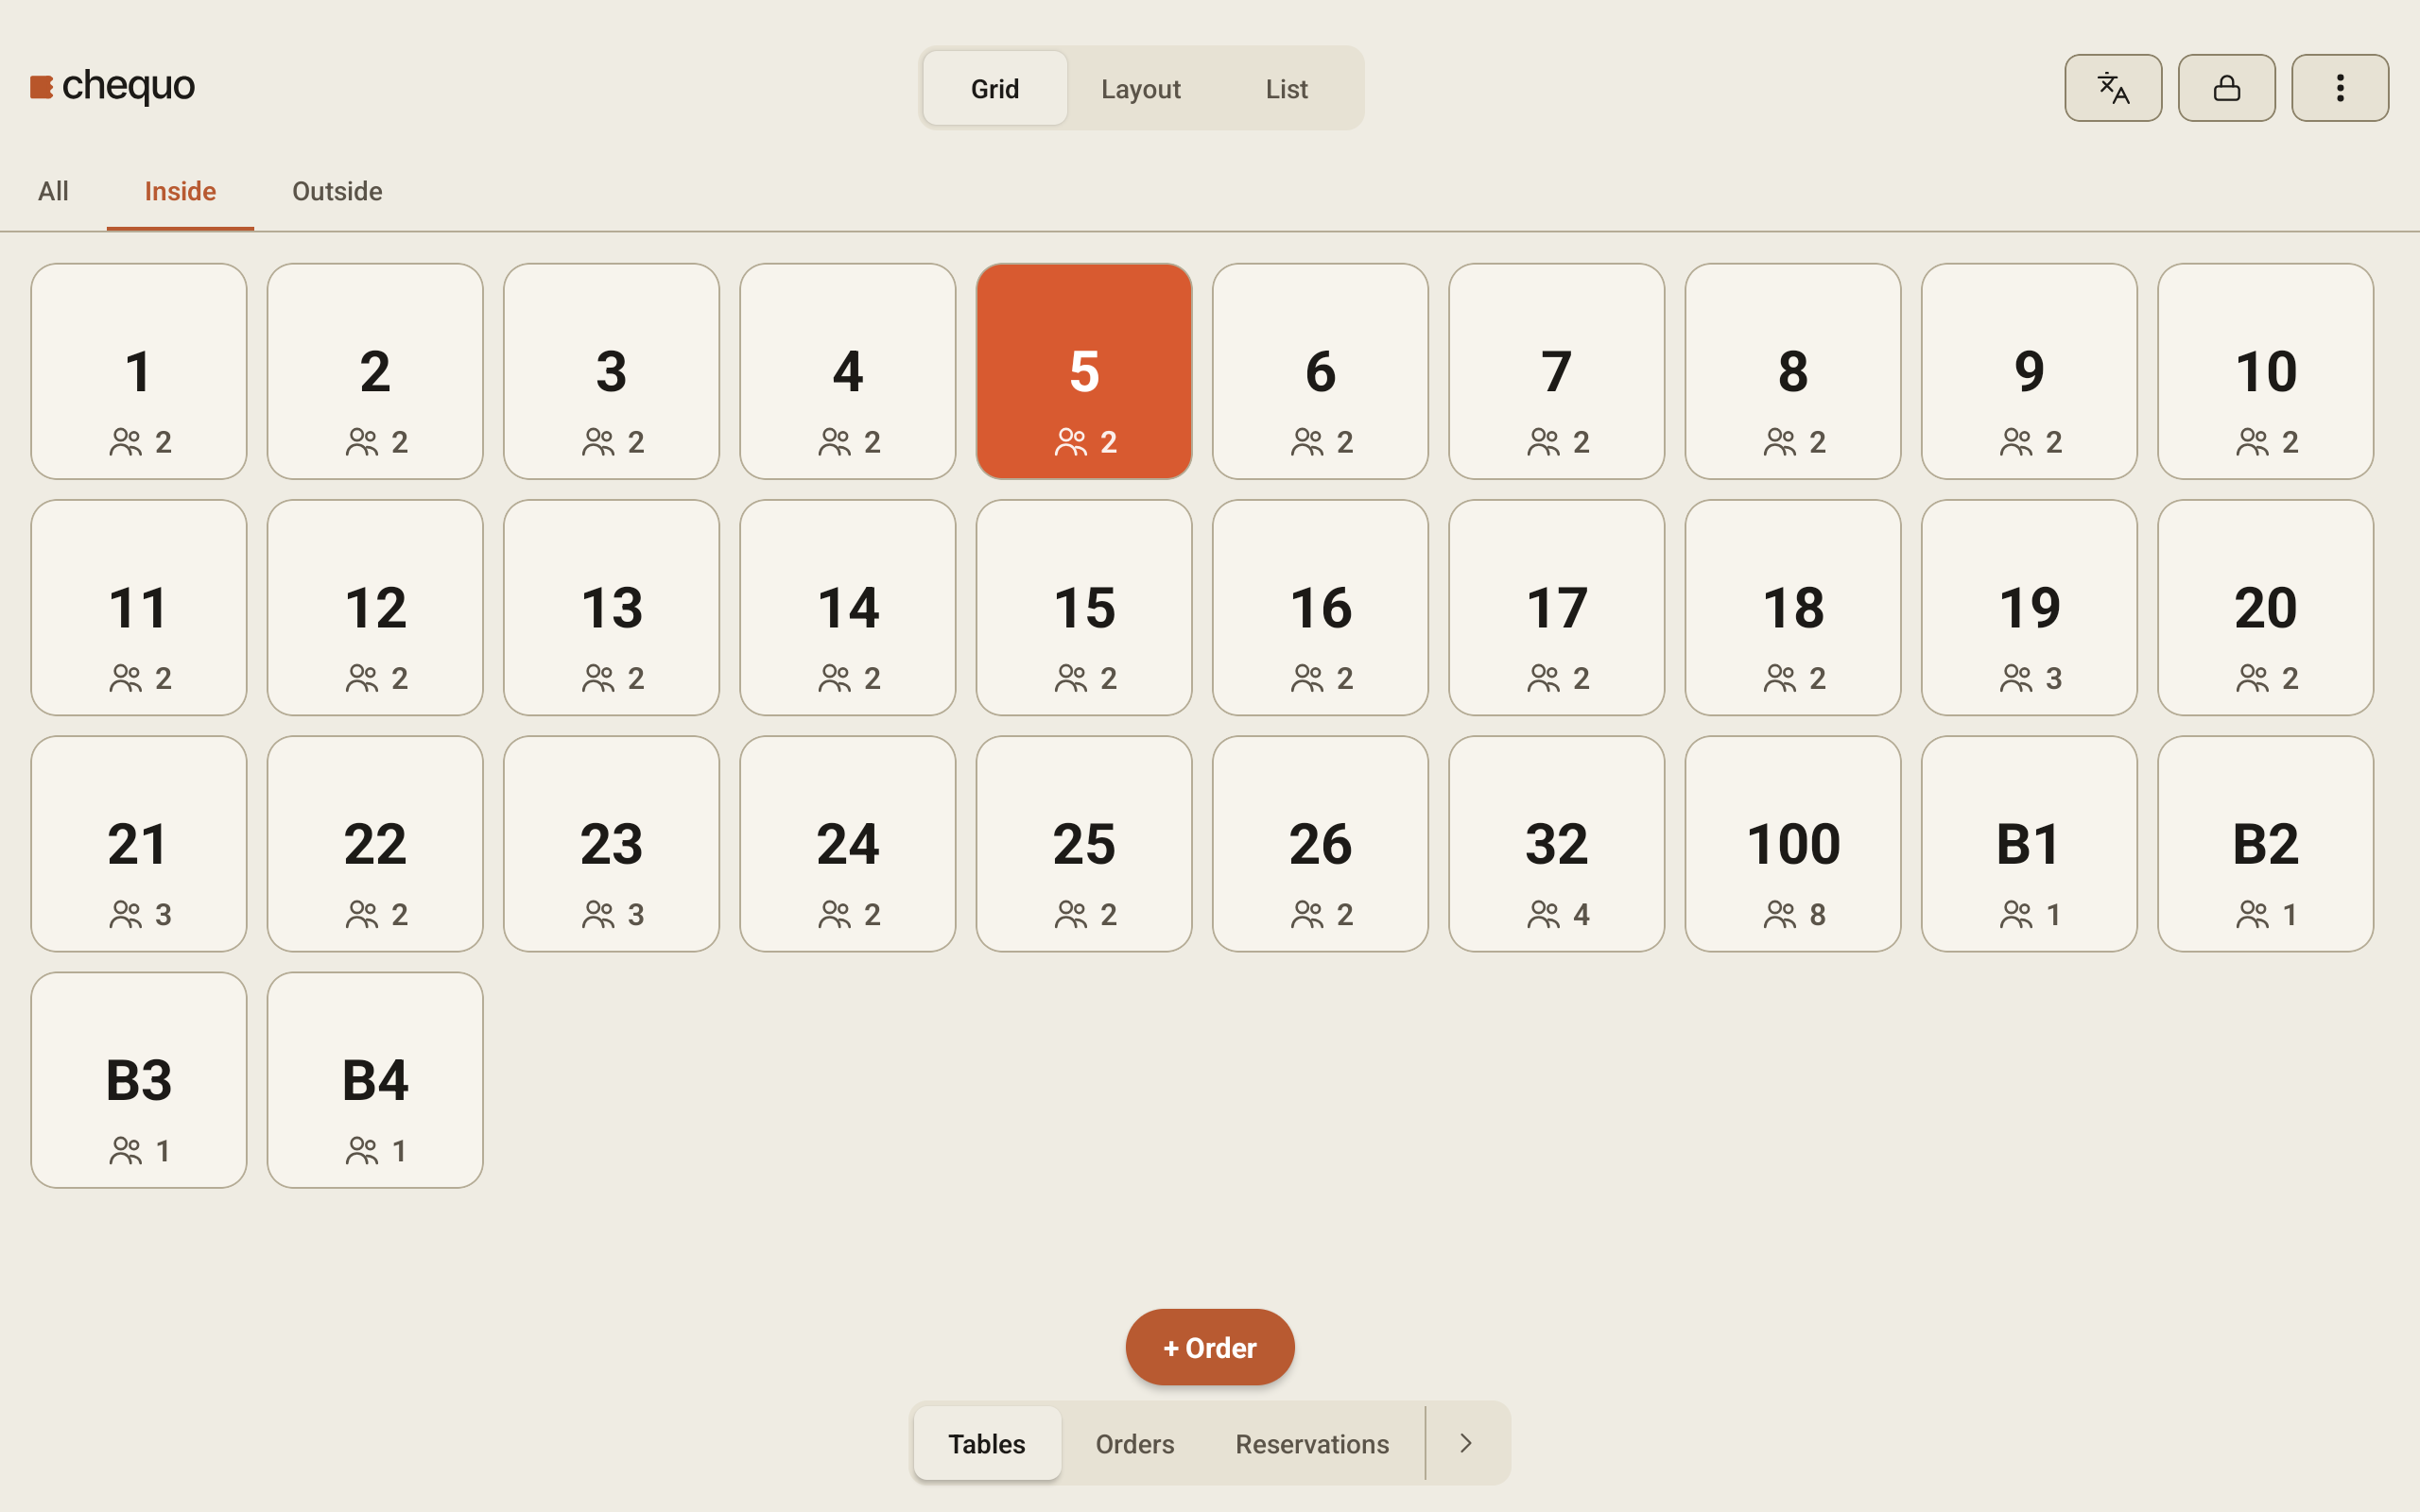
- On the Tables screen, tap a free table.
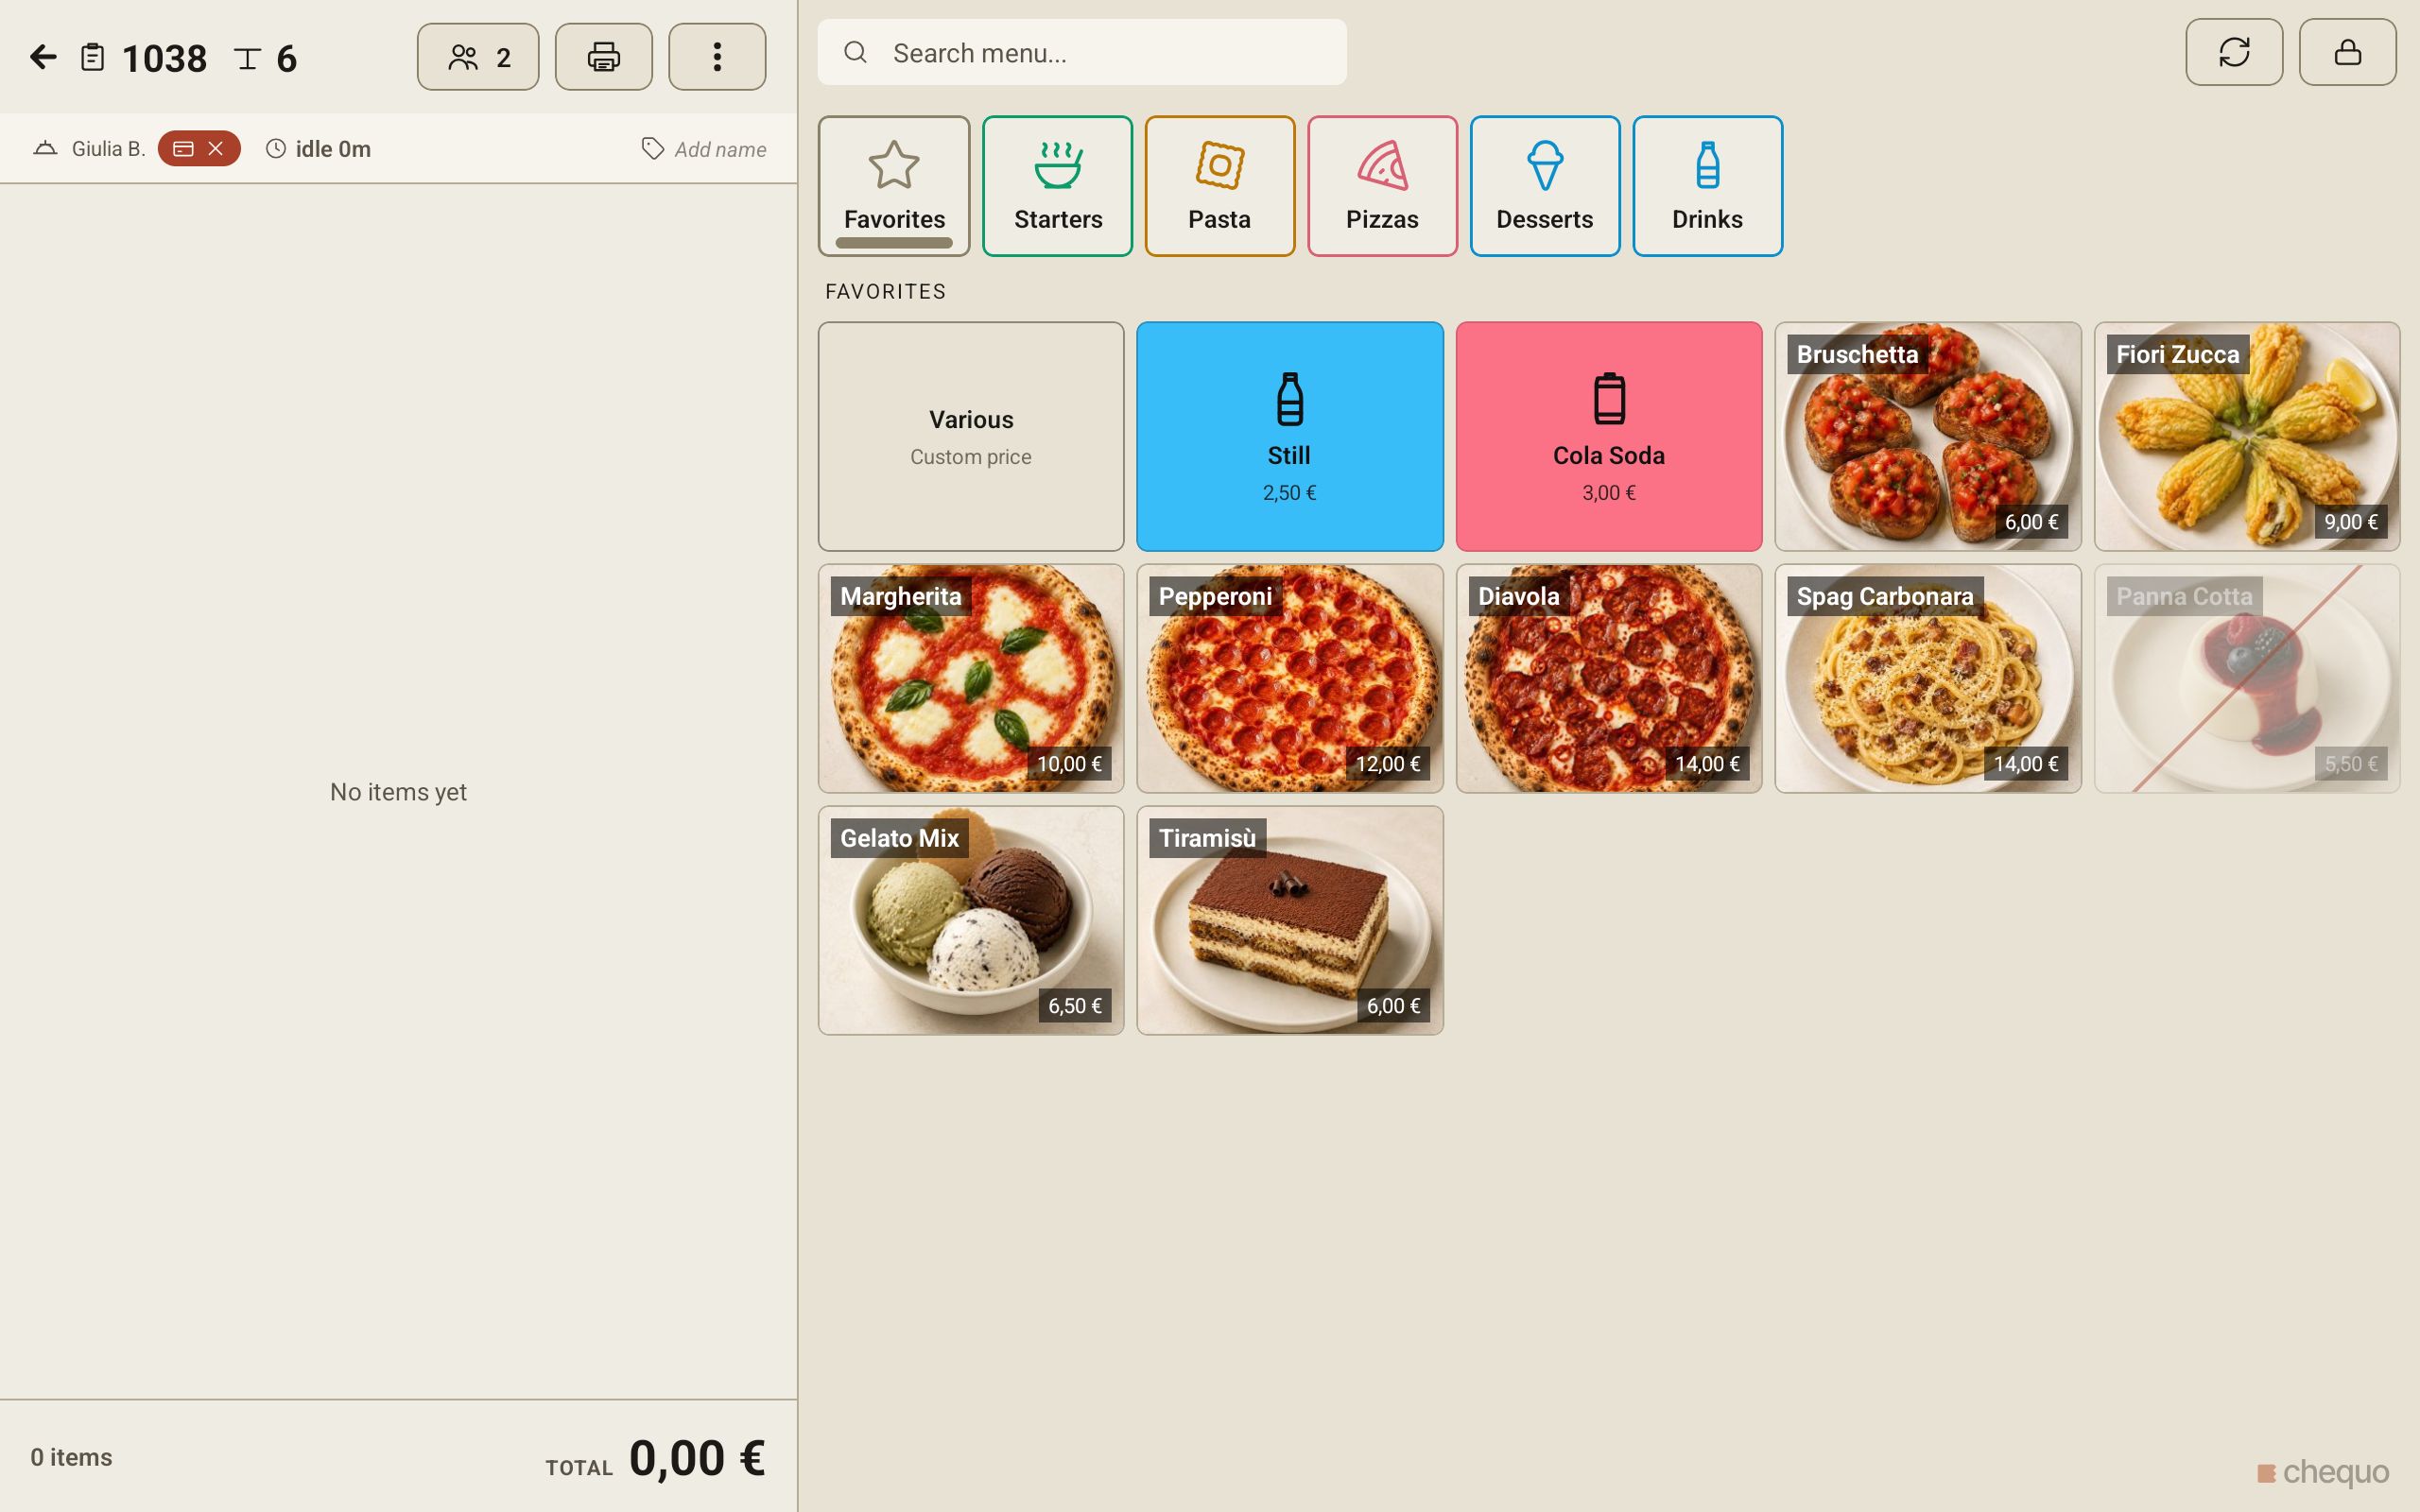
- The app opens a new check and takes you straight to the order screen.
The check is on the left of the order screen and the menu is on the right.
Set the number of guests
The guest count starts at the number of seats at the table. To change it:
- Tap the button with the person icon and a number, at the top of the check.
- In Guests, use − and + to set how many people are at the table.
- Tap Save.
If the table is reserved
If a booking is due at the table soon, a short menu opens instead. Tap Start walk-in order to seat other guests there now, or Mark arrived & seat if the guests on the booking have arrived.
Add items
- Tap a group in the row of groups above the items. If your menu has favourites, the app opens on Favorites. If a group has sub-groups, a second row appears; tap All to see everything in the group.
- Tap an item to add it to the check. Tapping an item with no options again adds one more to the same unsent line.
With more than one menu, a row of menu tabs sits above the groups.
Search for an item
Tap Search menu... above the menu and type part of a name. Tap an item under Search results to add it. Clear the search with the cross to go back.
Items with options
Many items have choices, such as a dough, a size or extra toppings.
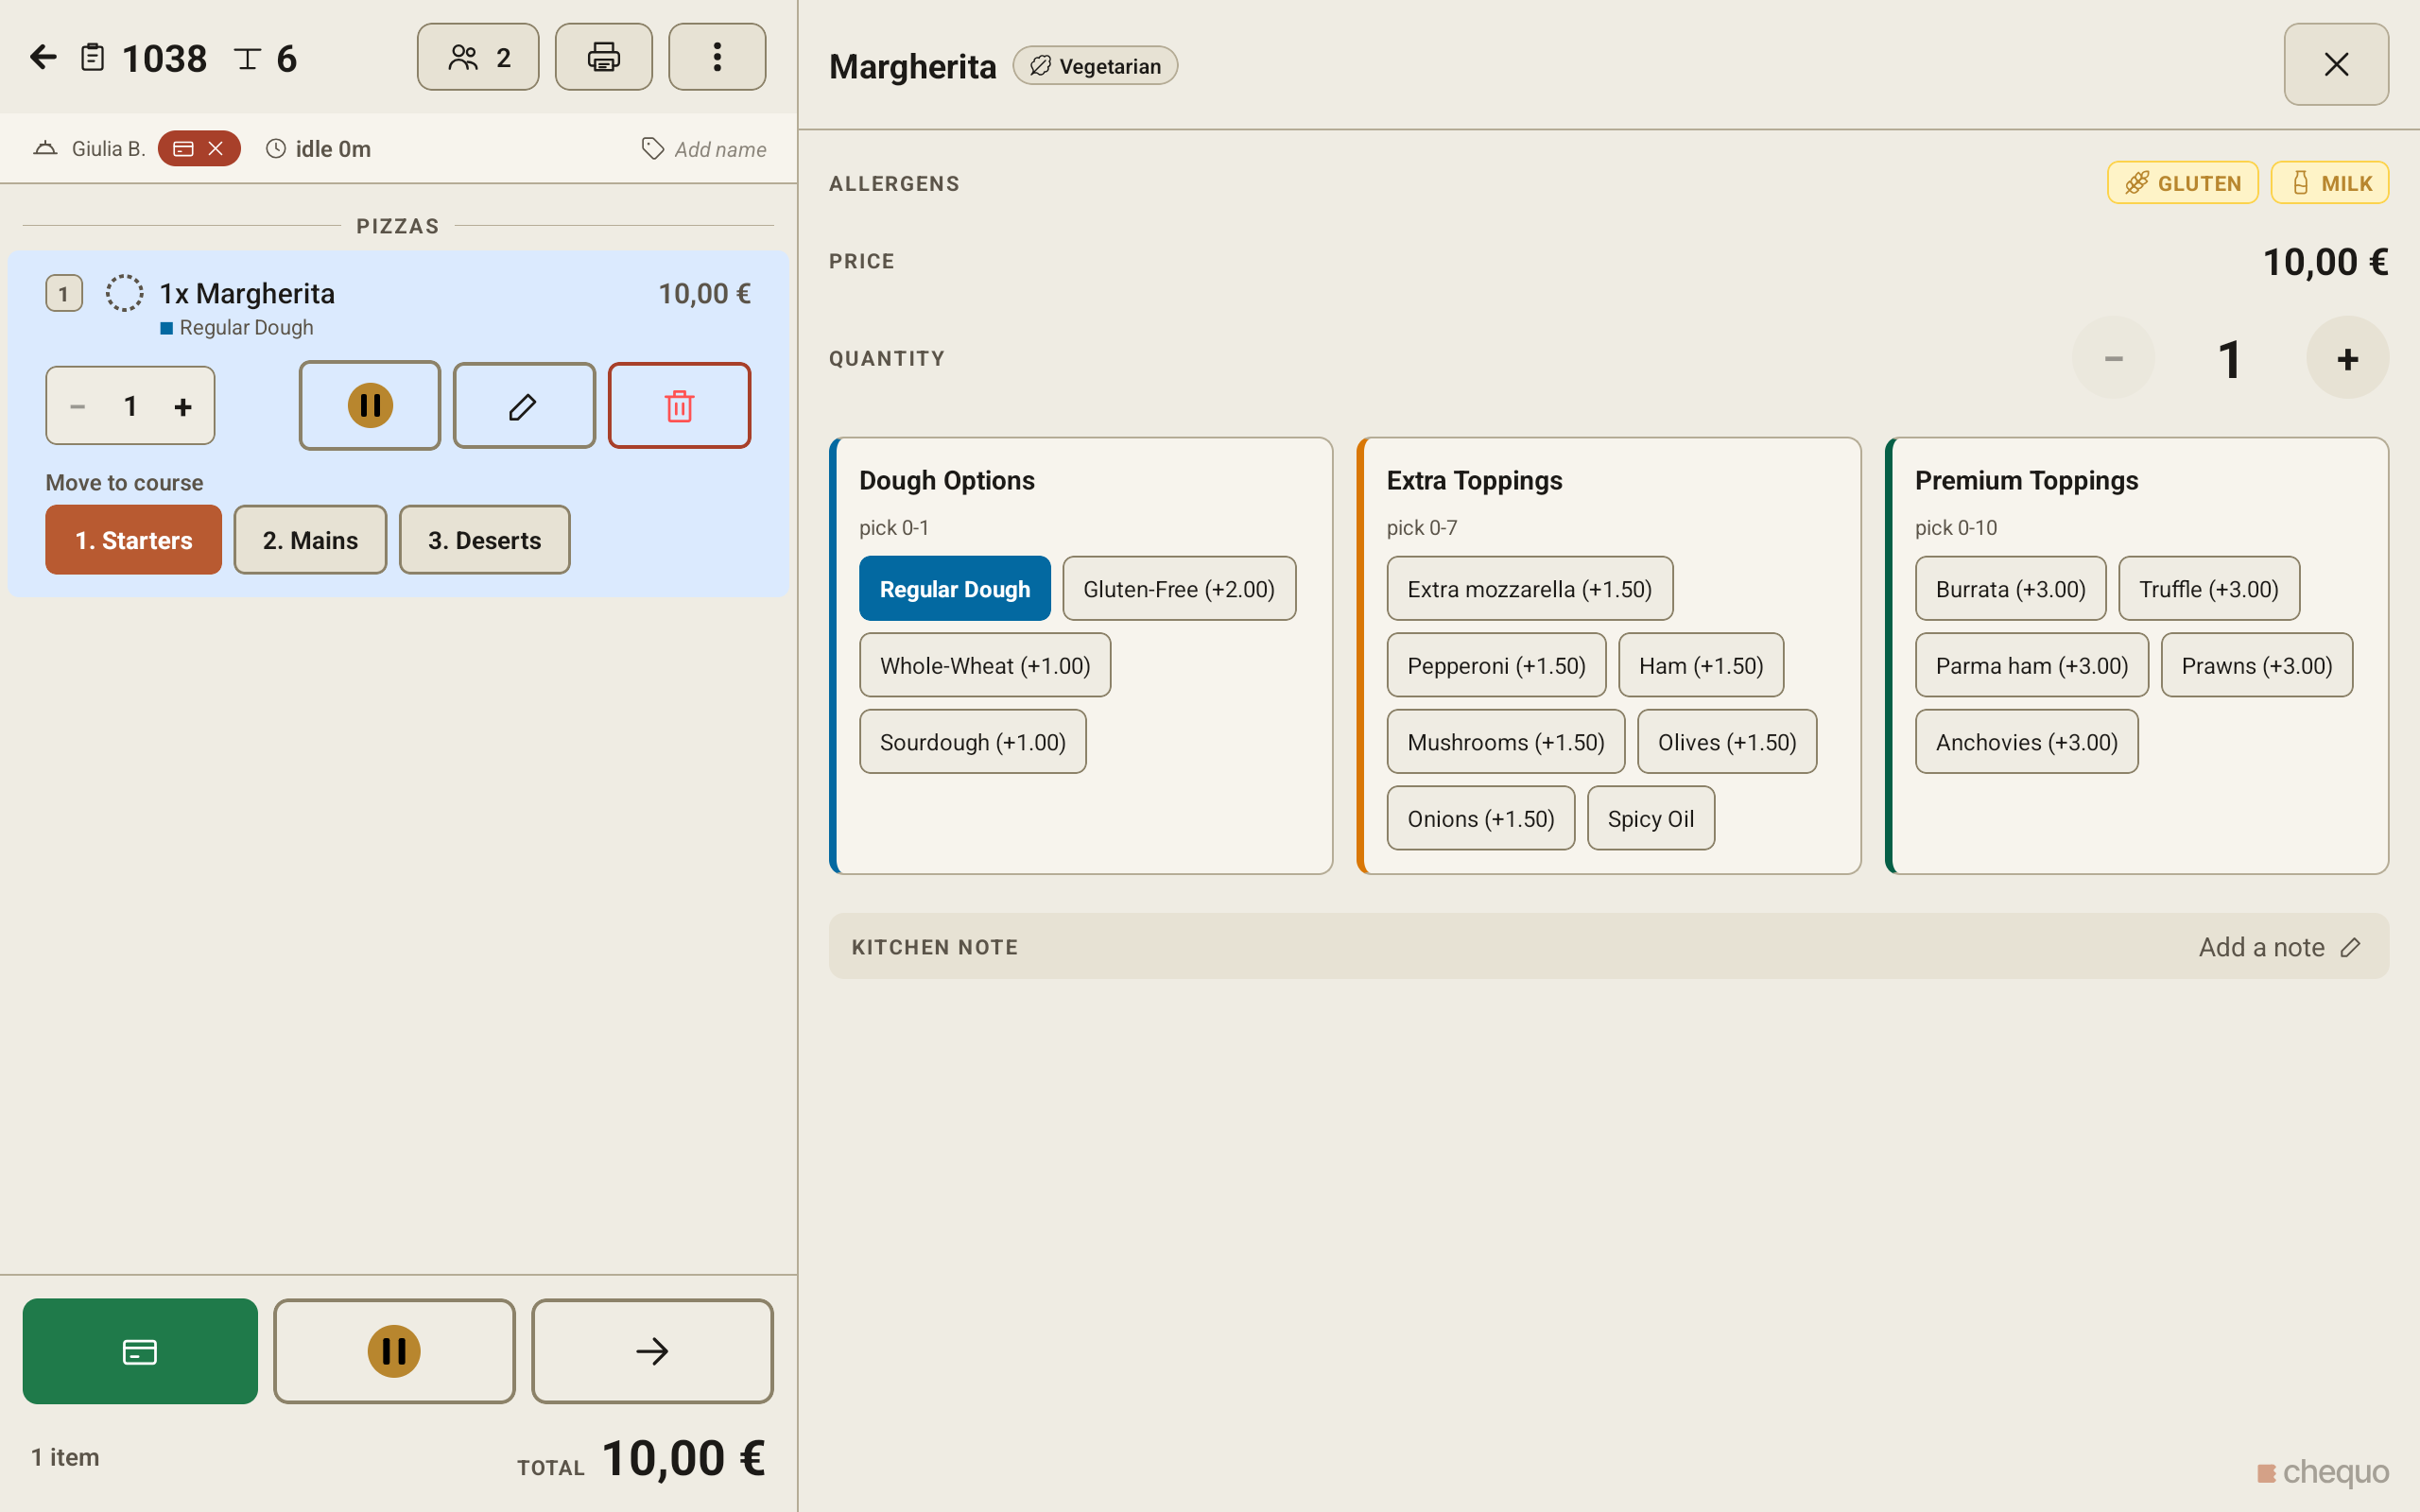
- Tap the item. It is added to the check and an editor replaces the menu.
- Tap the options you want. A hint such as "pick 1" under each group says how many to choose. Choices save as you tap.
- If a required group has nothing picked yet, a banner at the top of the editor names it: "Pick a … to complete this item."
- Tap the cross at the top right of the editor to go back to the menu.
Some products come in variants, for example a drink in several sizes. Tapping one opens a sheet with the product's name and Choose a variant at the top. Pick one value in each row, then tap Add.
Change or remove a line
Tap a line on the check to select it. A toolbar opens under the line, and the item editor opens on the right.
- Change the quantity: use − and + in the toolbar, or Quantity in the editor.
- Add a note for the kitchen: in the editor, tap Add a note under Kitchen note, type the note (for example an allergy) and tap Save. The note shows under the line on the check.
- Hold just this line: tap the pause button. A held line shows an arrow instead; tap it to send that line now.
- Remove the line: tap the red bin in the toolbar, then tap Remove to confirm.
Tap the line again to close the toolbar and the editor.
These changes apply to lines that have not been sent yet. Once a line is sent, its quantity and note can no longer be changed, and the bin opens the void and comp options instead of removing it. On a sent line, a tick button marks it served if the kitchen forgot to.
If your restaurant serves food in courses, the toolbar also shows Move to course with your course names. Tap one to put the line in that course. When you send, only the courses that are due go to the kitchen, and later courses wait until you fire them.
Send the order to the kitchen
Tap the send button at the bottom of the check: the button with the right-pointing arrow. You stay on the check. Every unsent line that is not on hold is sent, and its kitchen ticket goes to the printer or kitchen screen set up for it.
To keep lines back, for example desserts, tap the hold button (the pause sign next to send) before sending. It puts every unsent line on hold. Tap it again to take them off hold, then send.
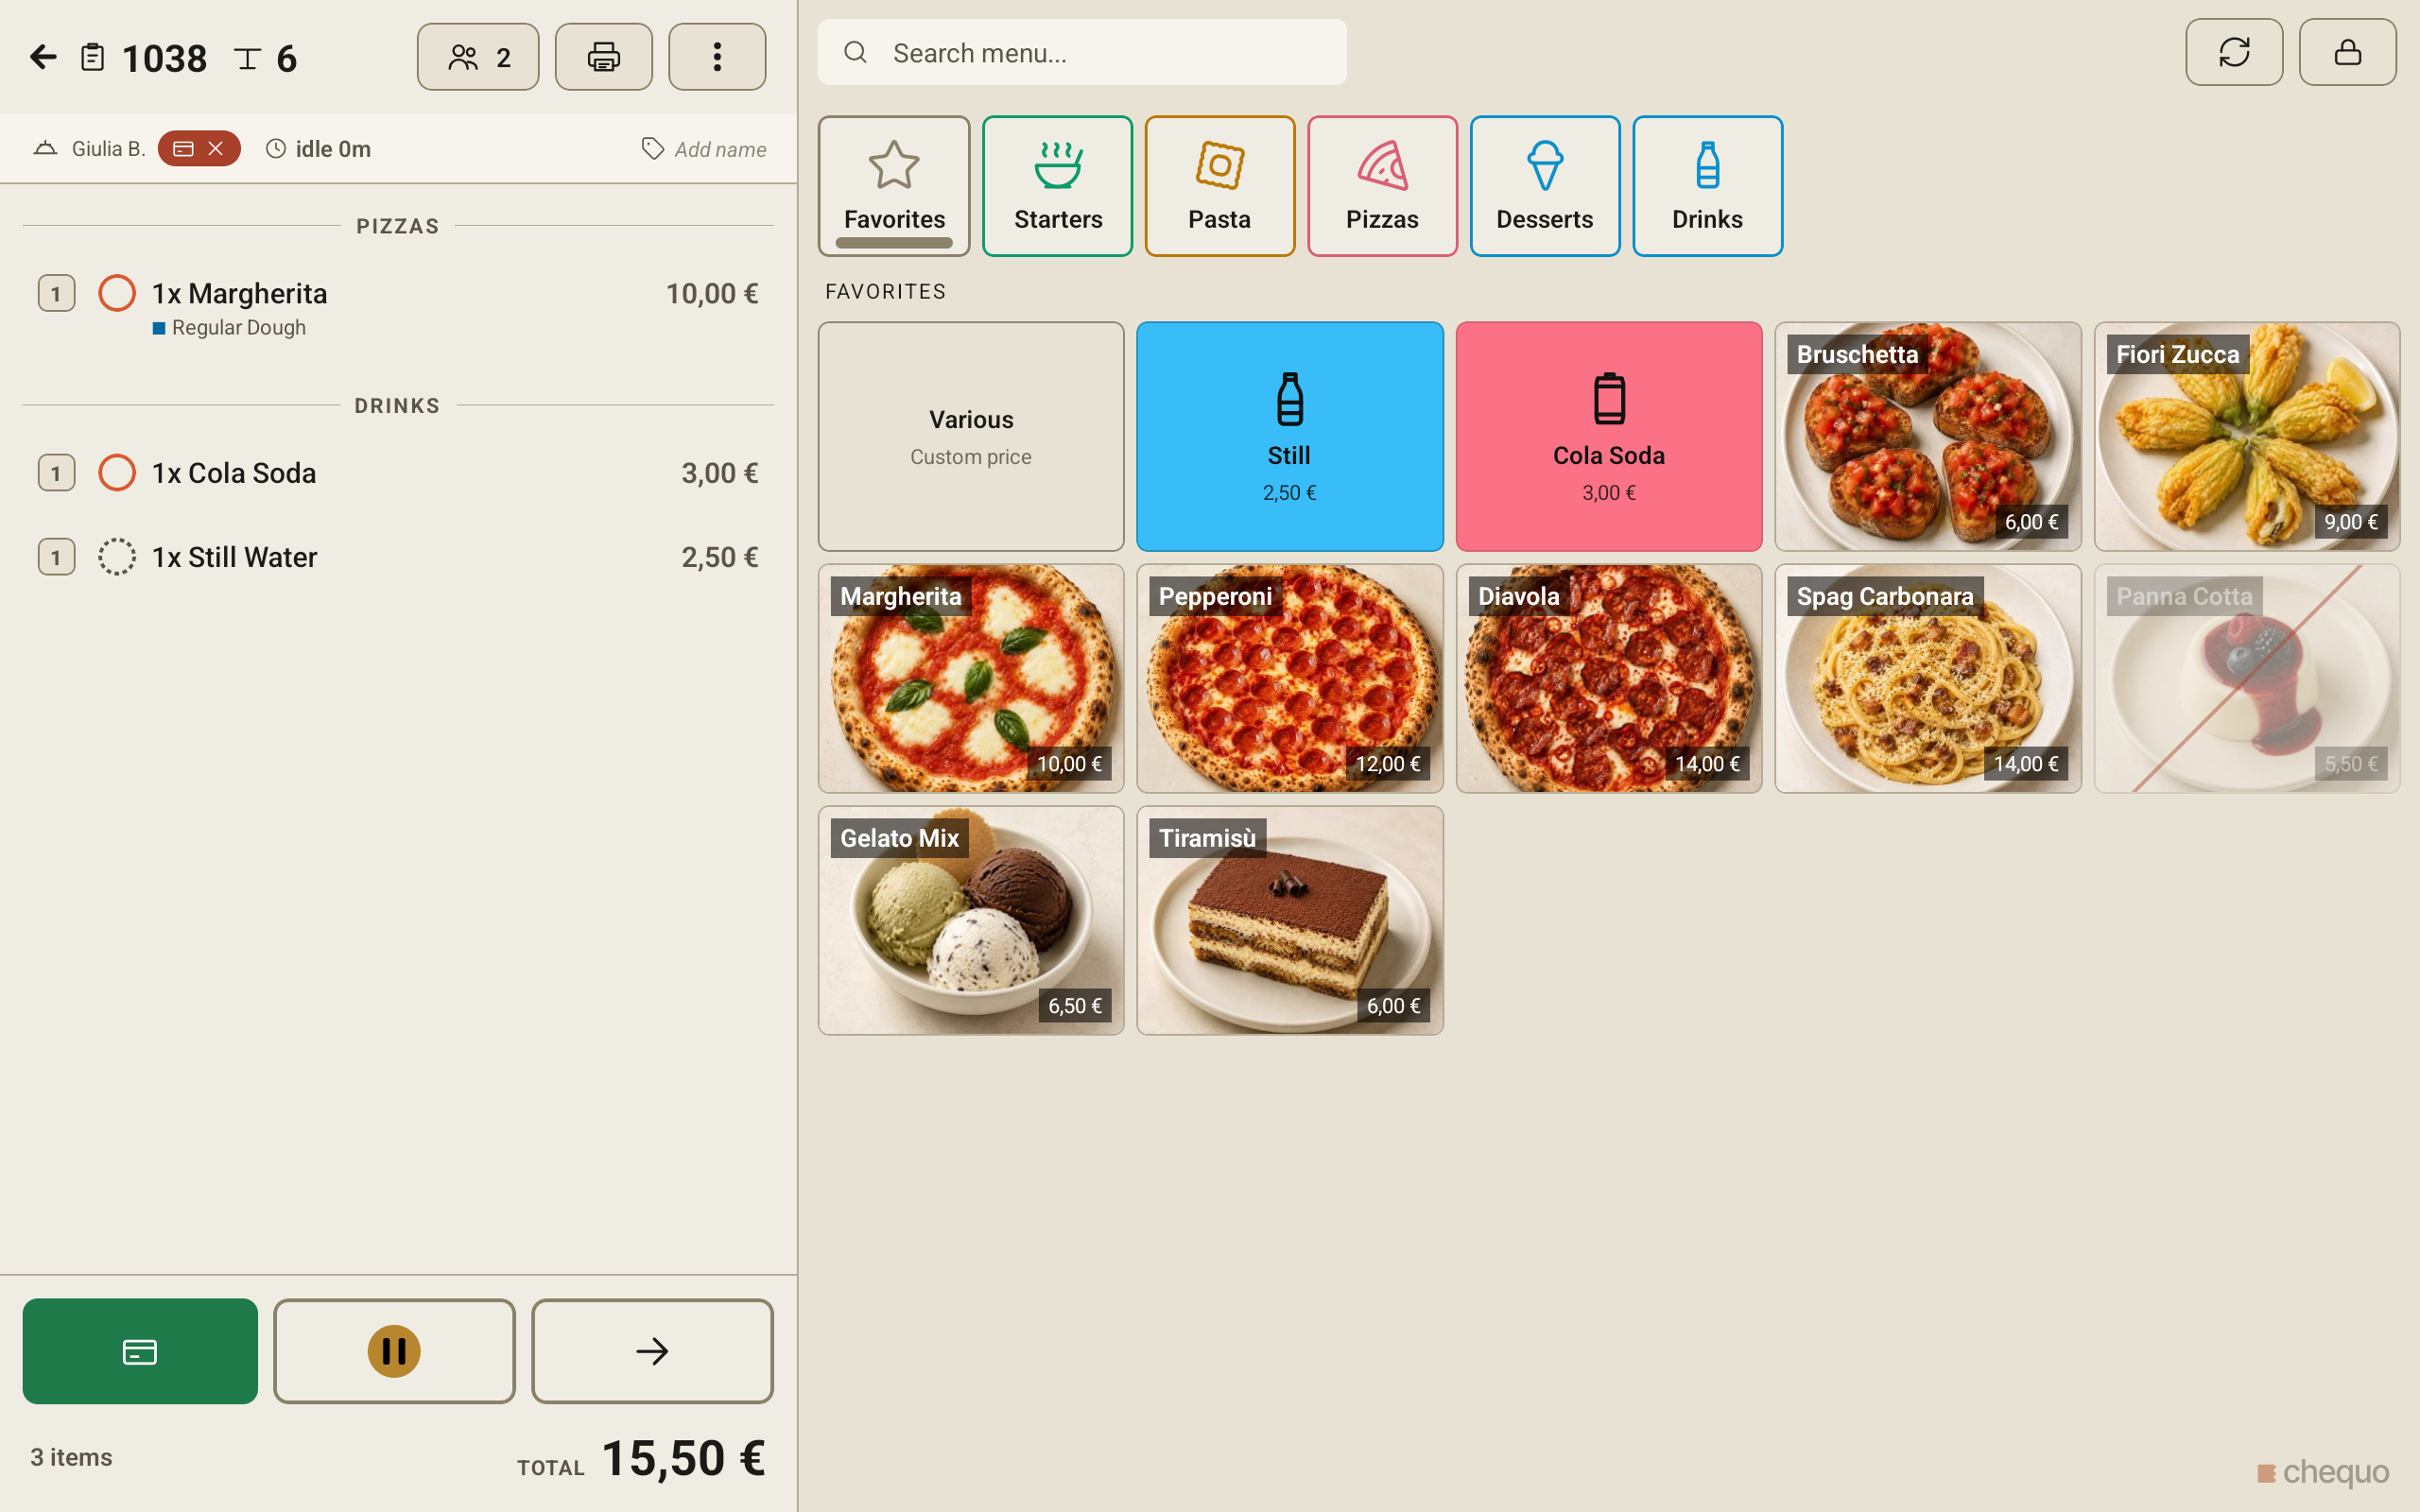
The circle at the start of each line shows where it is:
- Dashed grey circle: not sent yet.
- Amber circle with a pause sign: on hold, not sent.
- Orange ring: sent; the kitchen has it.
- Pulsing orange dot: being prepared.
- Green dot: ready.
- Green dot with a tick: served.
- Green dot with a flame: sent to a station that only prints tickets.
Add more items later
- On the Tables screen, tap the table. If it has one check, the check opens.
- Add the new items as before. They appear with a dashed circle.
- Tap the send button. Only the new lines are sent.
To leave the check, tap the arrow at the top left. Unsent lines stay on the check, and the payment screen warns you about them before you take payment.
When the guests are ready to pay, tap the green Pay button (card icon) at the bottom left of the check. It shows only its icon when the hold and send buttons are there too. See Taking a payment.
More than one check on a table
A table can hold more than one check, for example when two groups share it.
Start a second check
- On the Tables screen, press and hold the table.
- A sheet opens with the table's check. Tap Add order.
- The new check opens, empty. Add items to it as usual.
Open one of several checks
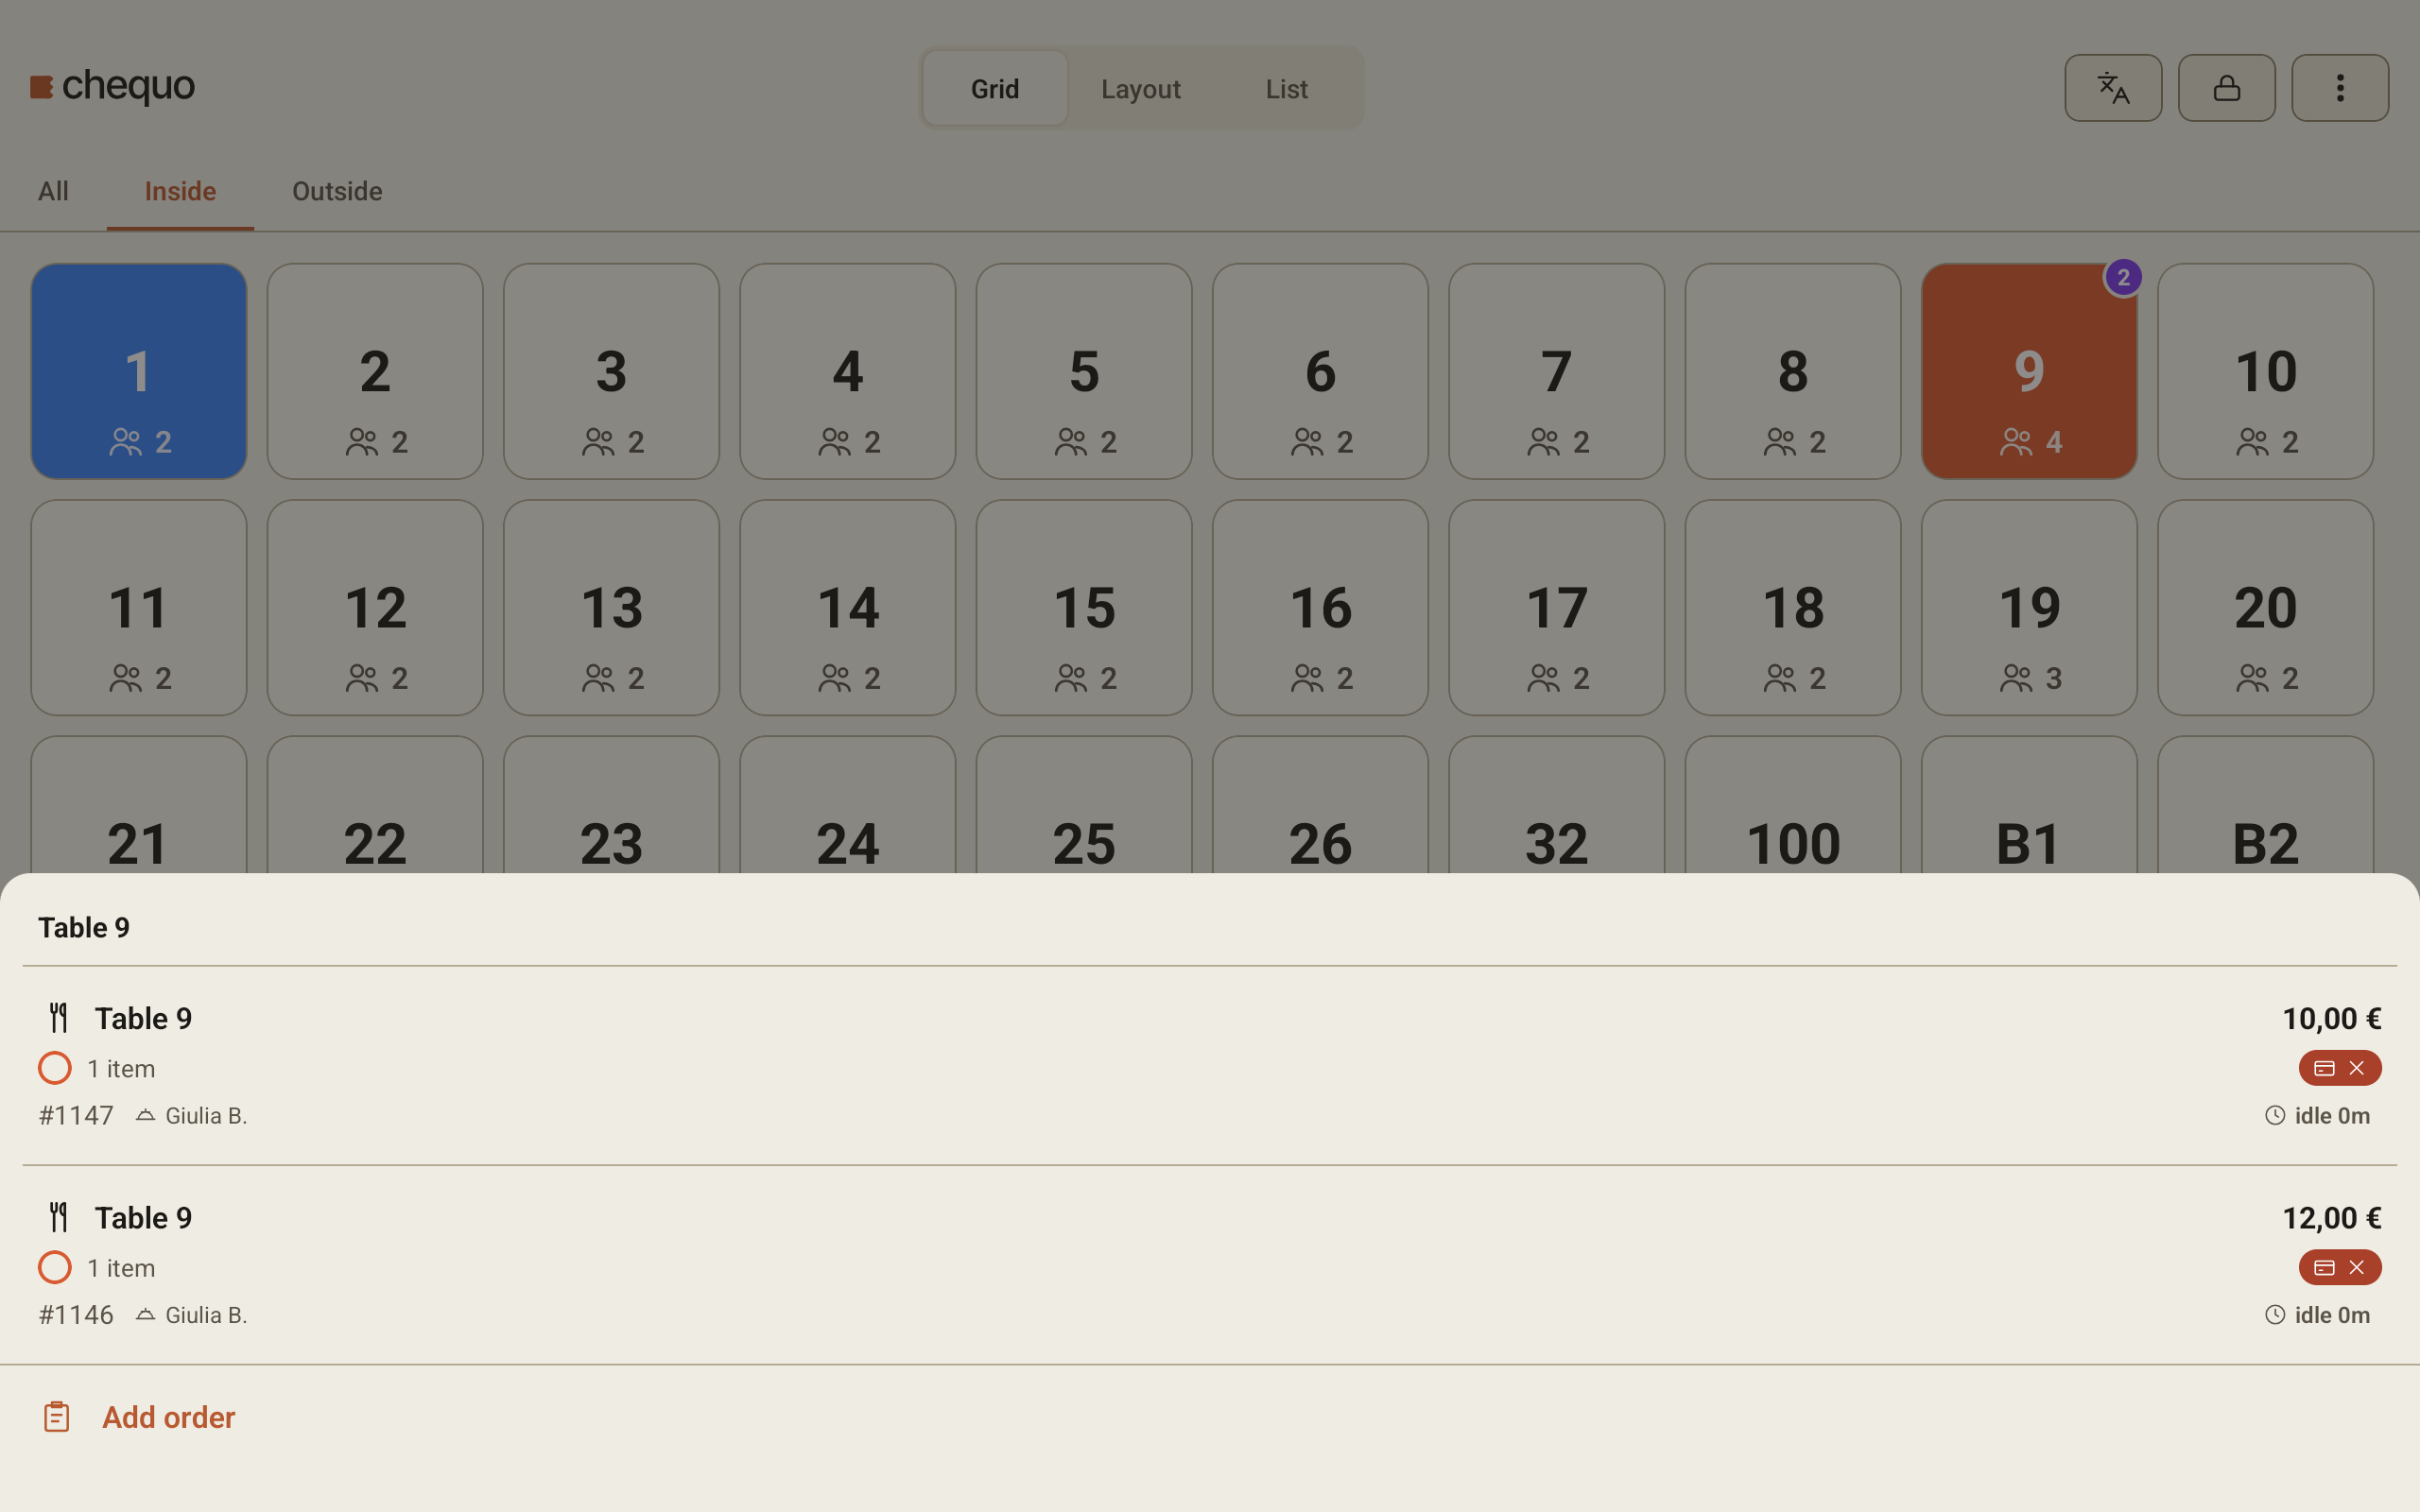
A table with more than one check shows a badge with the number of checks.
- Tap the table. A sheet headed with the table number lists its open checks.
- Tap the check you want to open it, or tap Add order to start another one.
On a phone
On a phone the check and the menu are on two tabs, Order and Menu. A new check opens on Menu. Tapping an item opens it first, with its options if it has any. Pick what you need and tap Add to put it on the check.