En este documento
Choose how tickets appear
The Kitchen Display can show orders in three ways (see Kitchen and bar displays for the basics): Whole order, Per-item tickets and Item fulfillment. This guide shows what each one looks like, how a cook works it, and where you choose it: for the whole location, for one station, or for one screen.
Whole order
Each order is one ticket on a board with three columns: NEW, IN PROGRESS and READY. The cook moves the whole ticket at once.
- Tap → on a ticket in NEW when you start cooking it. It moves to IN PROGRESS.
- Tap → again when the food is plated. It moves to READY.
- Tap → on a READY ticket once it has gone out. It leaves the board.
Tap ← to send a ticket back one column if you moved it by mistake.
On a station with quick actions on, a ticket in NEW shows three shortcut buttons instead of →, and the amber one does the same as →: see Send simple items straight out.
When a location uses course pacing, as Luna Rossa does, each course the waiter fires is its own ticket, so one order can show as more than one ticket. Courses the waiter has not fired yet wait in a tray at the foot of the NEW column. If part of the same course is still in an earlier column, for example an item added to the order after the rest, the READY ticket lists those items under Waiting on: and its → stays disabled until they are ready too.
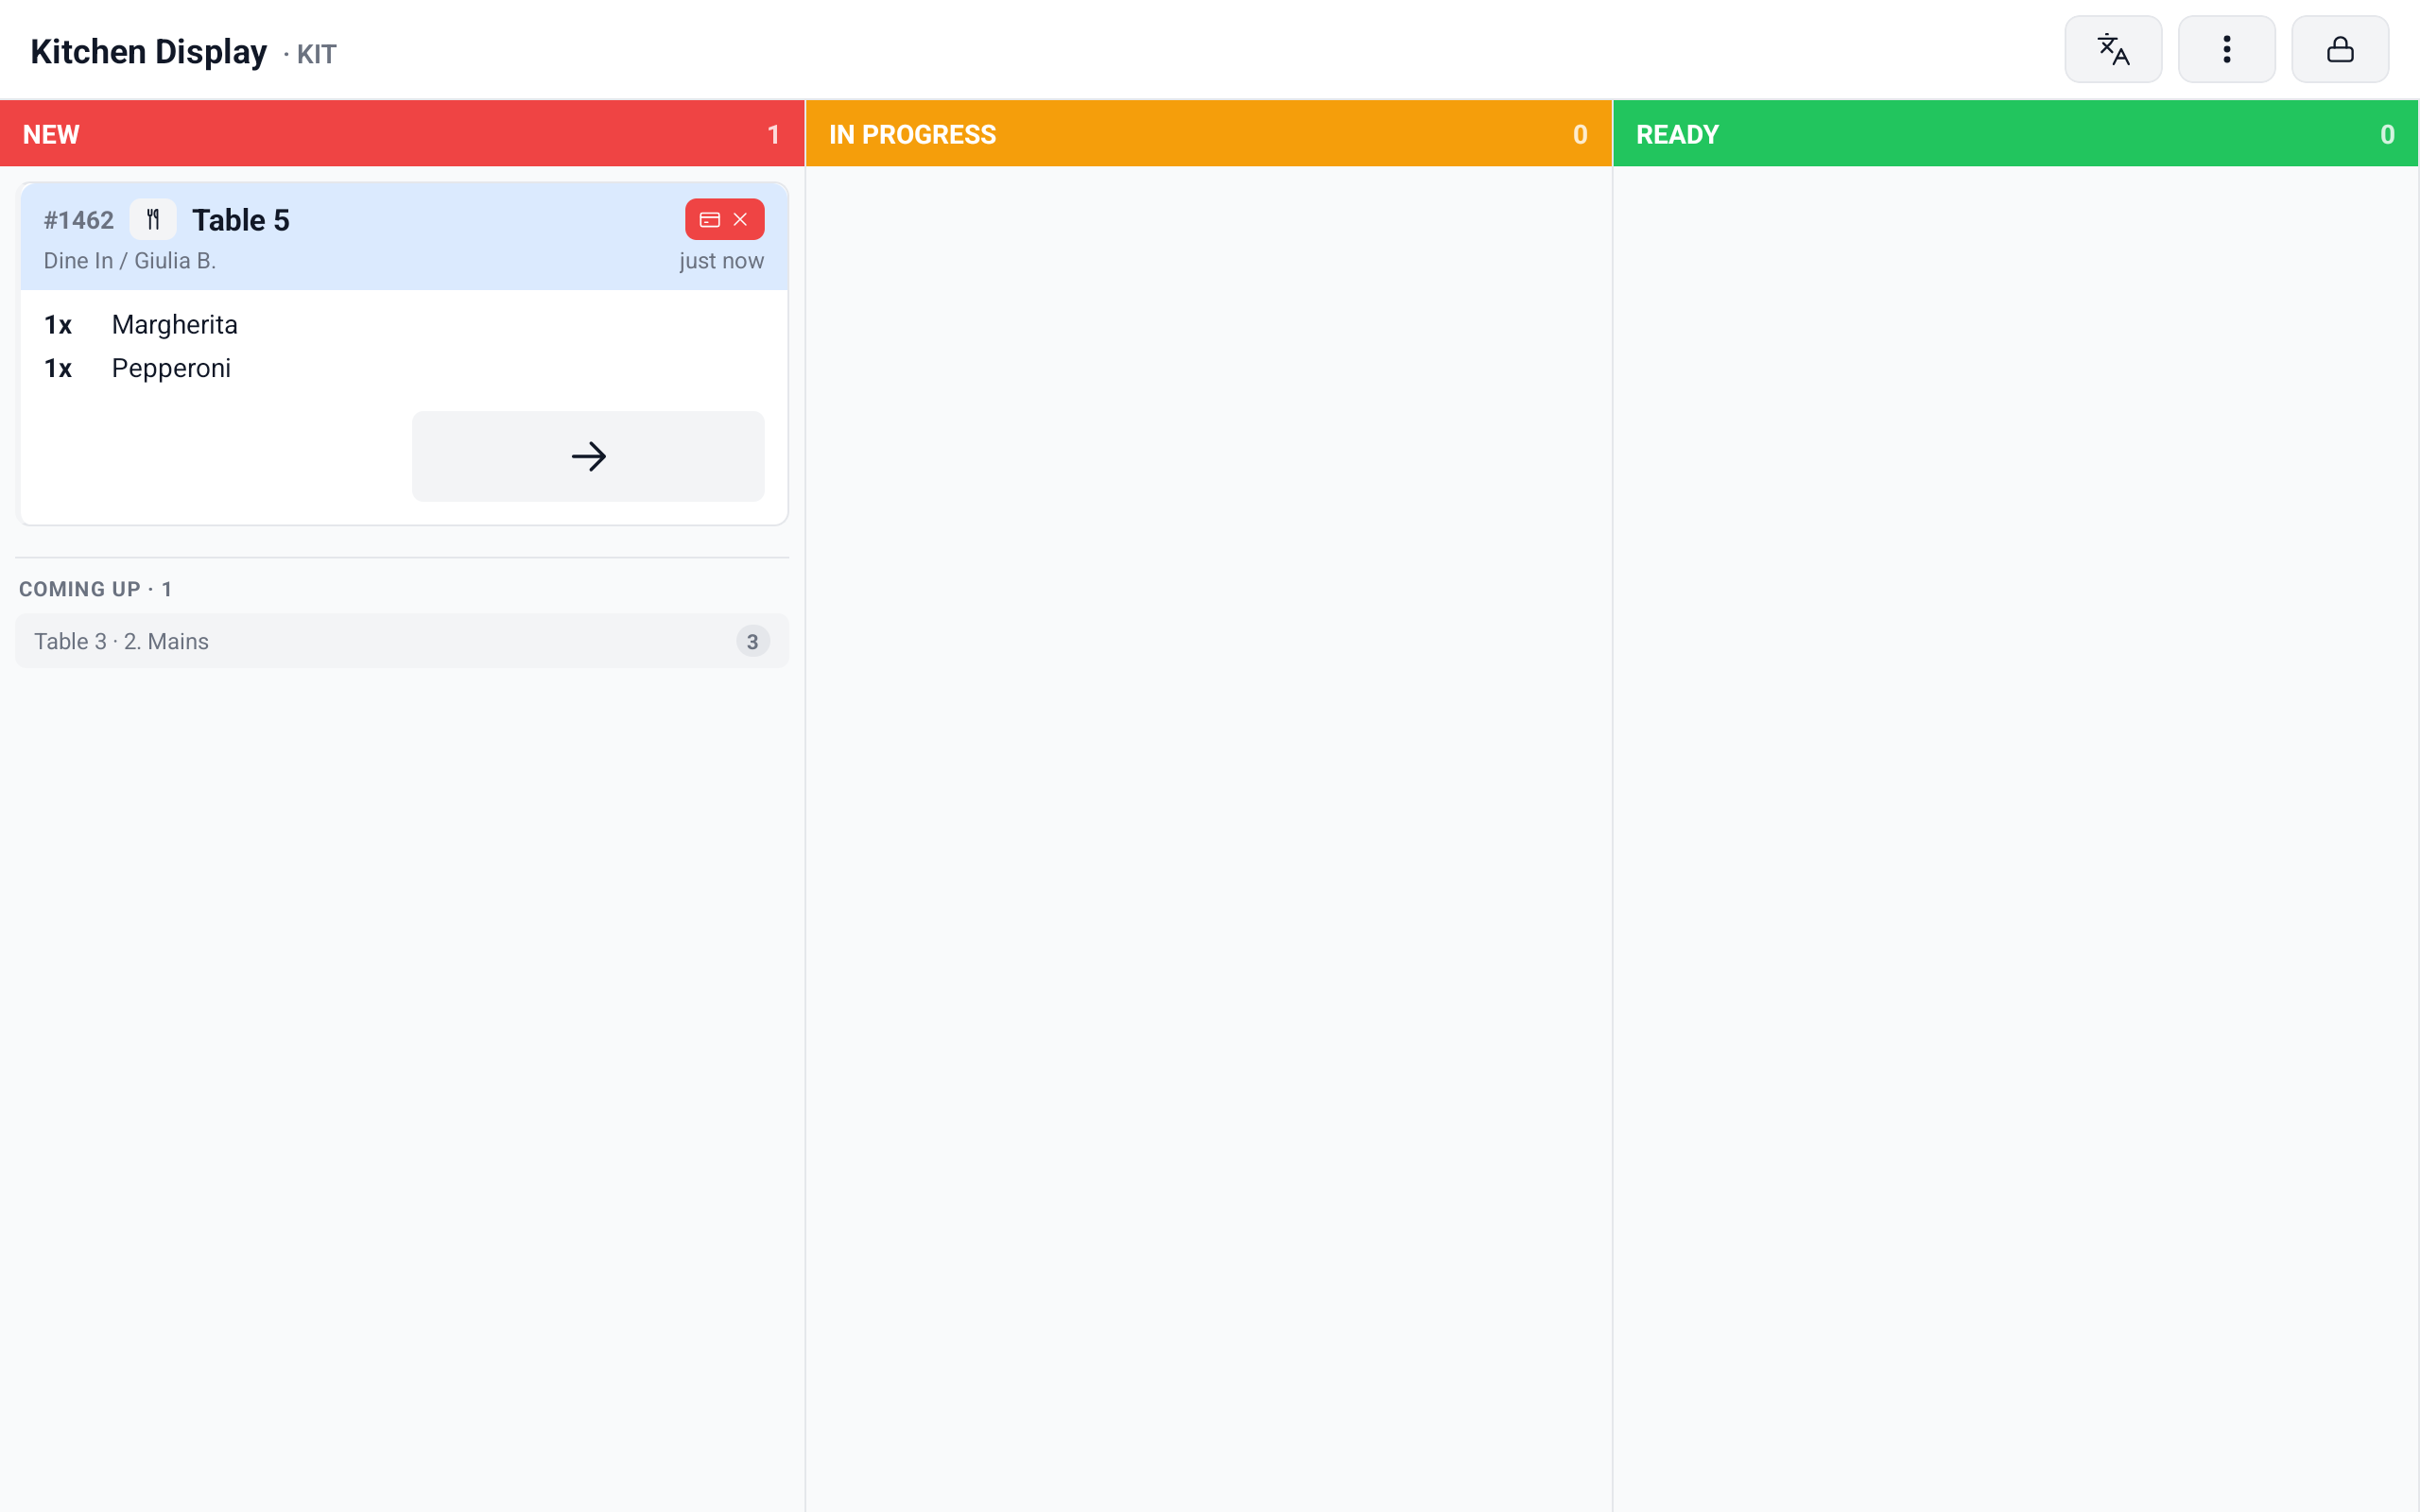
Pick it when a station cooks and plates an order together, like a line sending out a table's mains.
Per-item tickets
The same three-column board, but every item is its own ticket. A table's two pizzas show as two tickets, and each one moves with its own → and ← buttons. One item can be in READY while the other is still in IN PROGRESS.
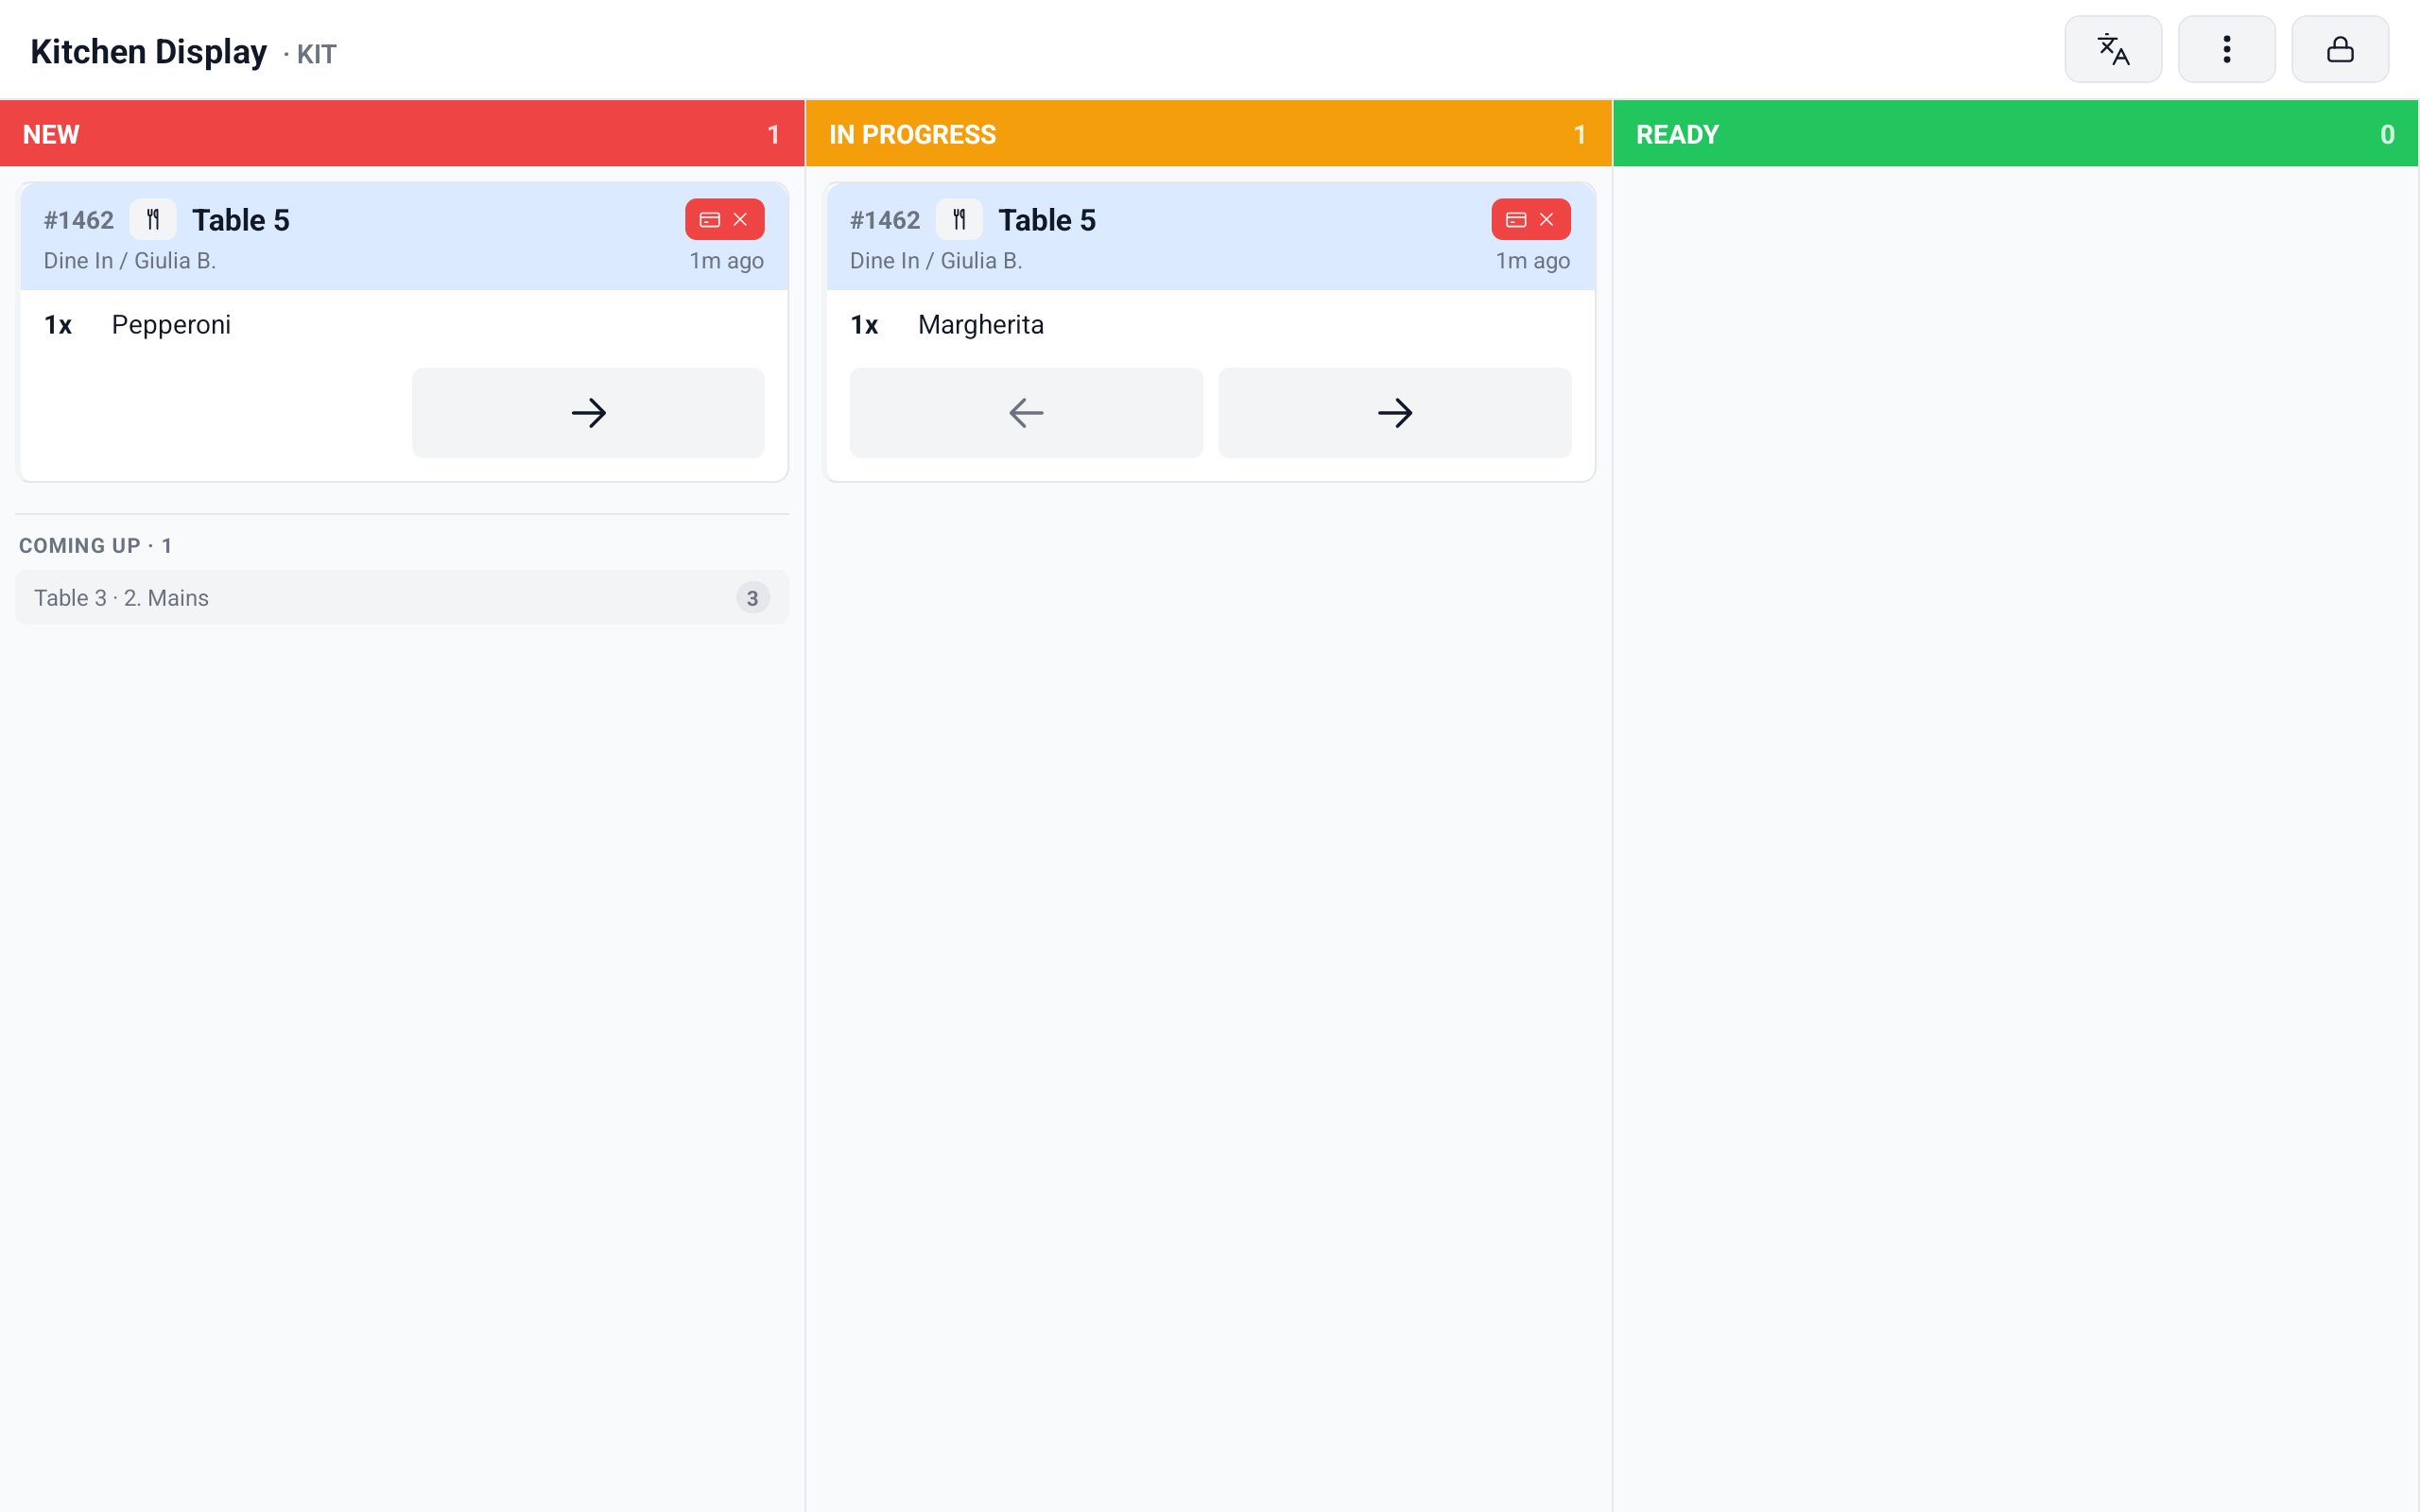
Pick it when a station works items independently, like a bar making drinks one at a time or a station with several cooks sharing the queue.
Item fulfillment
There are no columns. Each order is one card, laid out in a grid, with its items listed as checkboxes and grouped by course when the order has more than one.
- Tap an item when it is done. It gets a tick.
- Tap it again to untick it if you were wrong.
- When every item on the card is ticked, the card leaves the board.
Items from a course the waiter is holding show greyed out with the course name, and you cannot tick them until the waiter fires that course.
To check an order that just went out, tap Show recently fulfilled in the header. The board then shows the last ten finished orders. Tap Show current to go back.
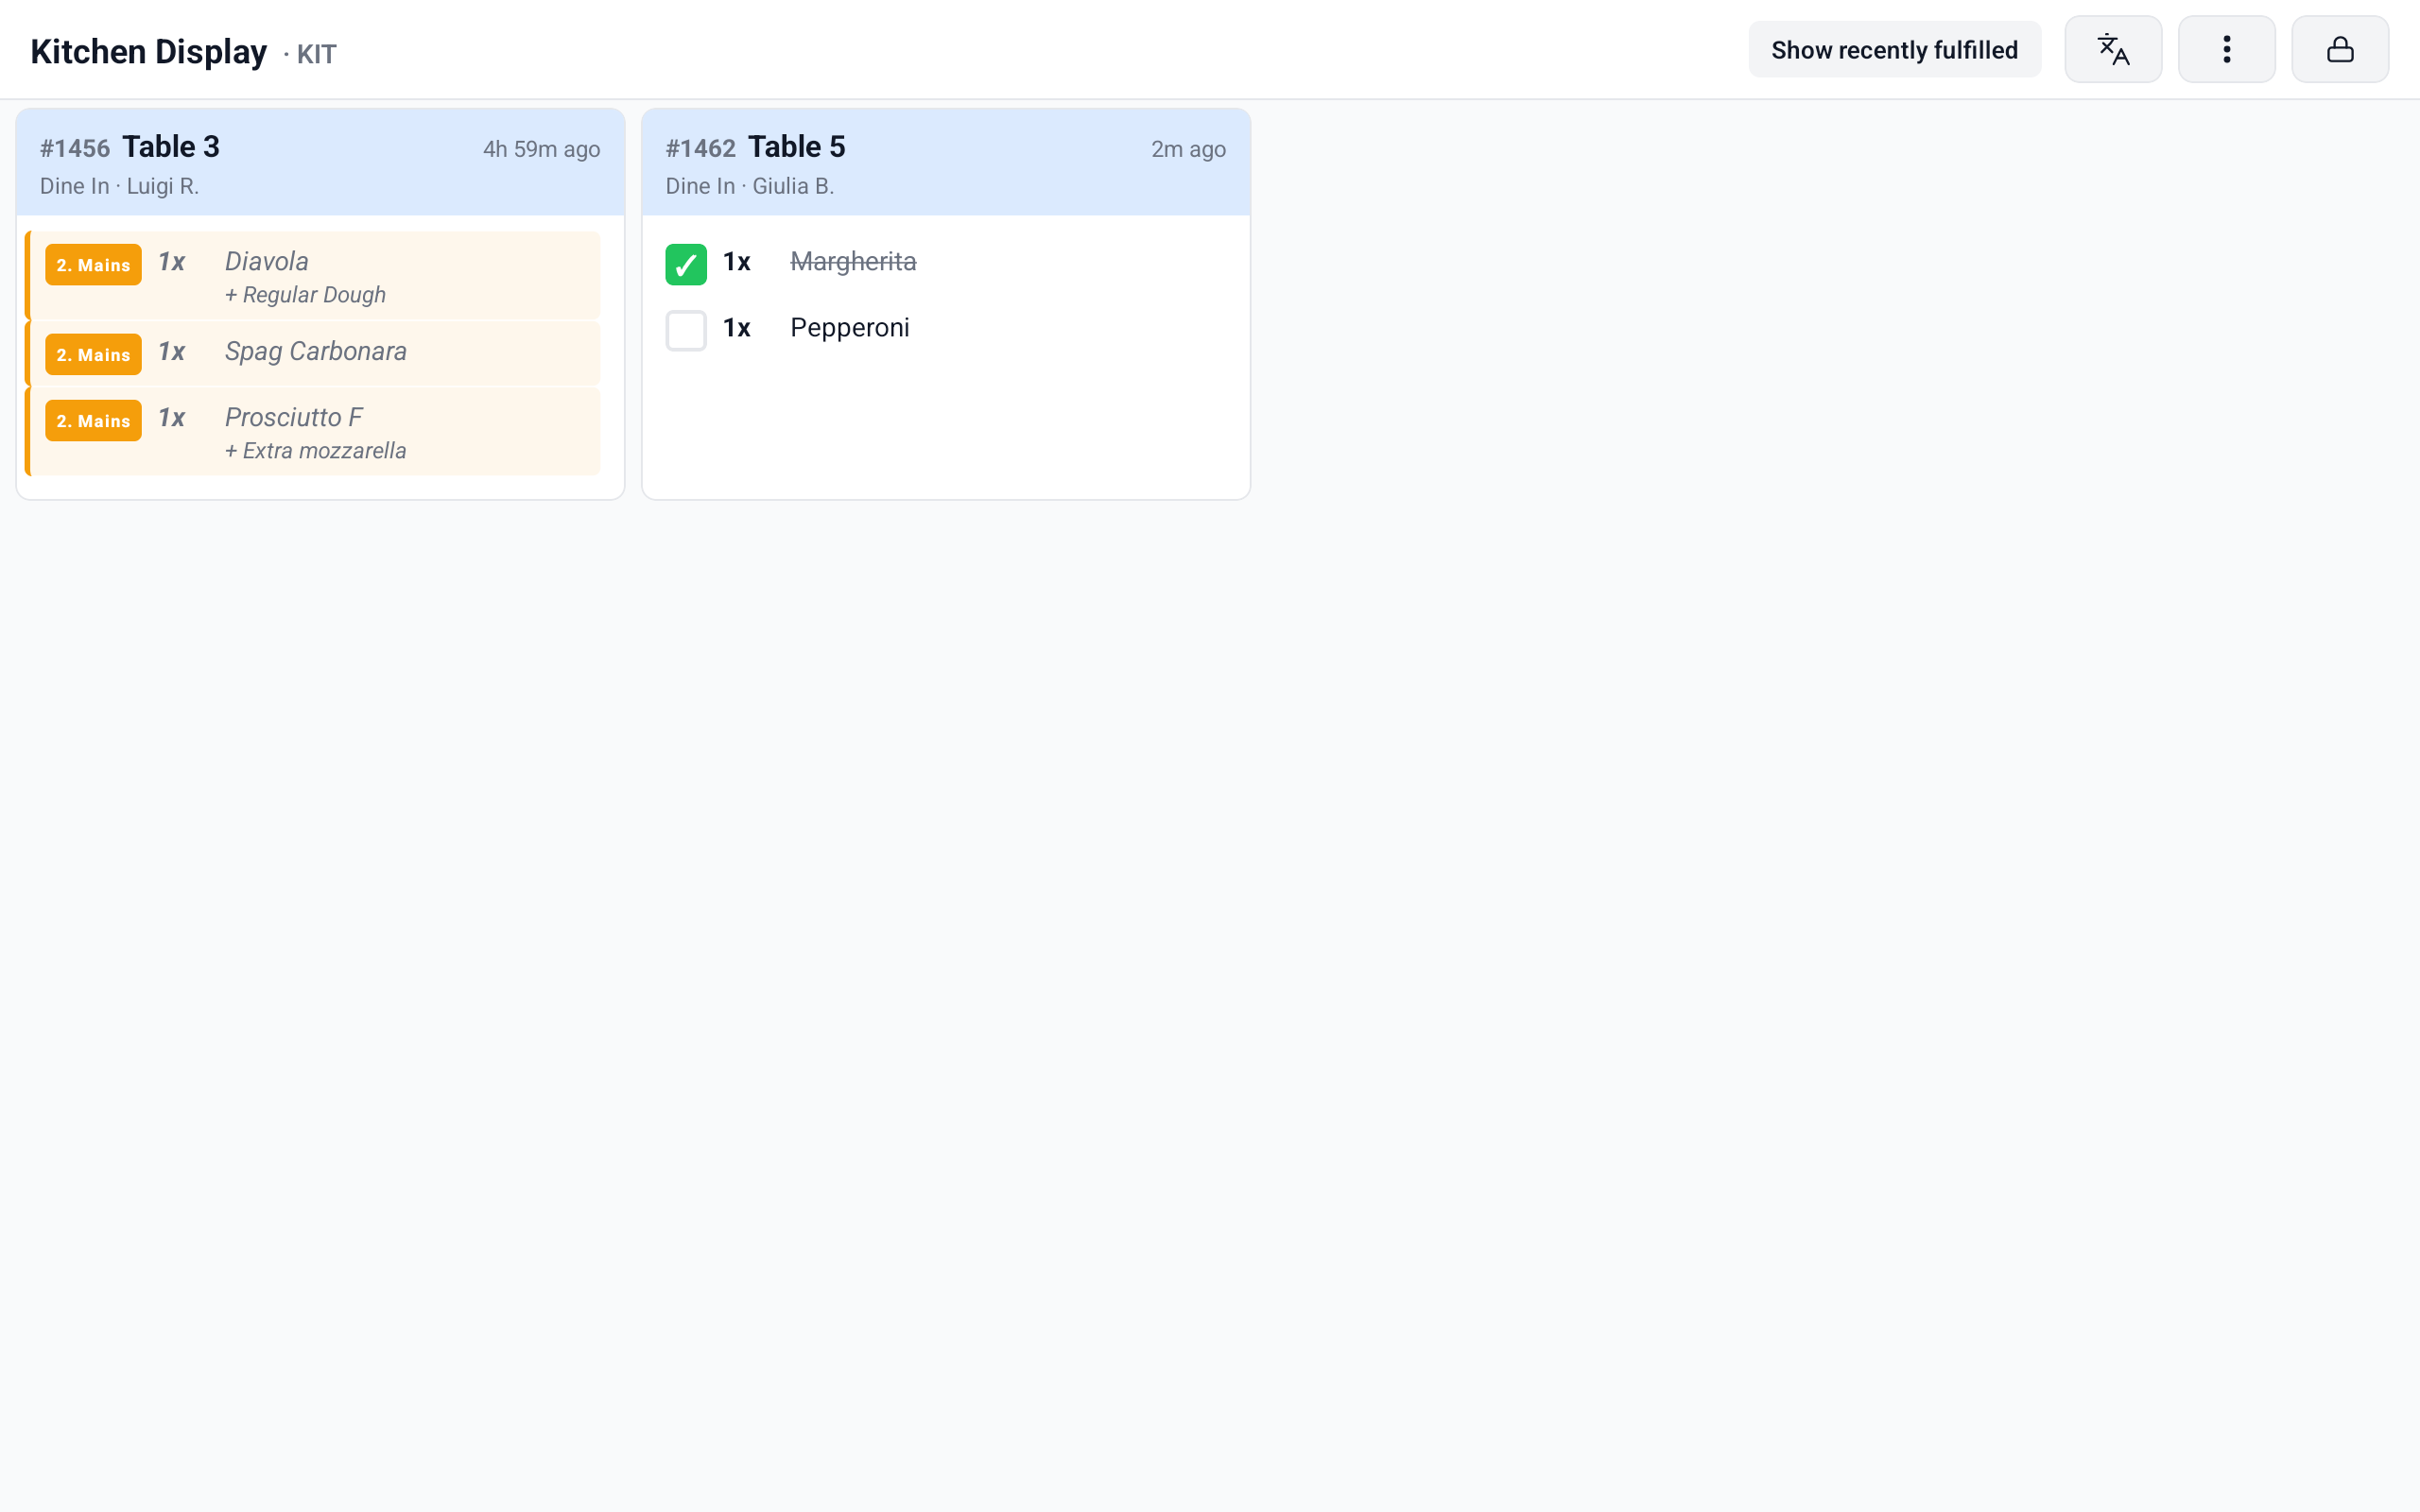
Pick it for a pass or expo station that checks off a whole order as the parts arrive.
Item fulfillment has no claiming and no quick actions. Those work only on the column board, in Whole order and Per-item tickets: see Share one queue between several people and Send simple items straight out.
Where the mode is set
You set a mode in three places. The most specific one wins:
- This screen, set on the Kitchen Display itself.
- The station the screen displays, set in the back office.
- The location, set in the back office.
A screen showing All stations has no station setting, so it follows the location unless the screen has its own.
For the whole location
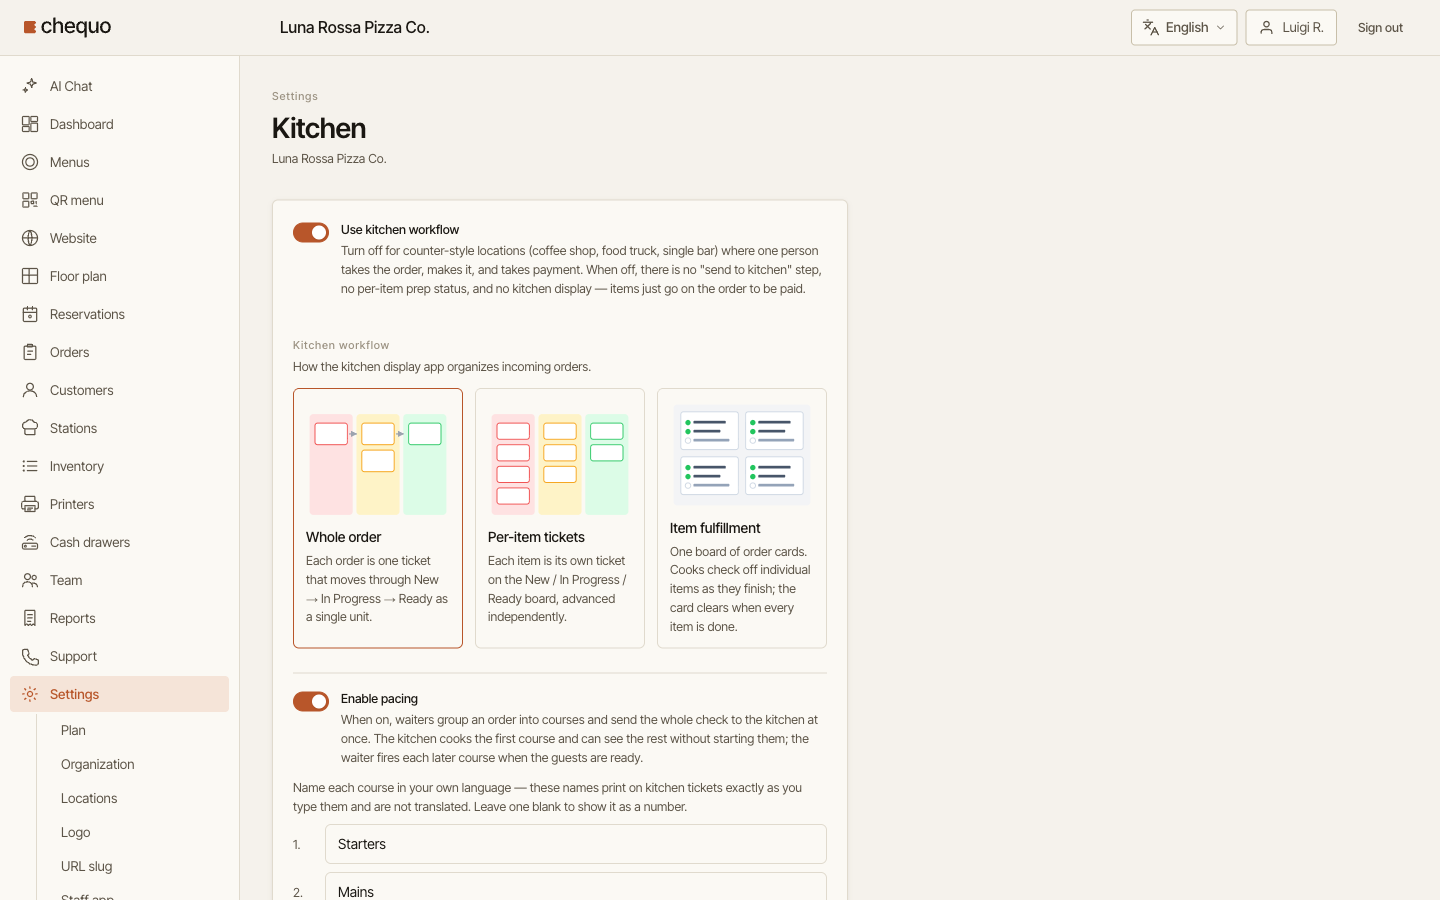
- In the back office, go to Settings → Kitchen.
- Under Kitchen workflow, pick Whole order, Per-item tickets or Item fulfillment.
- Click Save.
The Kitchen workflow cards only appear while Use kitchen workflow is on.
For one station
- In the back office, go to Stations and open the station.
- Under Station details, set KDS workflow to the mode this station should use. Leave it on Use location default to follow the location.
- Click Save.
For one screen
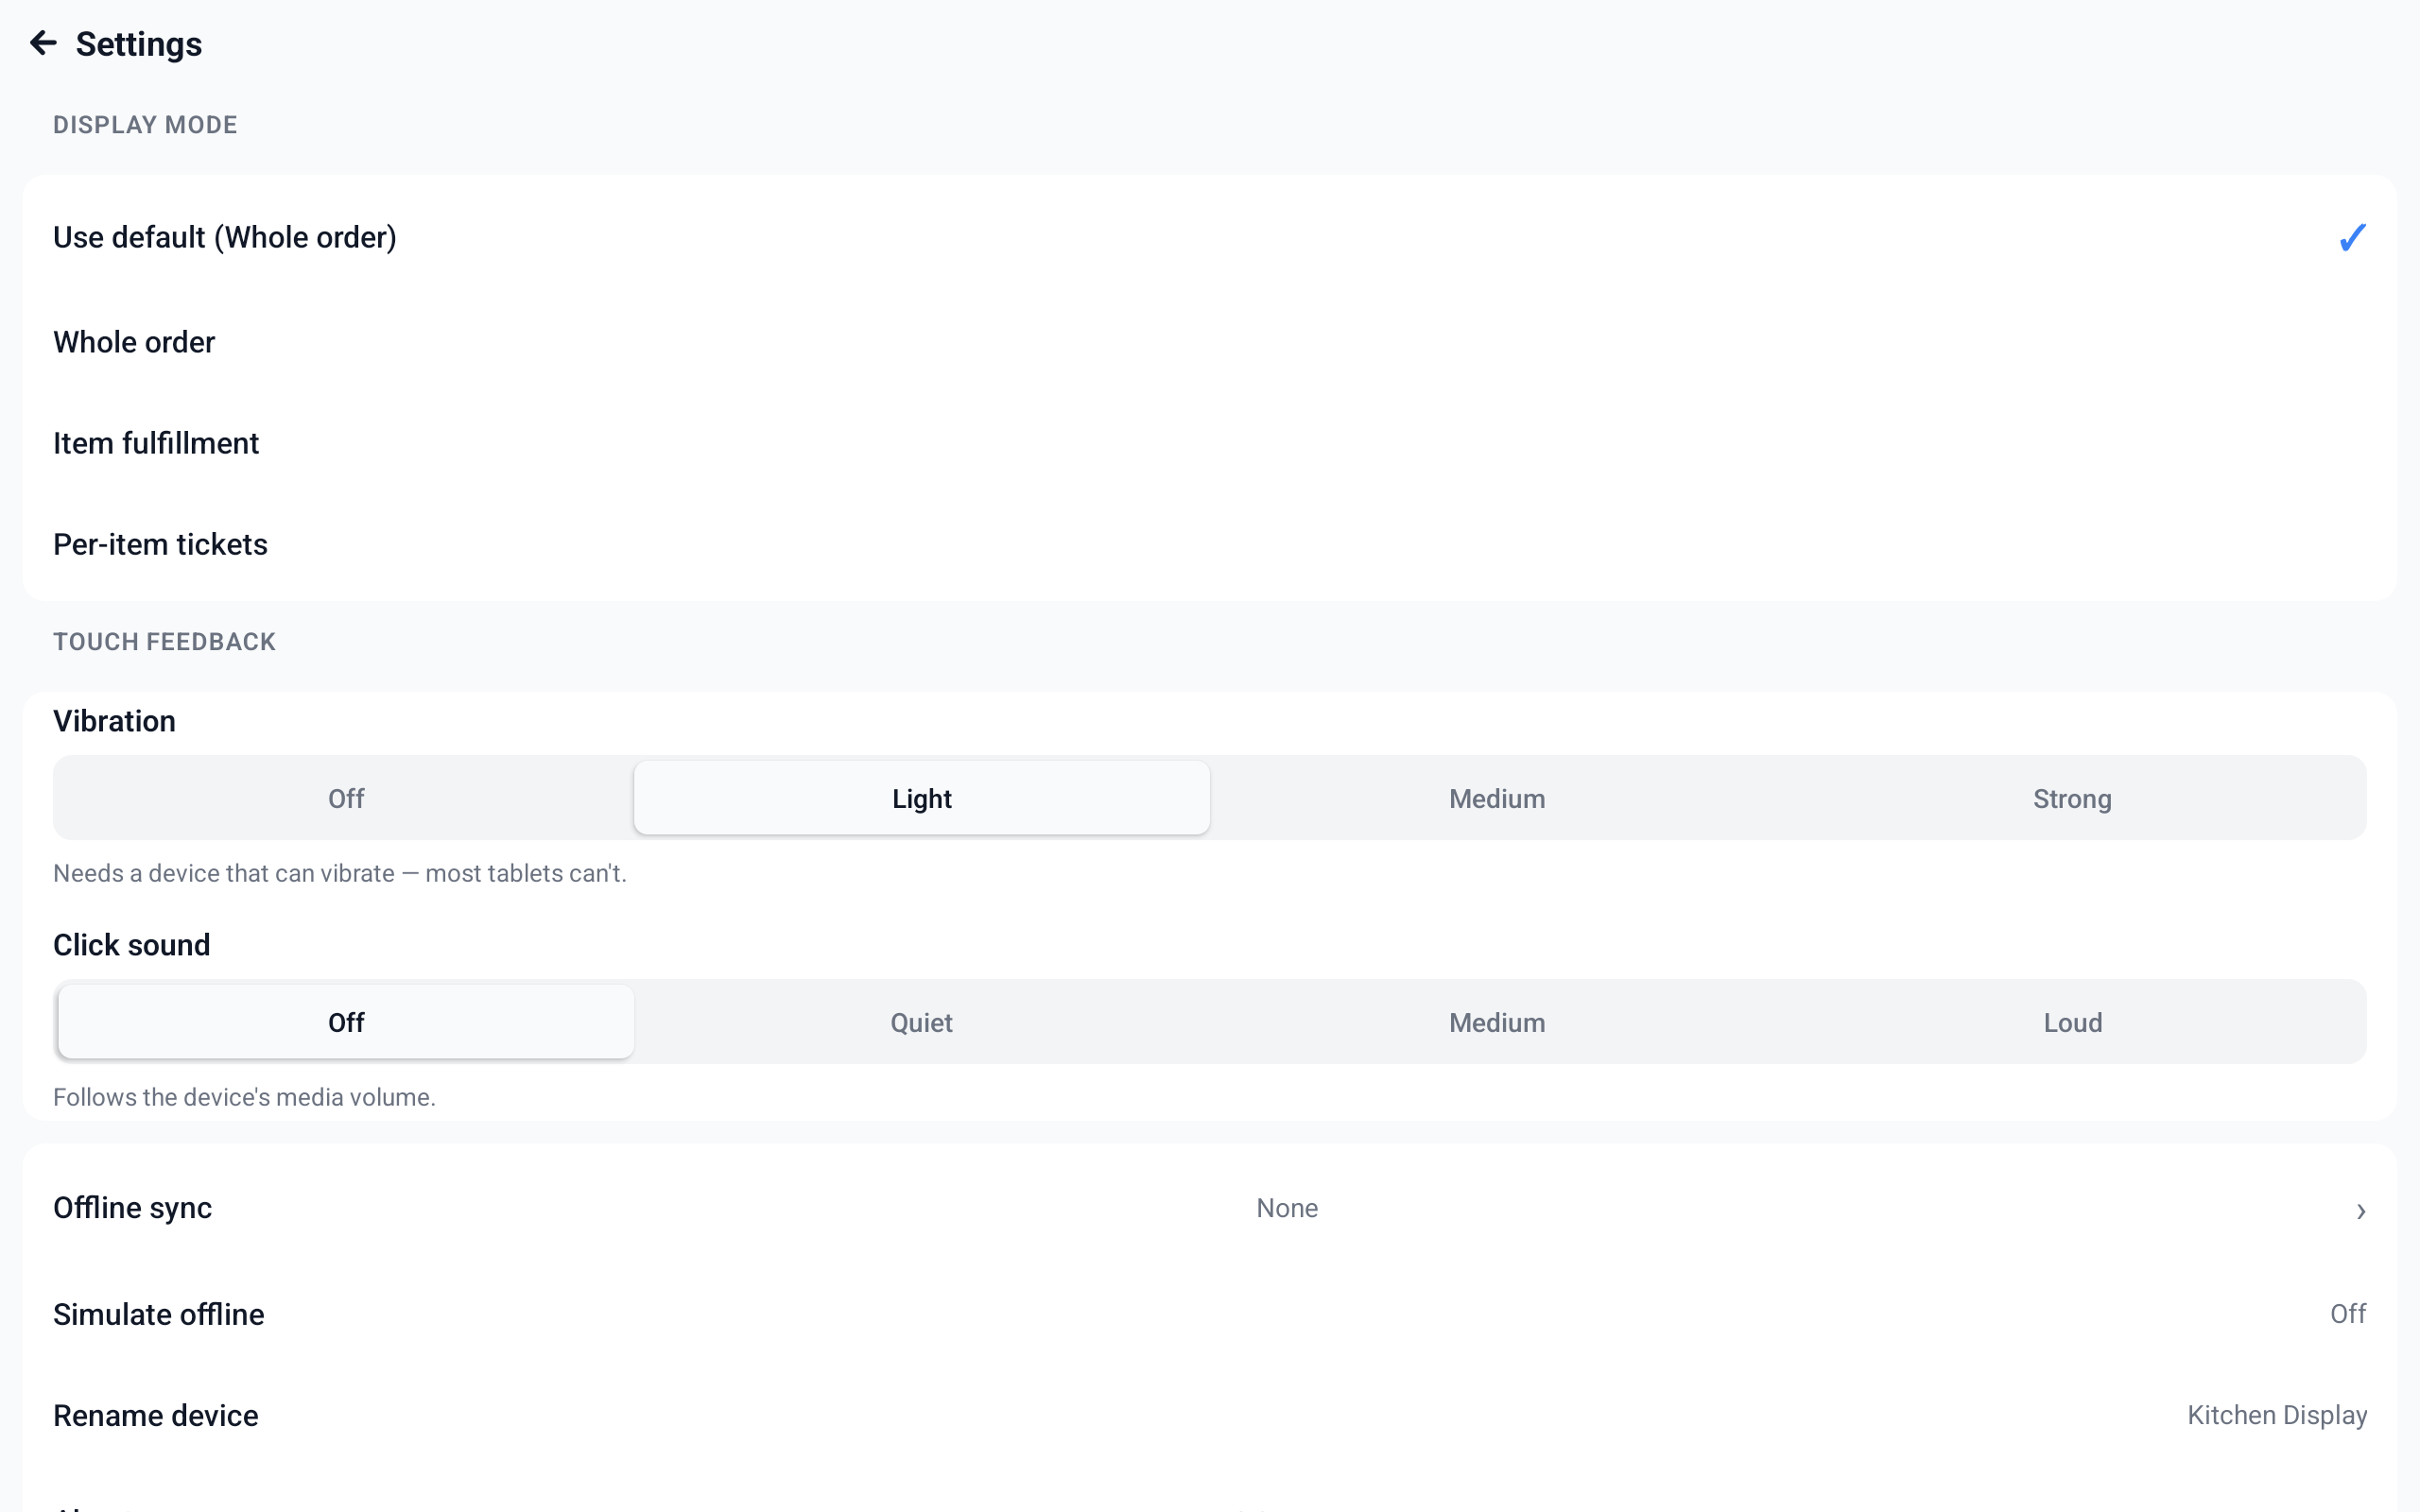
- On the Kitchen Display, tap ⋮ in the header and choose Settings.
- Under Display mode, tap the mode this screen should use. The first row, Use default, follows the station or location and shows which mode that is in brackets, for example "Use default (Whole order)".
- Go back to the board. It now shows the mode you picked.
The choice is kept on that screen only. Pick Use default again to hand control back to the back office.