In this document
Kitchen and bar displays
The Kitchen Display is one app. On a tablet in the kitchen it is your KDS (kitchen display). On a phone or a small tablet at the bar it is your BDS (bar display), for spaces where a tablet doesn't fit. This guide shows how stations decide which tickets each screen shows, and what changes on a phone.
You can also watch the demo.
The Kitchen Display and the Stations page are part of ProPOS, which has no limit on how many stations you create.
One app, any screen
Every screen runs the same Kitchen Display app, on Android or iOS. Staff sign in with the same PIN they use in the staff app, and tickets appear the moment a waiter sends them from the staff app.
What a screen shows depends on one thing: its station. A tablet set to your kitchen station shows the food. A phone set to Bar shows the drinks. The app picks its layout from the screen's width, so the same app gives you a full board on a tablet and a compact one on a phone.
Two stations, two ways of working
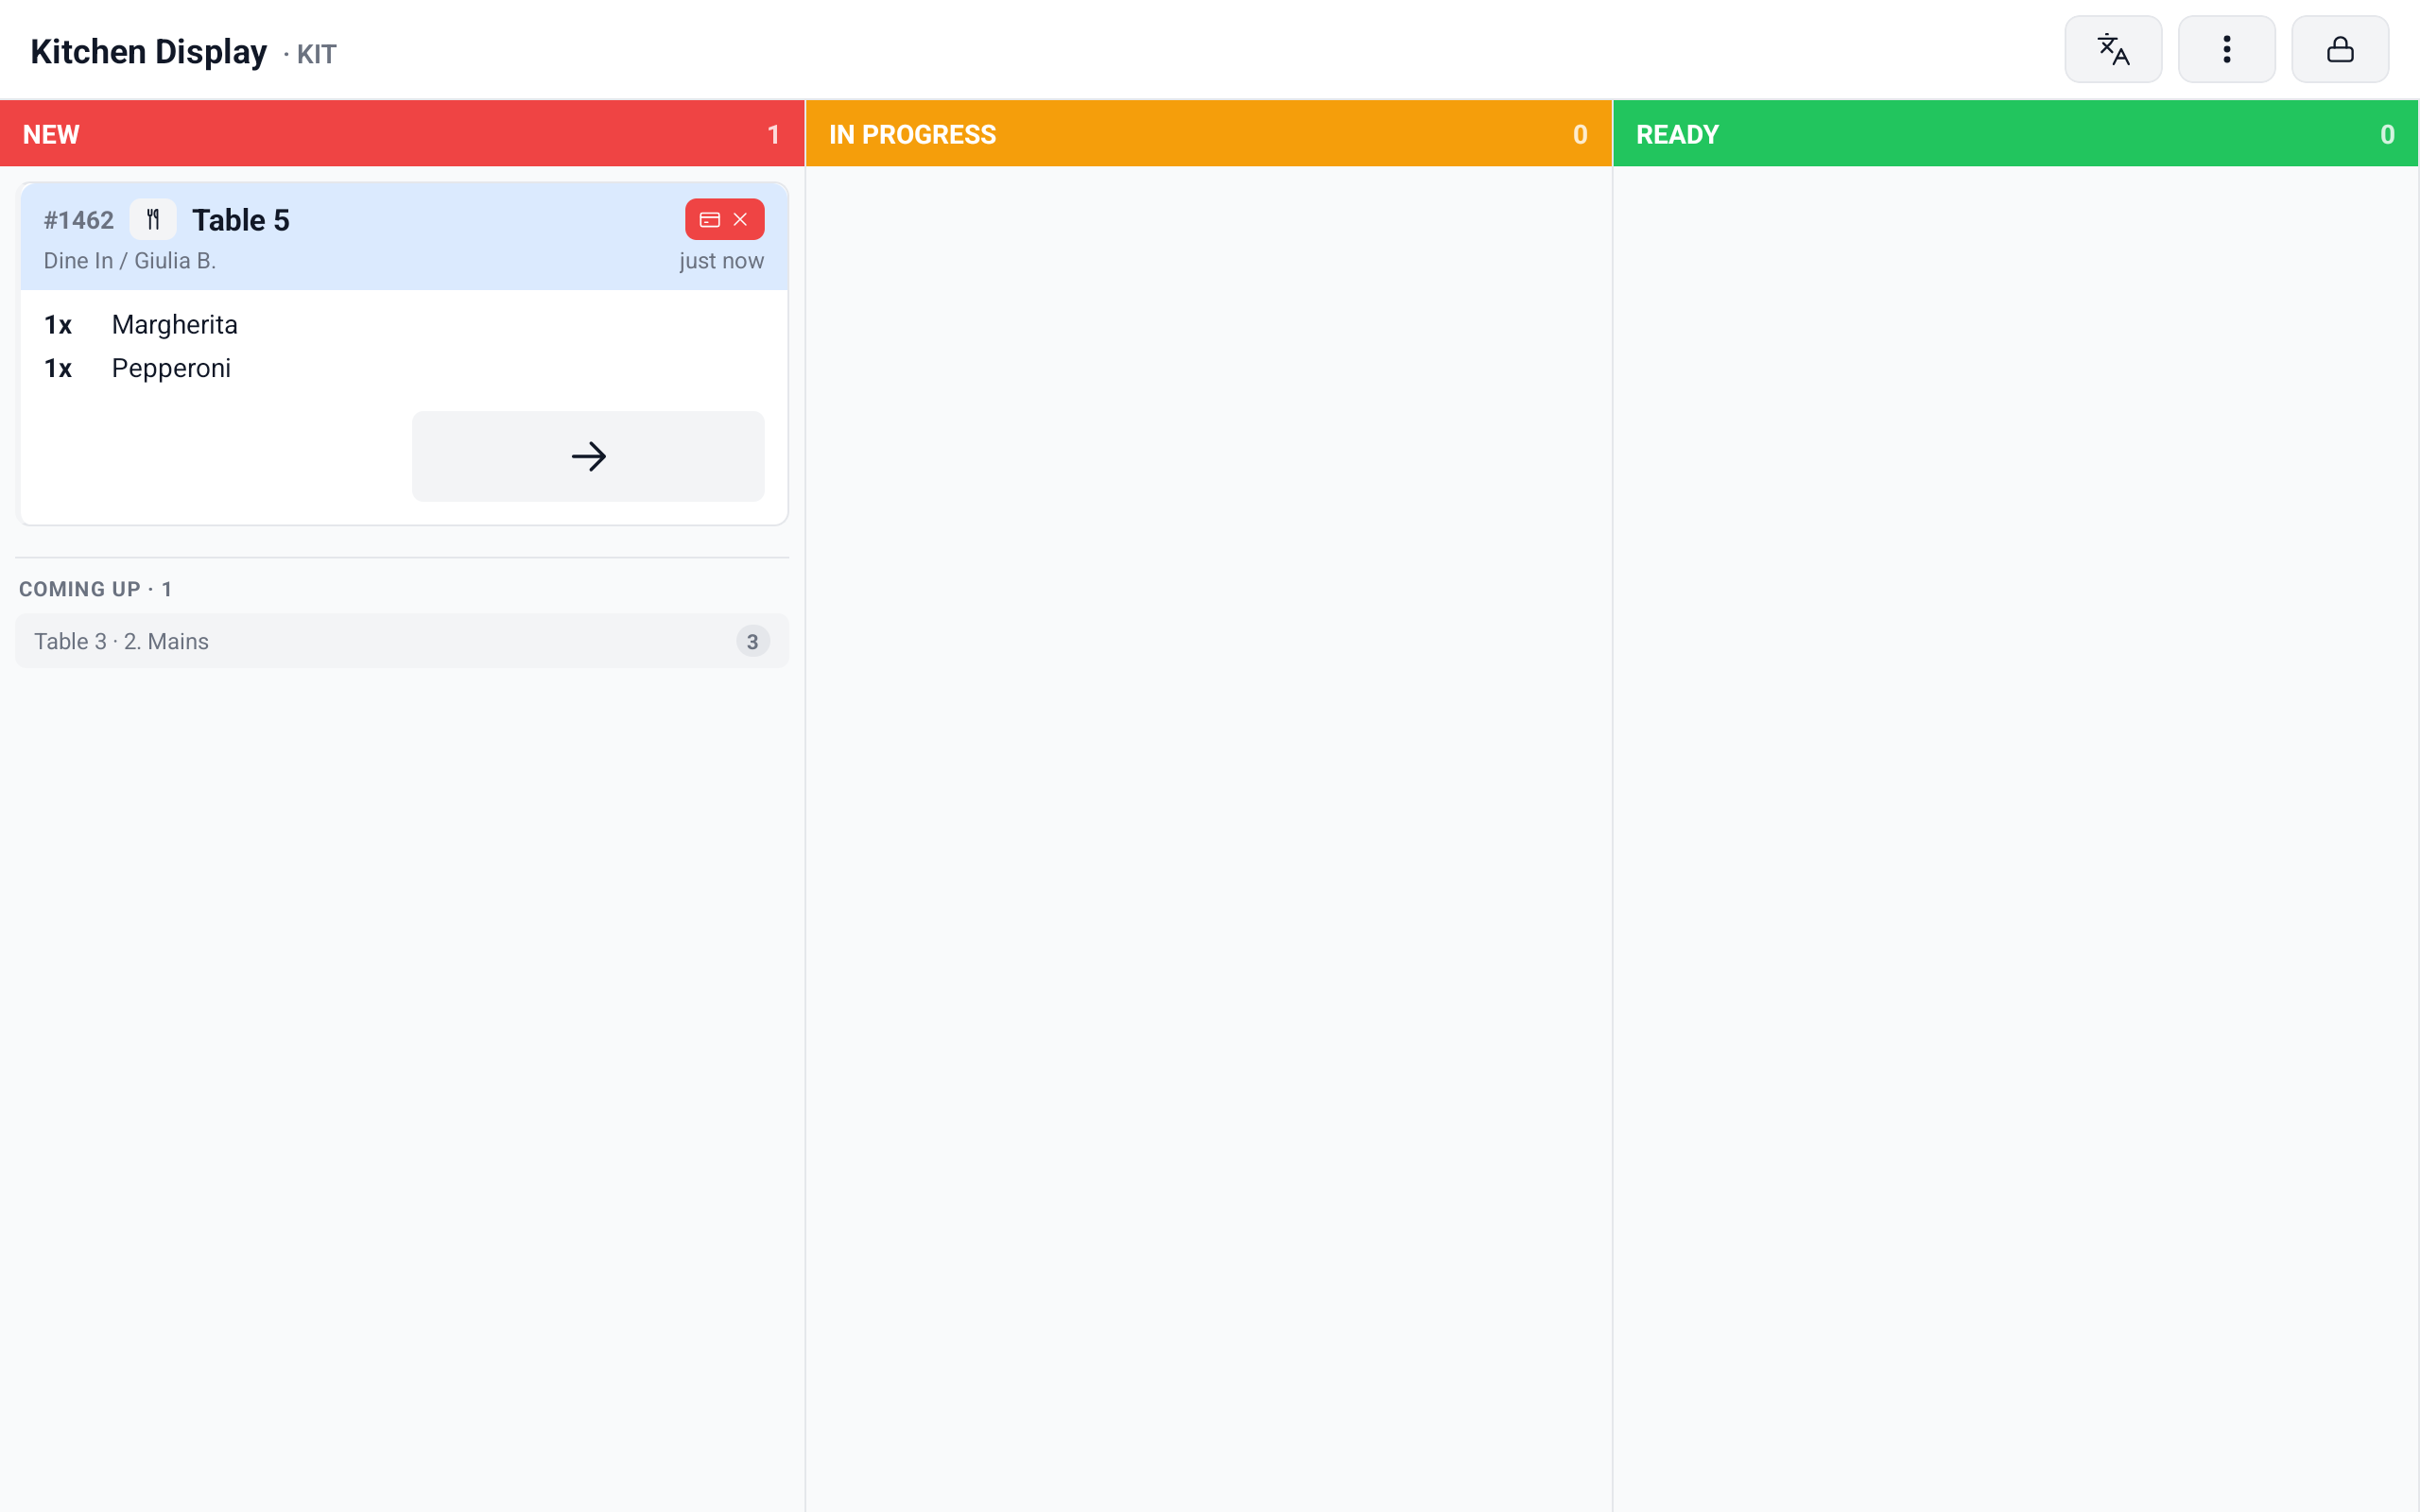
Each station can work at its own pace. In this example the kitchen station, KIT, cooks food through every stage. A new ticket has one → button: tap it to move the ticket from NEW to IN PROGRESS, and again to READY when the food is done.
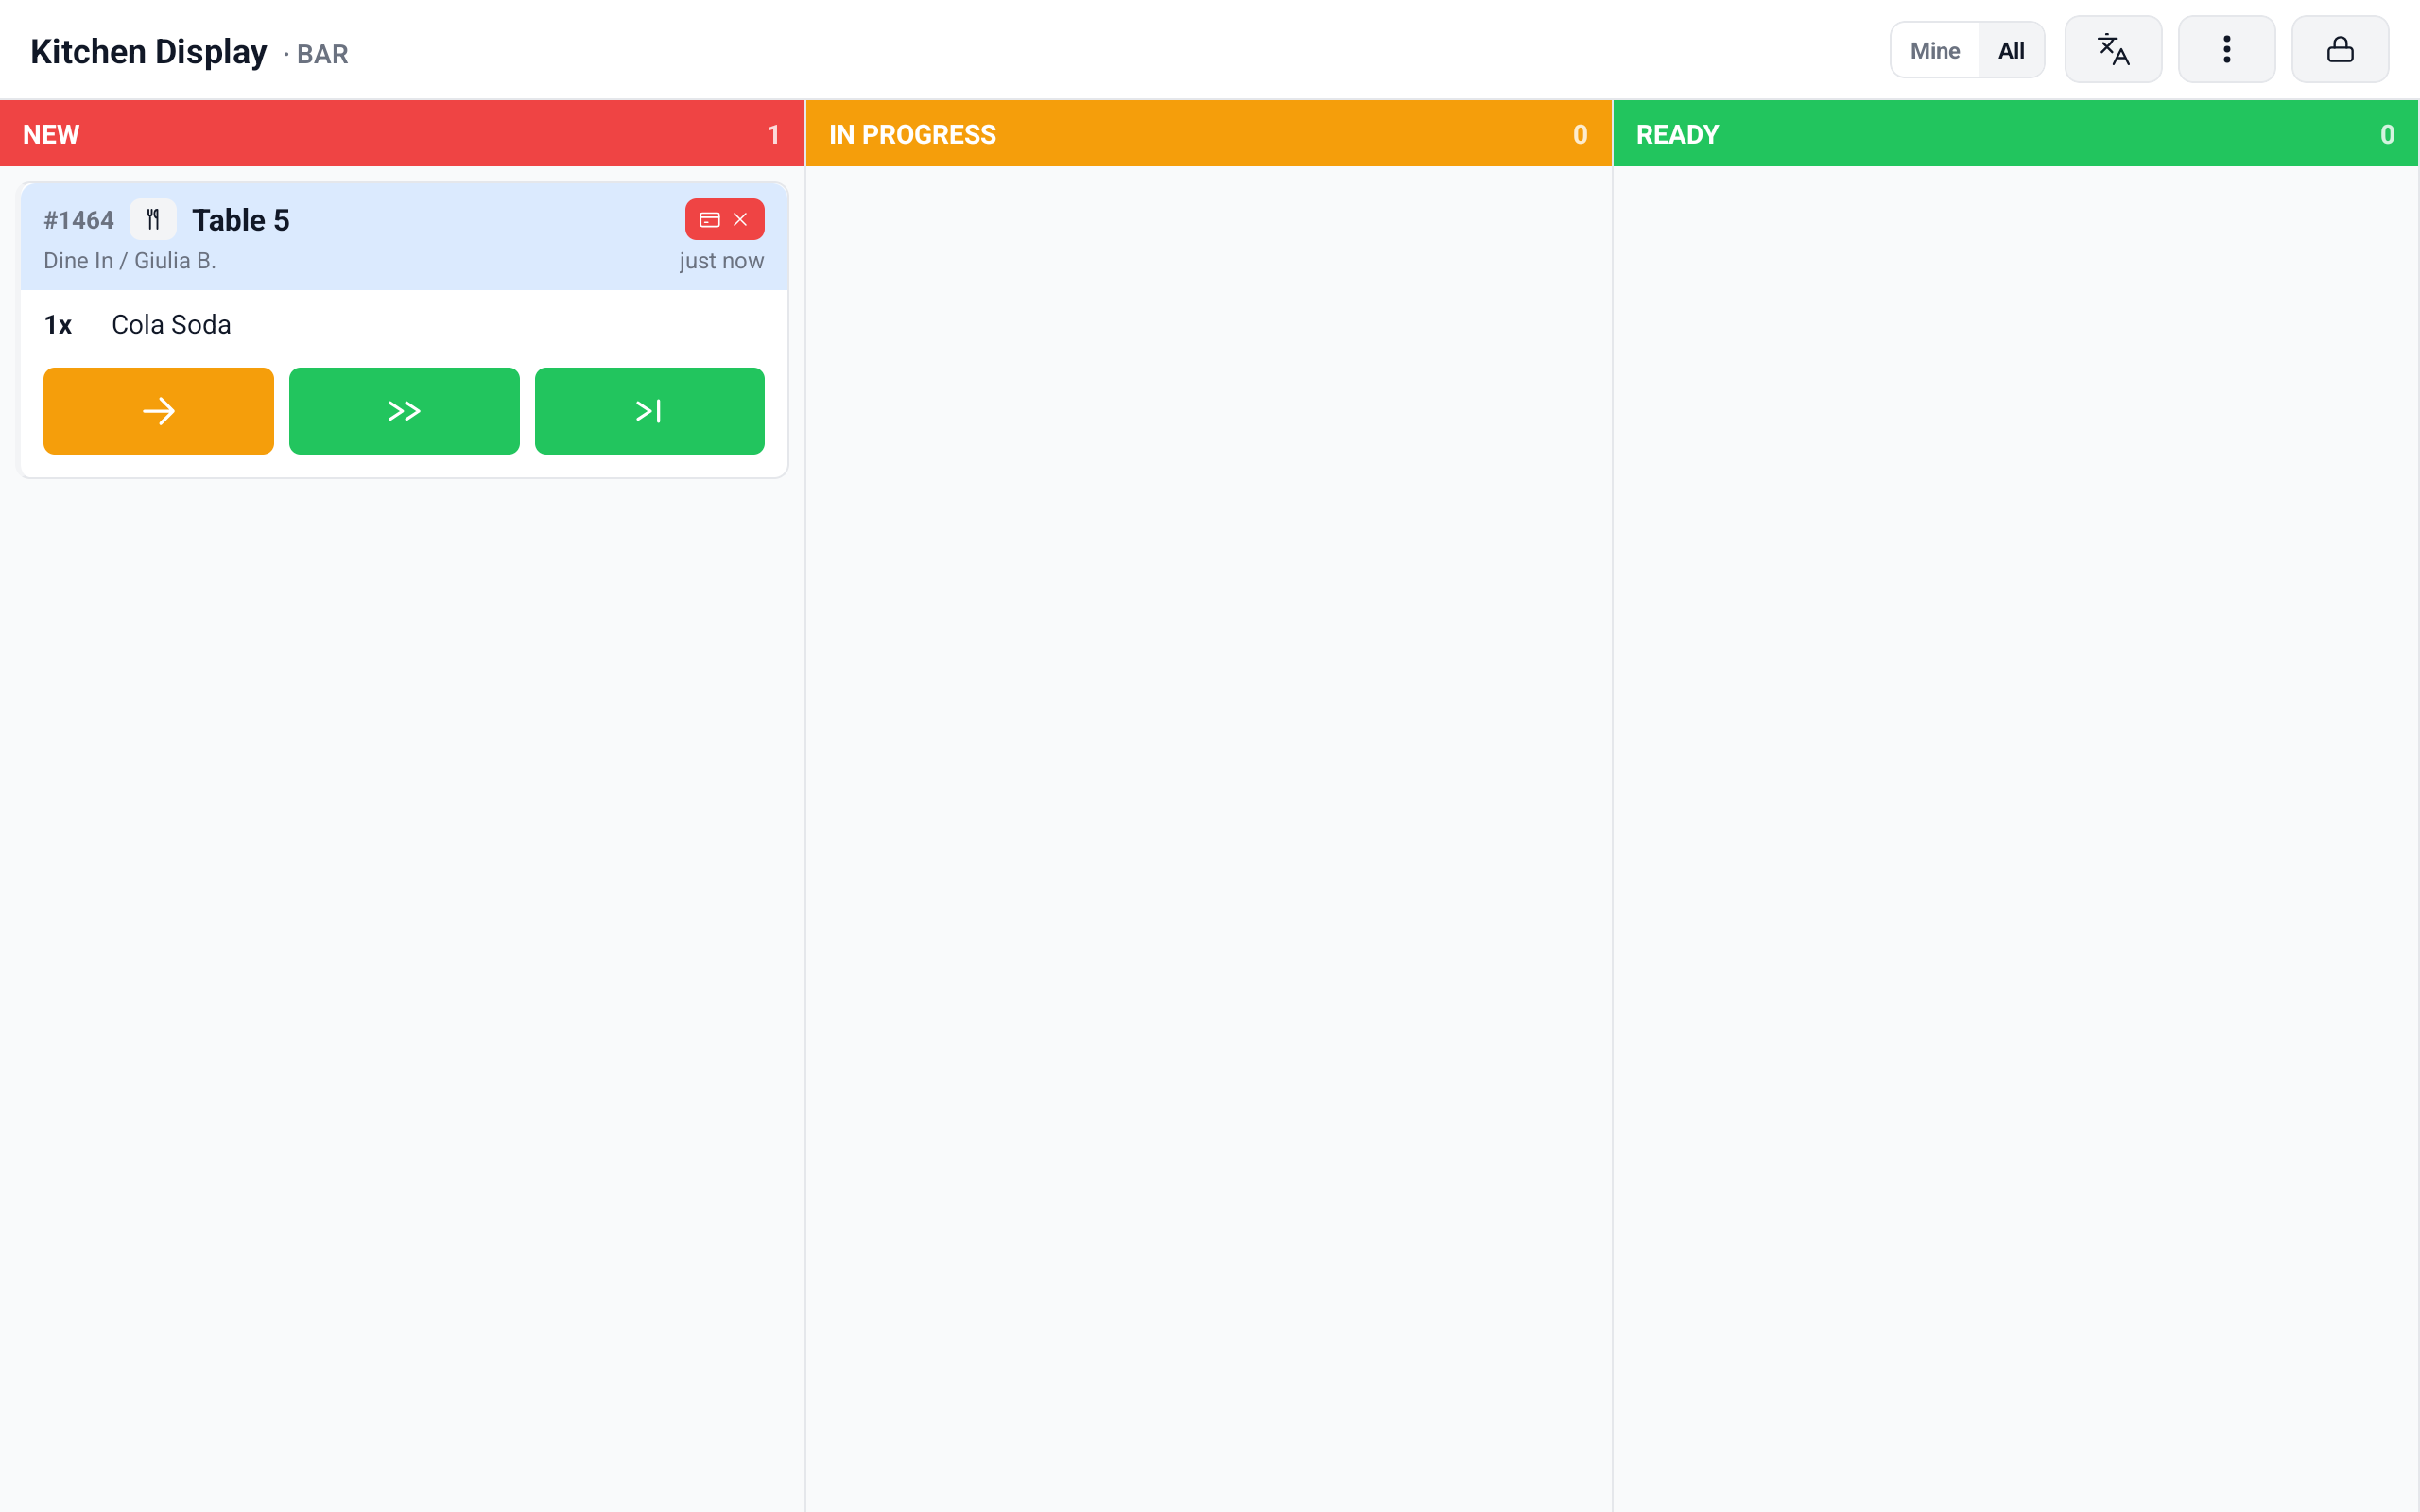
The Bar station has Quick actions in the New column turned on, because a drink, or a dessert from the fridge, is made and handed over at once. A new ticket there shows three buttons instead of one:
- Amber arrow: start preparing, the same as →.
- Green fast-forward: straight to READY.
- Green skip-to-end: done, and off the board.
You turn this on for each station on its page in the back office. See Send simple items straight out.
Create your stations
A station is a place where food or drinks are made: the kitchen, the pizza oven, the bar. You create stations in the back office.
- In the back office, open Stations.
- Click New station.
- Enter a Name, for example "Bar". Under POS name (shorter label) you can add a short label, such as "BAR".
- Click Create. The station's page opens.
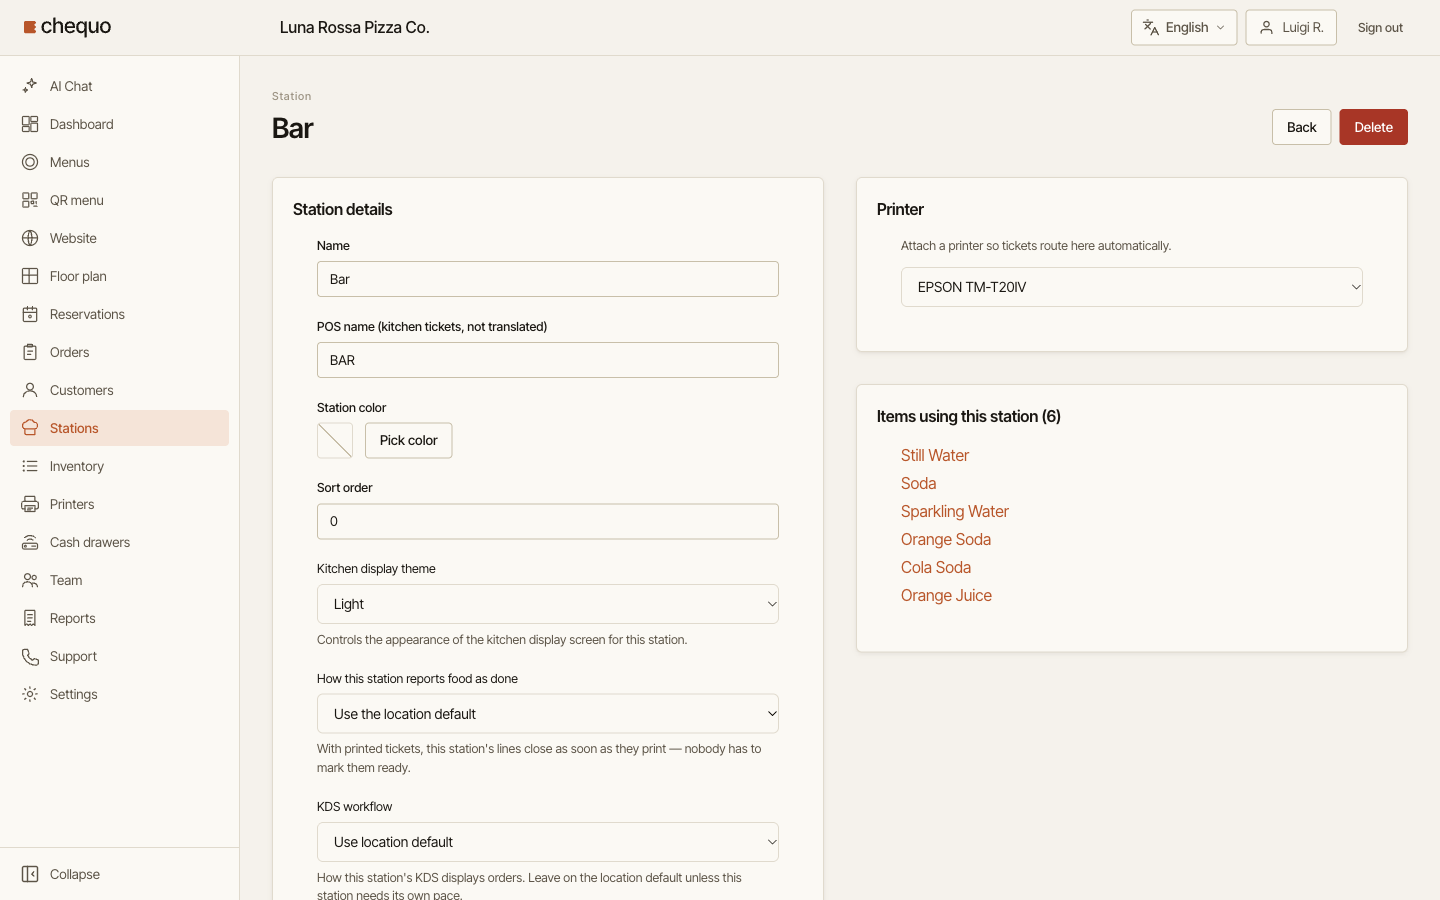
On the station's page, the Station details card holds its settings. Two of them matter for the screens:
- POS name (kitchen tickets, not translated): the short label the screens show for this station.
- Kitchen display theme: Light or Dark for the screens that show this station.
Click Save when you change anything. The same card also sets how the station's board works and whether staff can claim tickets; see the guides at the end of this page.
Send each menu item to a station
Each menu item goes to one station. That is how a pizza reaches the kitchen screen and a drink reaches the bar.
- In the back office, open Menus, then the Items tab.
- Open the item.
- Under Prep routing, choose the station that makes it.
- Click Save.
The station's page lists every item sent to it under Items using this station, so you can check your routing there.
The station is set on an item when it is added to a check. A change to Prep routing applies to new orders, not to tickets already on a screen.
An item with no station set does not appear on any single station's screen. It shows only on a screen set to All stations.
Choose what a screen shows
You choose a screen's station when you register it. On Register Device, under Station this device displays, tap a station, or All for every station.
To change it later, on the screen itself:
- Tap the menu button (⋮) at the top right.
- Tap Stations.
- Under Display station, tap a station, or All stations. Stations are listed by their POS name, such as BAR or KIT.
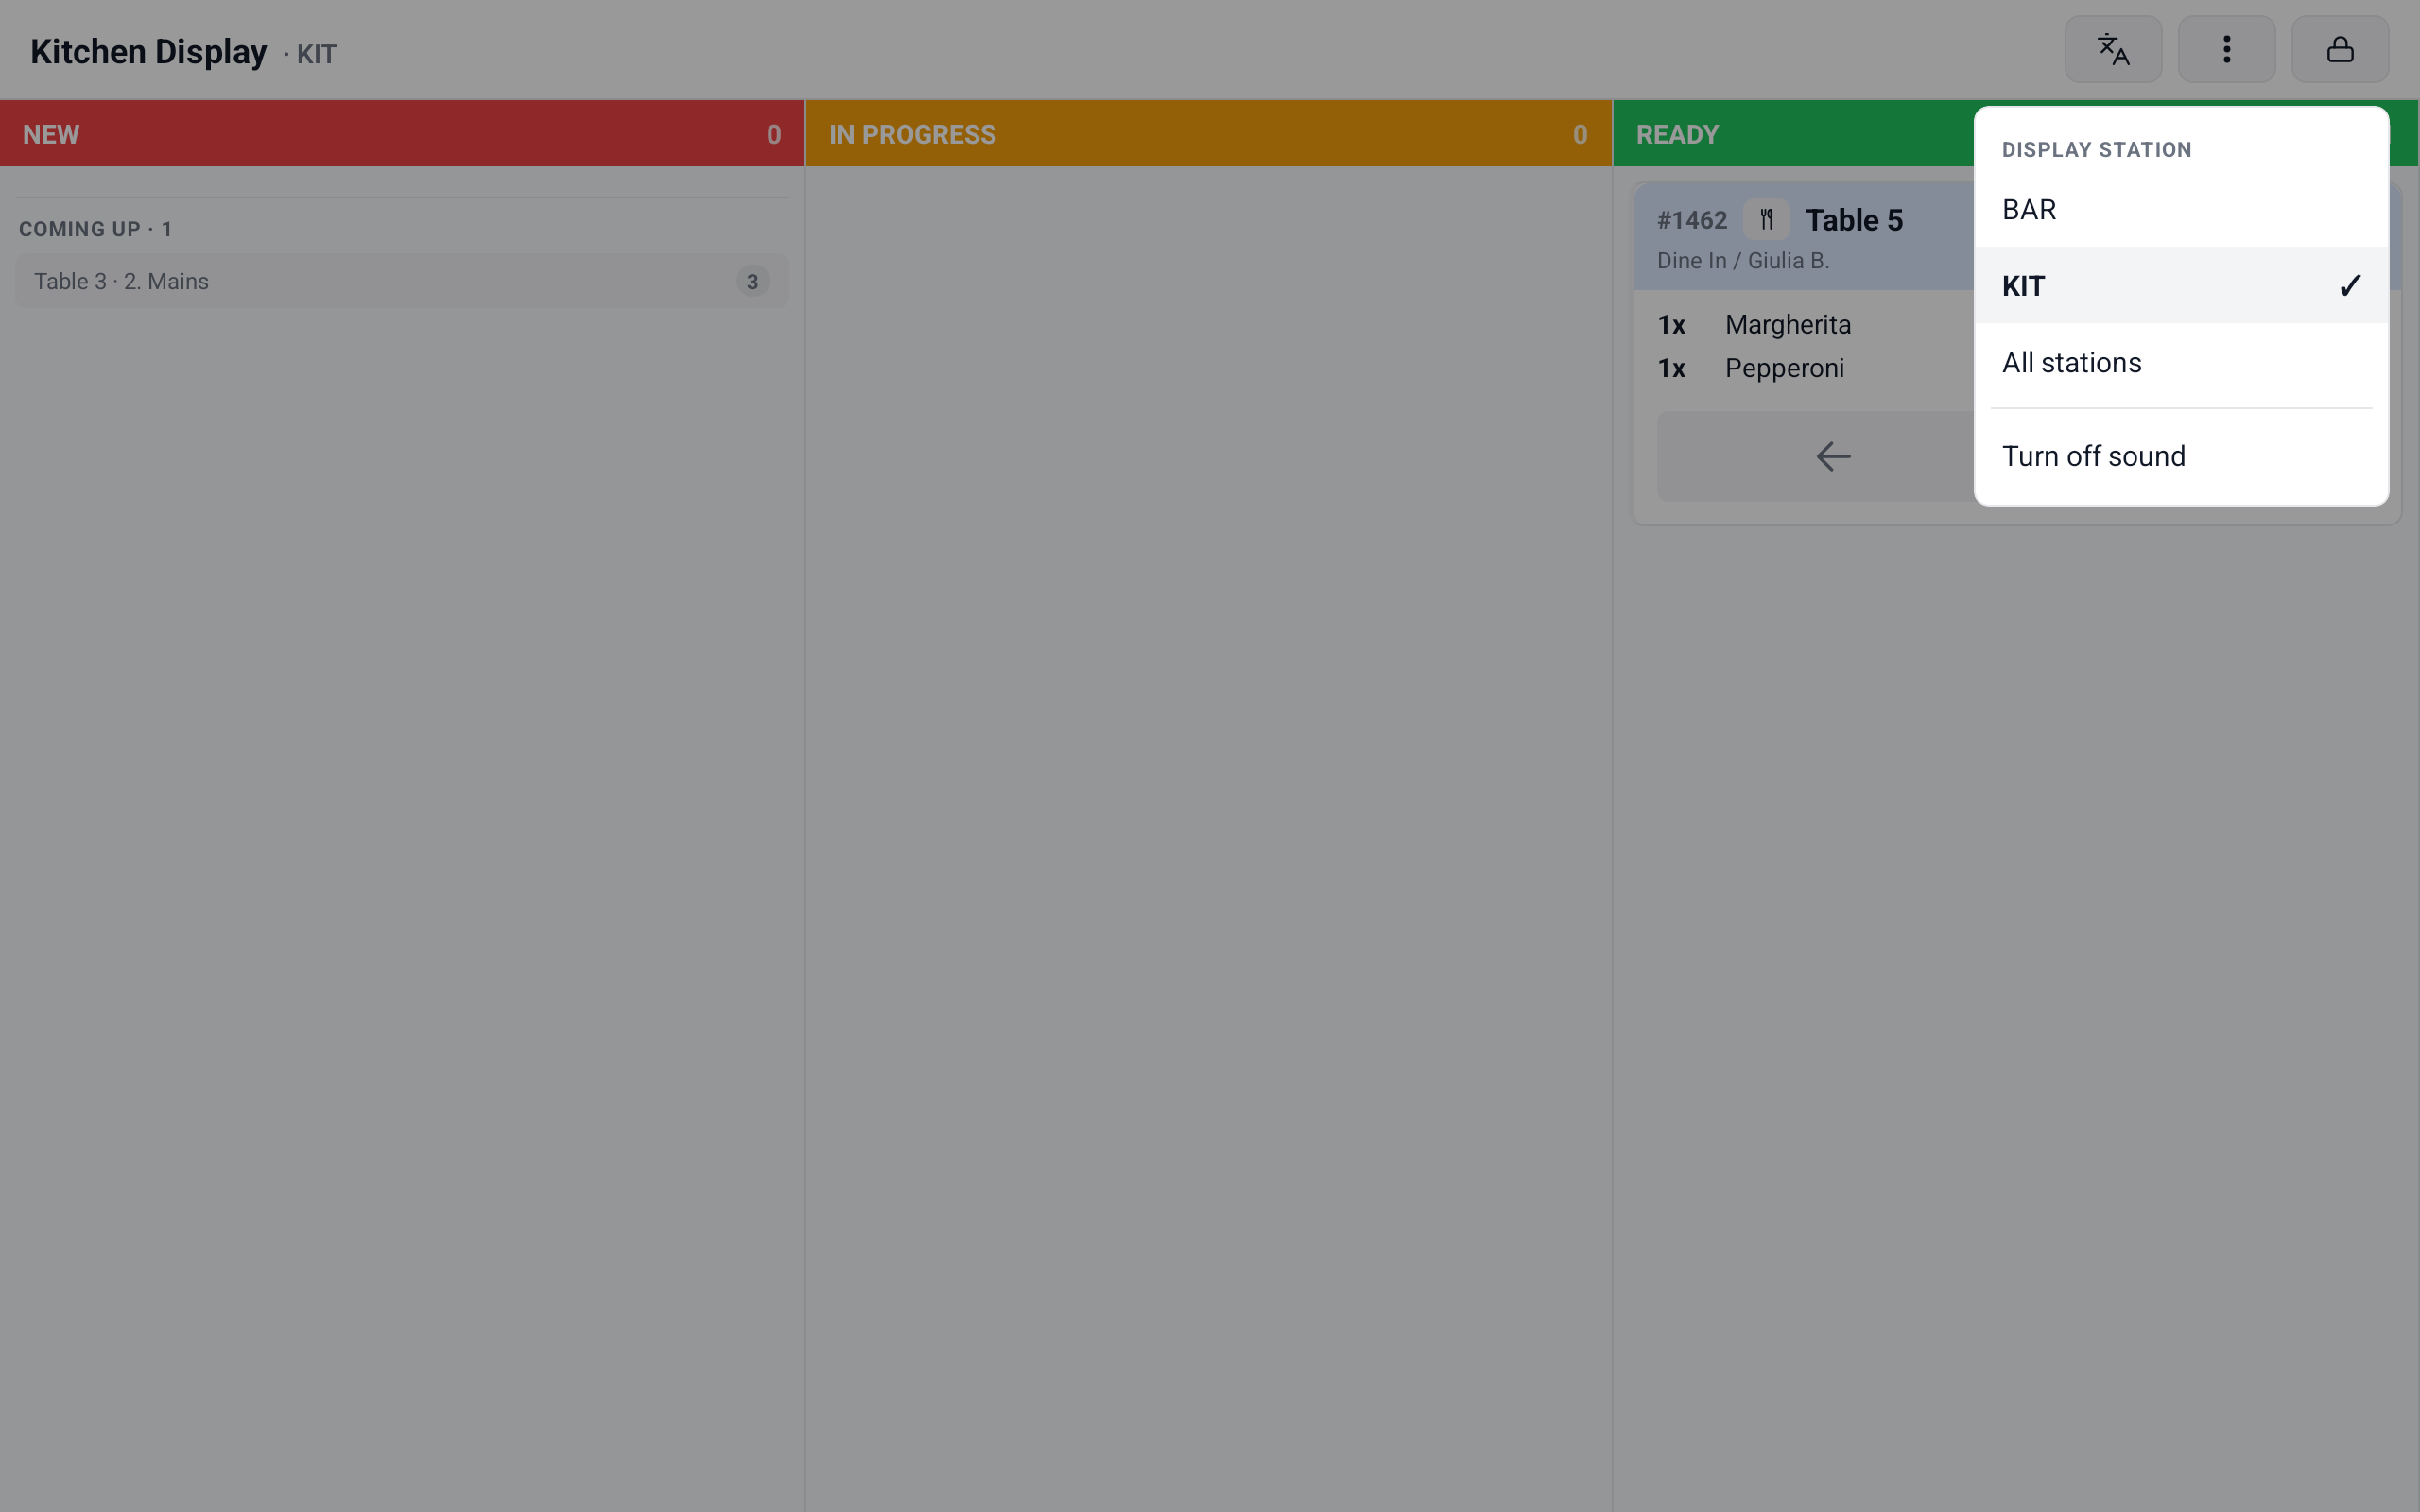
The board switches at once. The choice belongs to the screen, so it stays when staff sign out and back in.
All stations shows every ticket from every station. Use it for a runner or expo screen that watches the whole service.
On a phone: NEW, IN PROGRESS and READY tabs
On a tablet the board has three columns side by side: NEW, IN PROGRESS and READY. A phone has no room for three columns, so they become three tabs at the top, each with a count of its tickets. The board opens on NEW. (A station in Item fulfillment mode has no columns at all; see Choose how tickets appear.)
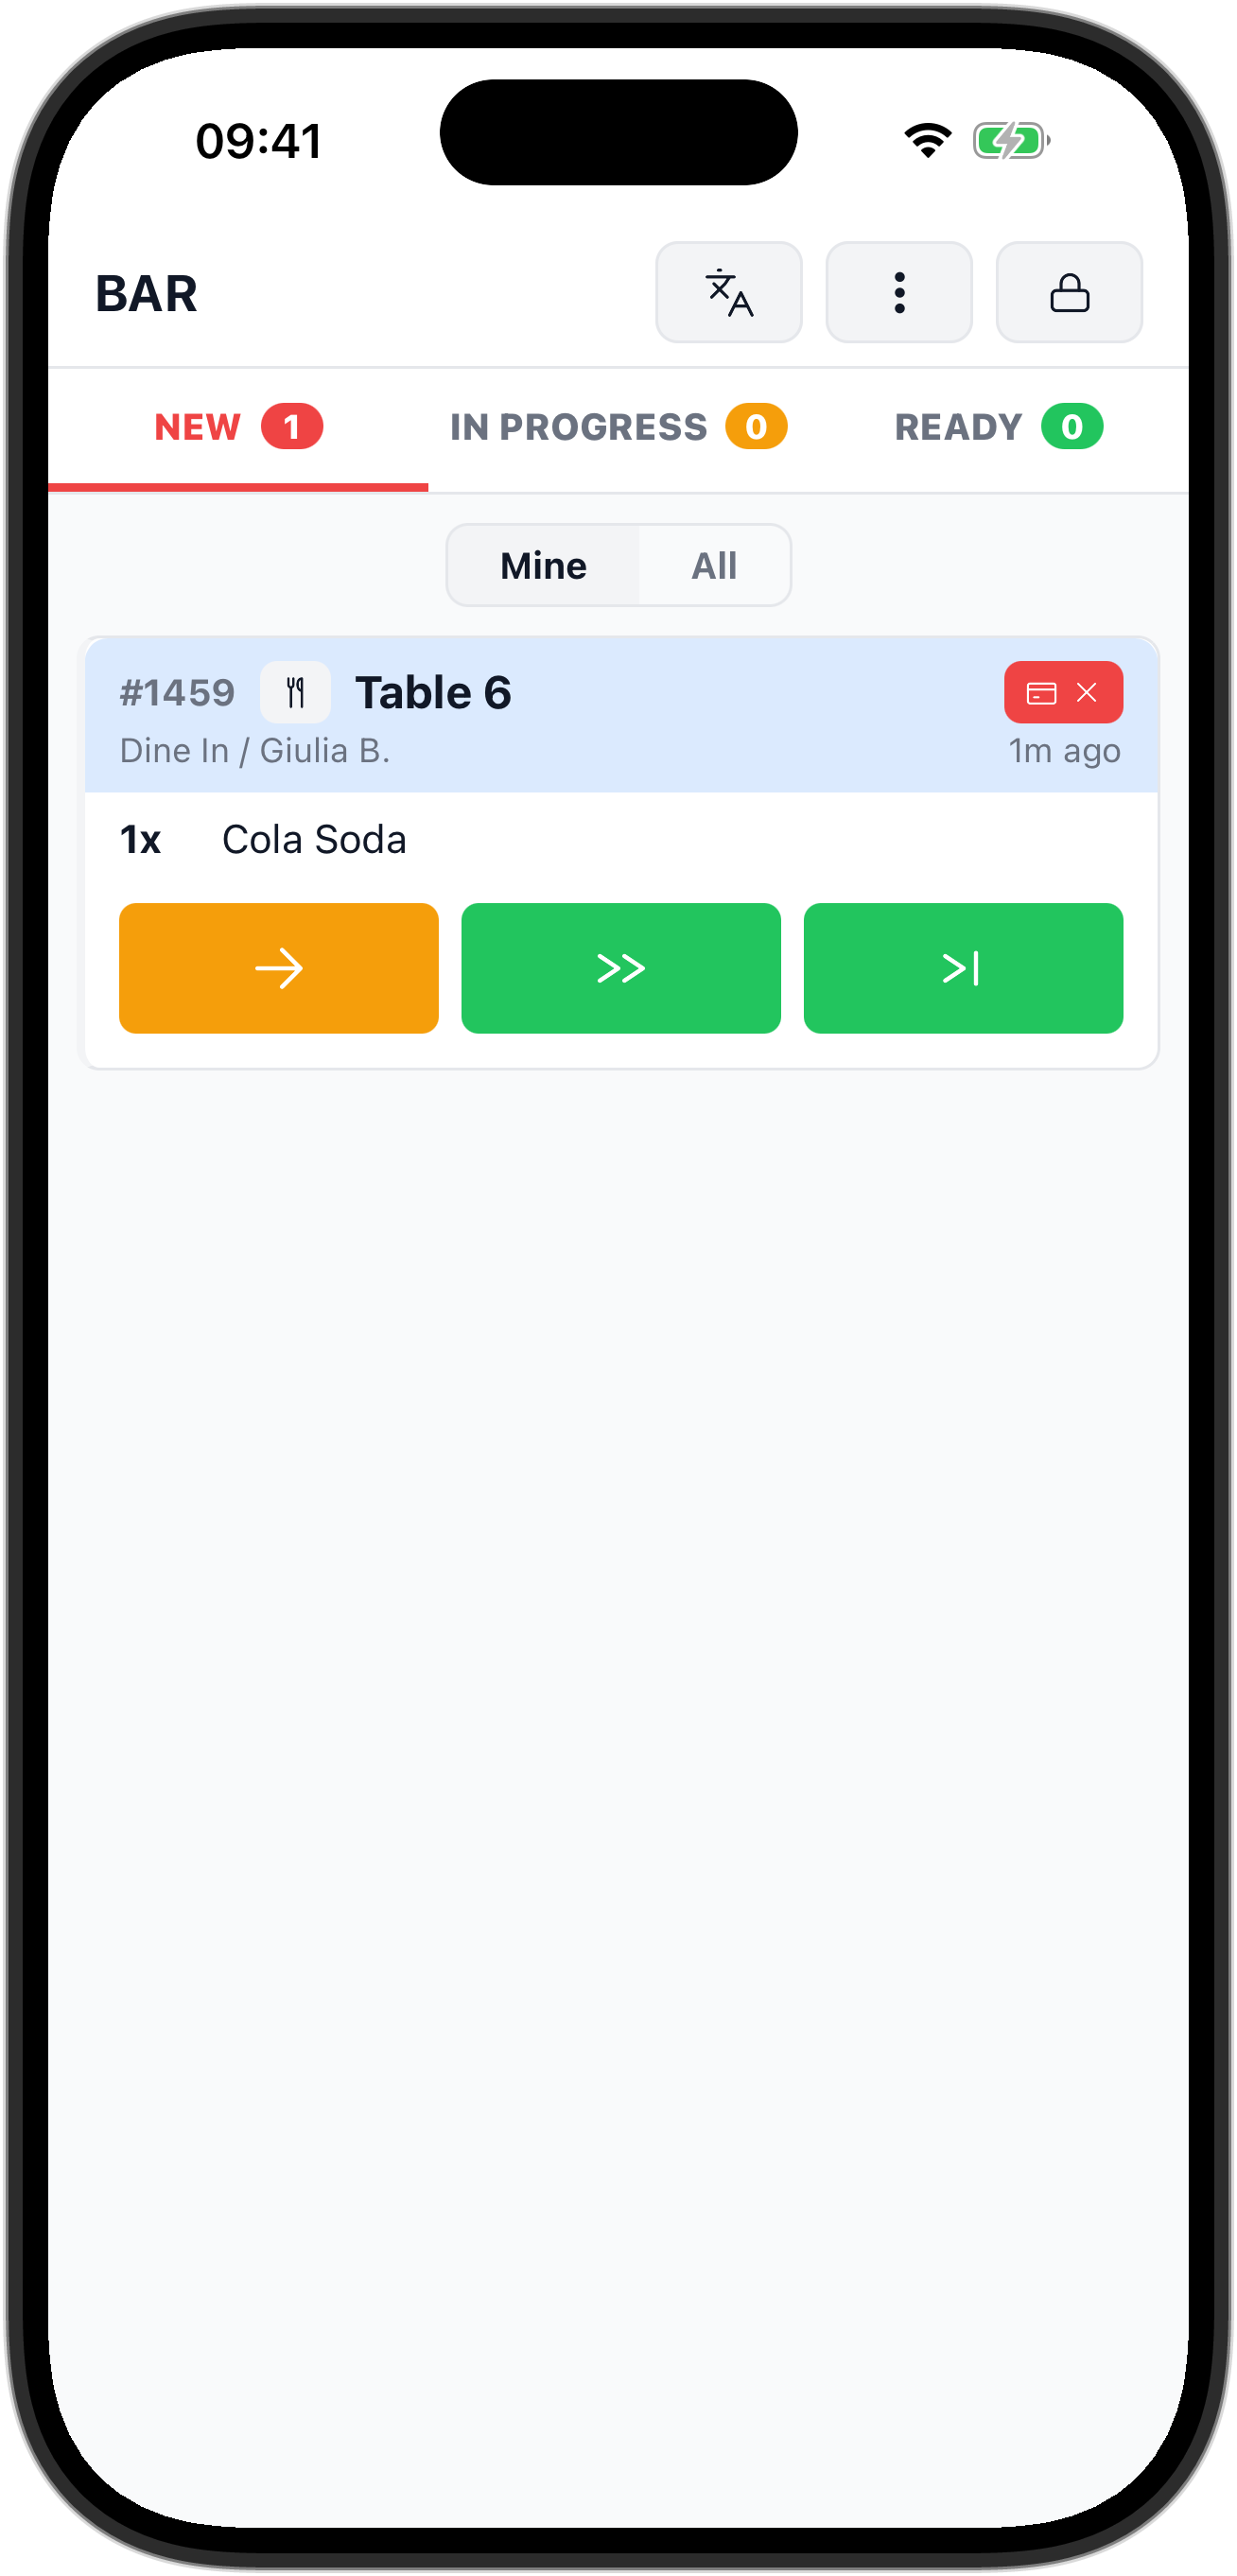
Other differences on a phone:
- The header shows a short code for the station instead of the full title. It takes the first three letters of the station's POS name, or its name, so the Bar station shows BAR and All stations shows ALL.
- The first time you open the board, a hint explains the arrows: tap → to take and advance a ticket, ← to send it back. Tap ✕ to dismiss it.
- If the station lets staff claim tickets, a Mine and All switch sits under the tabs. See Share one queue between several people.
A small tablet held upright counts as a phone, and switches back to columns when you turn it. On a tablet you can also tap a column's header to give that column the whole board, and tap it again to go back.
What's next
- Choose how tickets appear: the three display modes and where to set them.
- Send simple items straight out: shortcut buttons for items that need no cooking.
- Share one queue between several people: when several people work one station.