In diesem Dokument
Signing in and finding your way around
This guide covers your first minutes on a tablet your restaurant has already set up: signing in with your PIN, reading the Tables screen, and moving between the main screens. It also explains how to lock the tablet when you step away and how the next person signs in.
Sign in with your PIN
The tablet waits on the PIN screen whenever nobody is signed in. Your manager gives you a PIN when they add you as a staff member.
- Find the Enter your PIN screen. The row of dots under the title shows how many digits a PIN has at your restaurant.
- Type your PIN on the keypad. Use the backspace key at the bottom right of the keypad to correct a digit.
- You are signed in as soon as you type the last digit. There is no button to press.
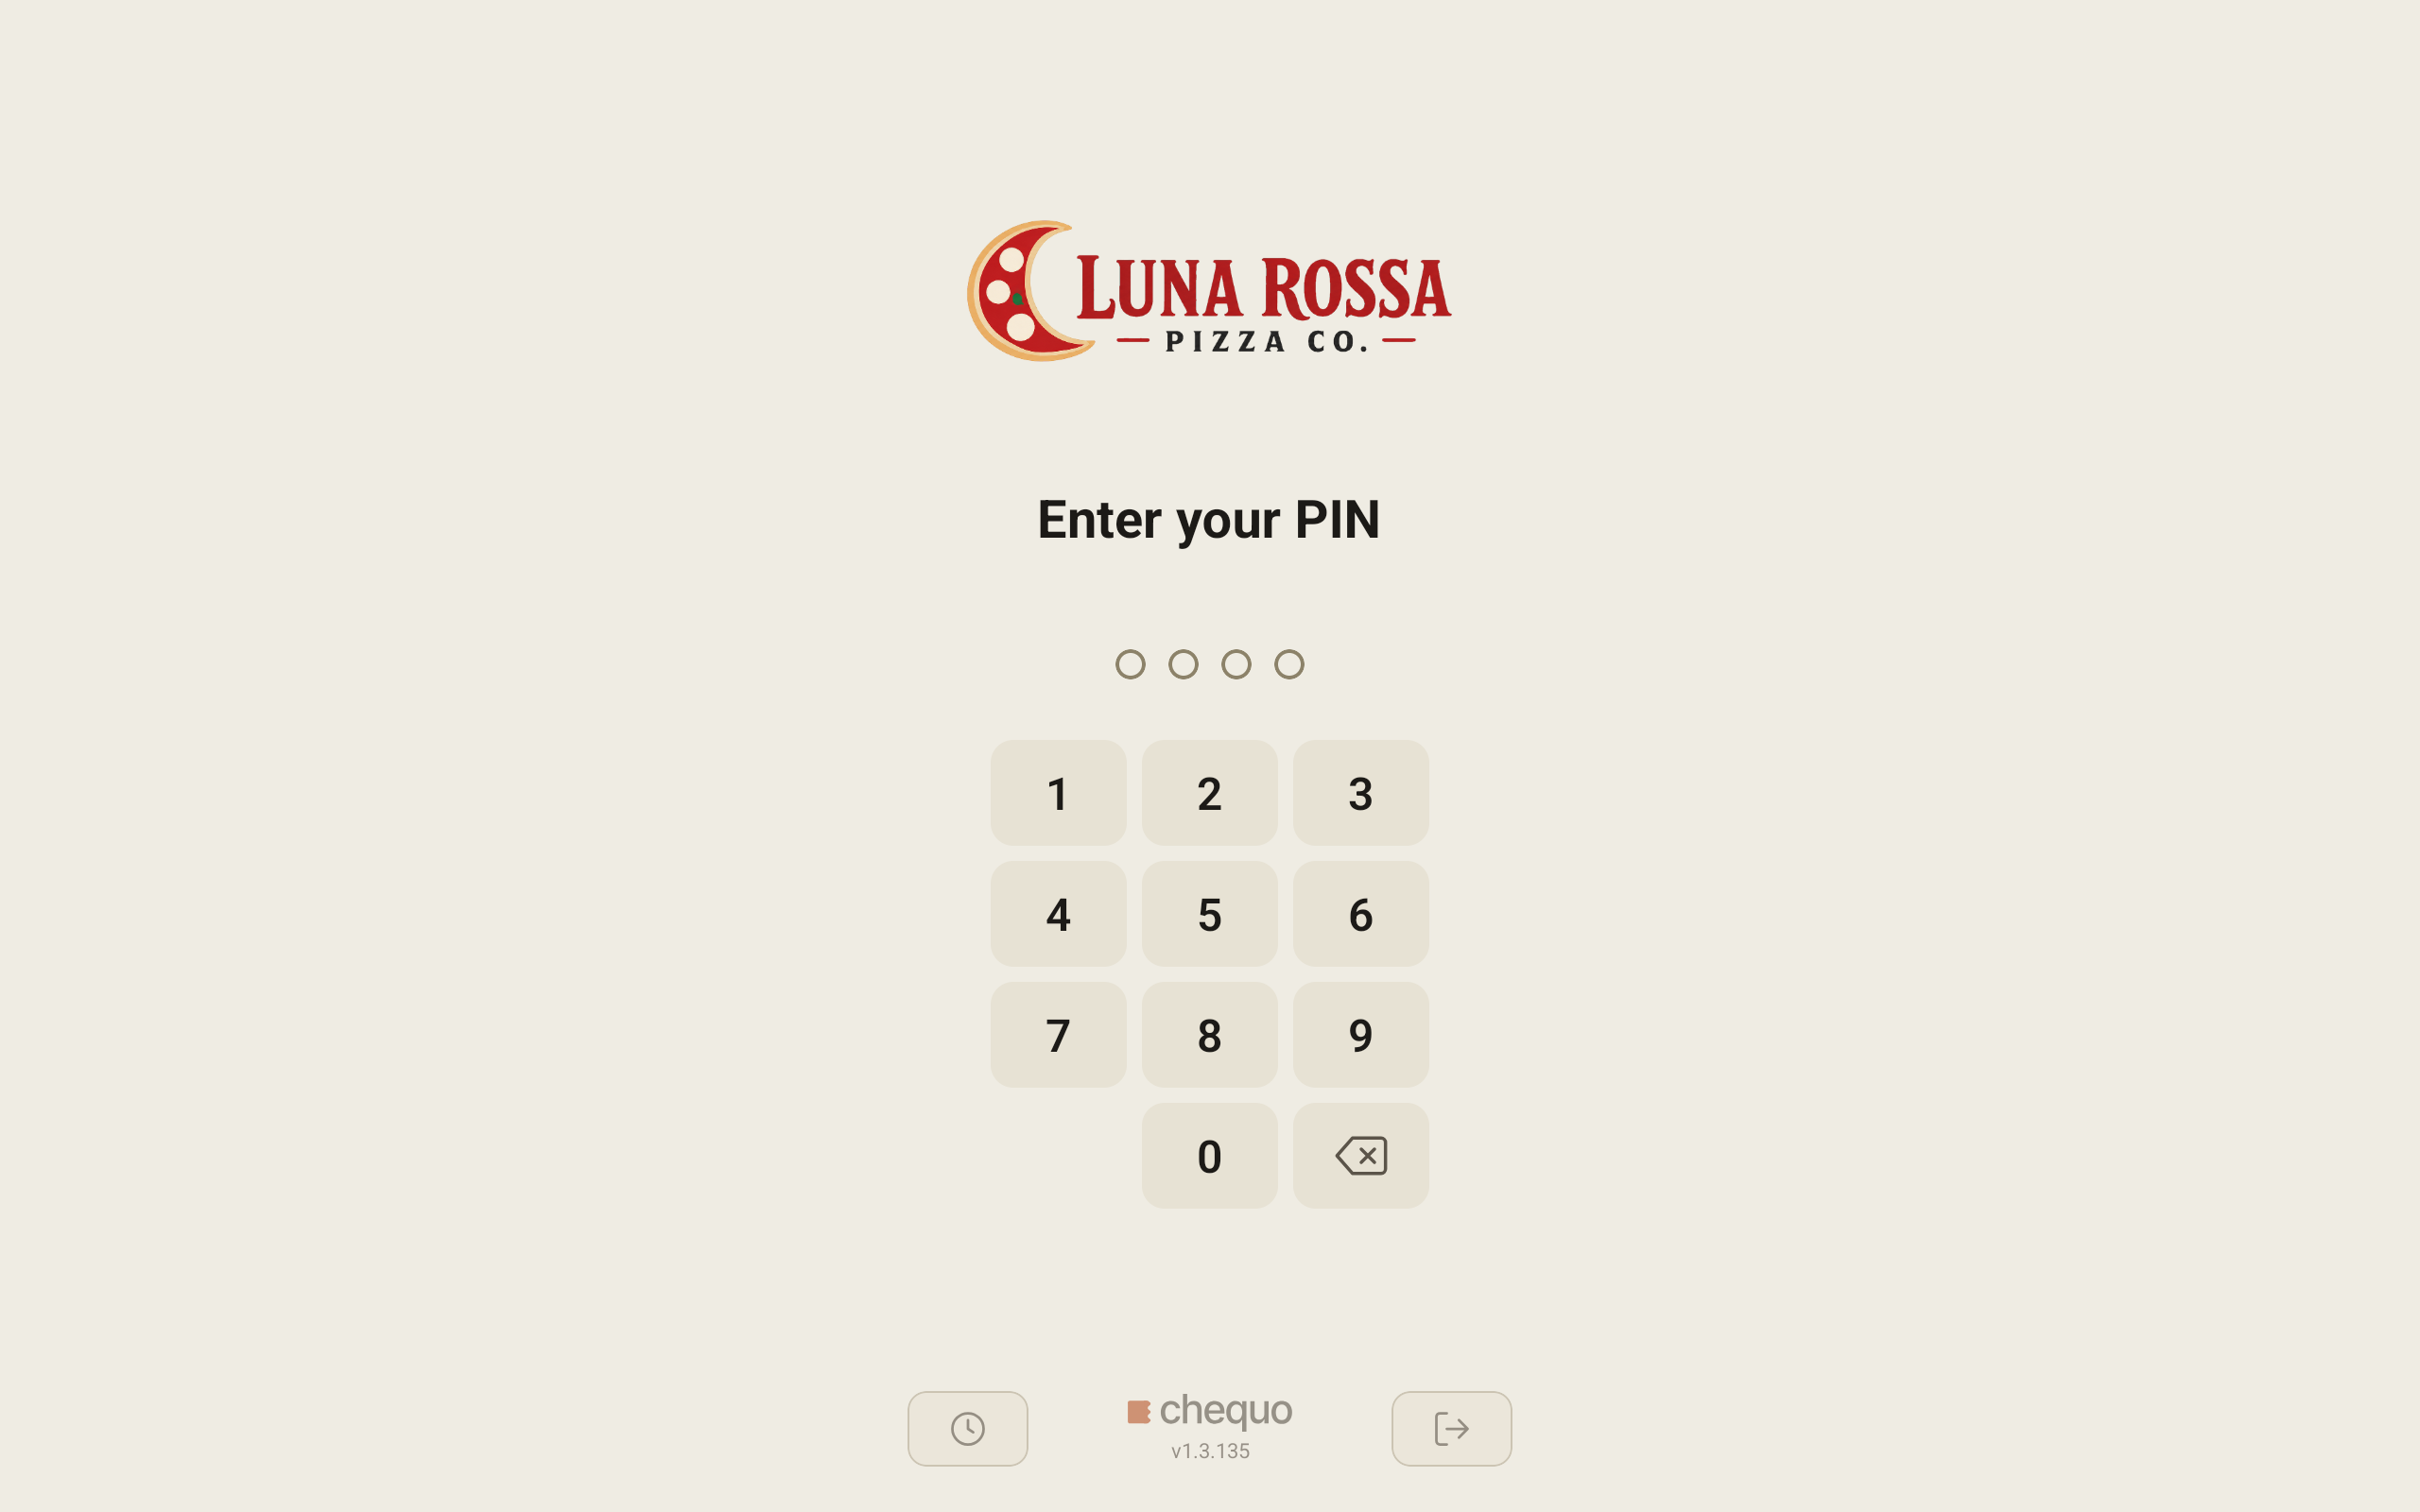
If the PIN is wrong, the app shows Invalid PIN and clears the dots so you can try again.
If the internet is down, you can still sign in, as long as this tablet has been online recently. If it has not, the app shows No internet connection and you need to wait for the connection to come back.
Two small buttons sit at the bottom of the PIN screen, either side of the Chequo logo:
- The clock button on the left is for clocking in and out of your shift. It only appears if your restaurant uses Chequo for time tracking. See Clock in and out on the staff app.
- The button on the right logs the whole tablet out of the restaurant. It is not how you end your shift. It asks Unregister this device?, and once you confirm, a manager has to set the tablet up again with their email and password. Press Cancel if you open it by mistake.
The Tables screen
After you sign in you land on the Tables screen. It shows every table on the current floor and what is happening at each one.
Along the top of the screen you'll find:
- The view buttons: Grid, Layout and List.
- The language button, the lock button (a padlock) and the three-dot menu, on the right.
- The floor tabs, under the header, one for each floor of your restaurant.
At the bottom is the + Order button and, under it, the navigation bar with Tables, Orders and, if your restaurant takes reservations in Chequo, Reservations.
Switch between Grid, Layout and List
Tap Grid, Layout or List at the top of the screen. The highlighted button is the view you are in.
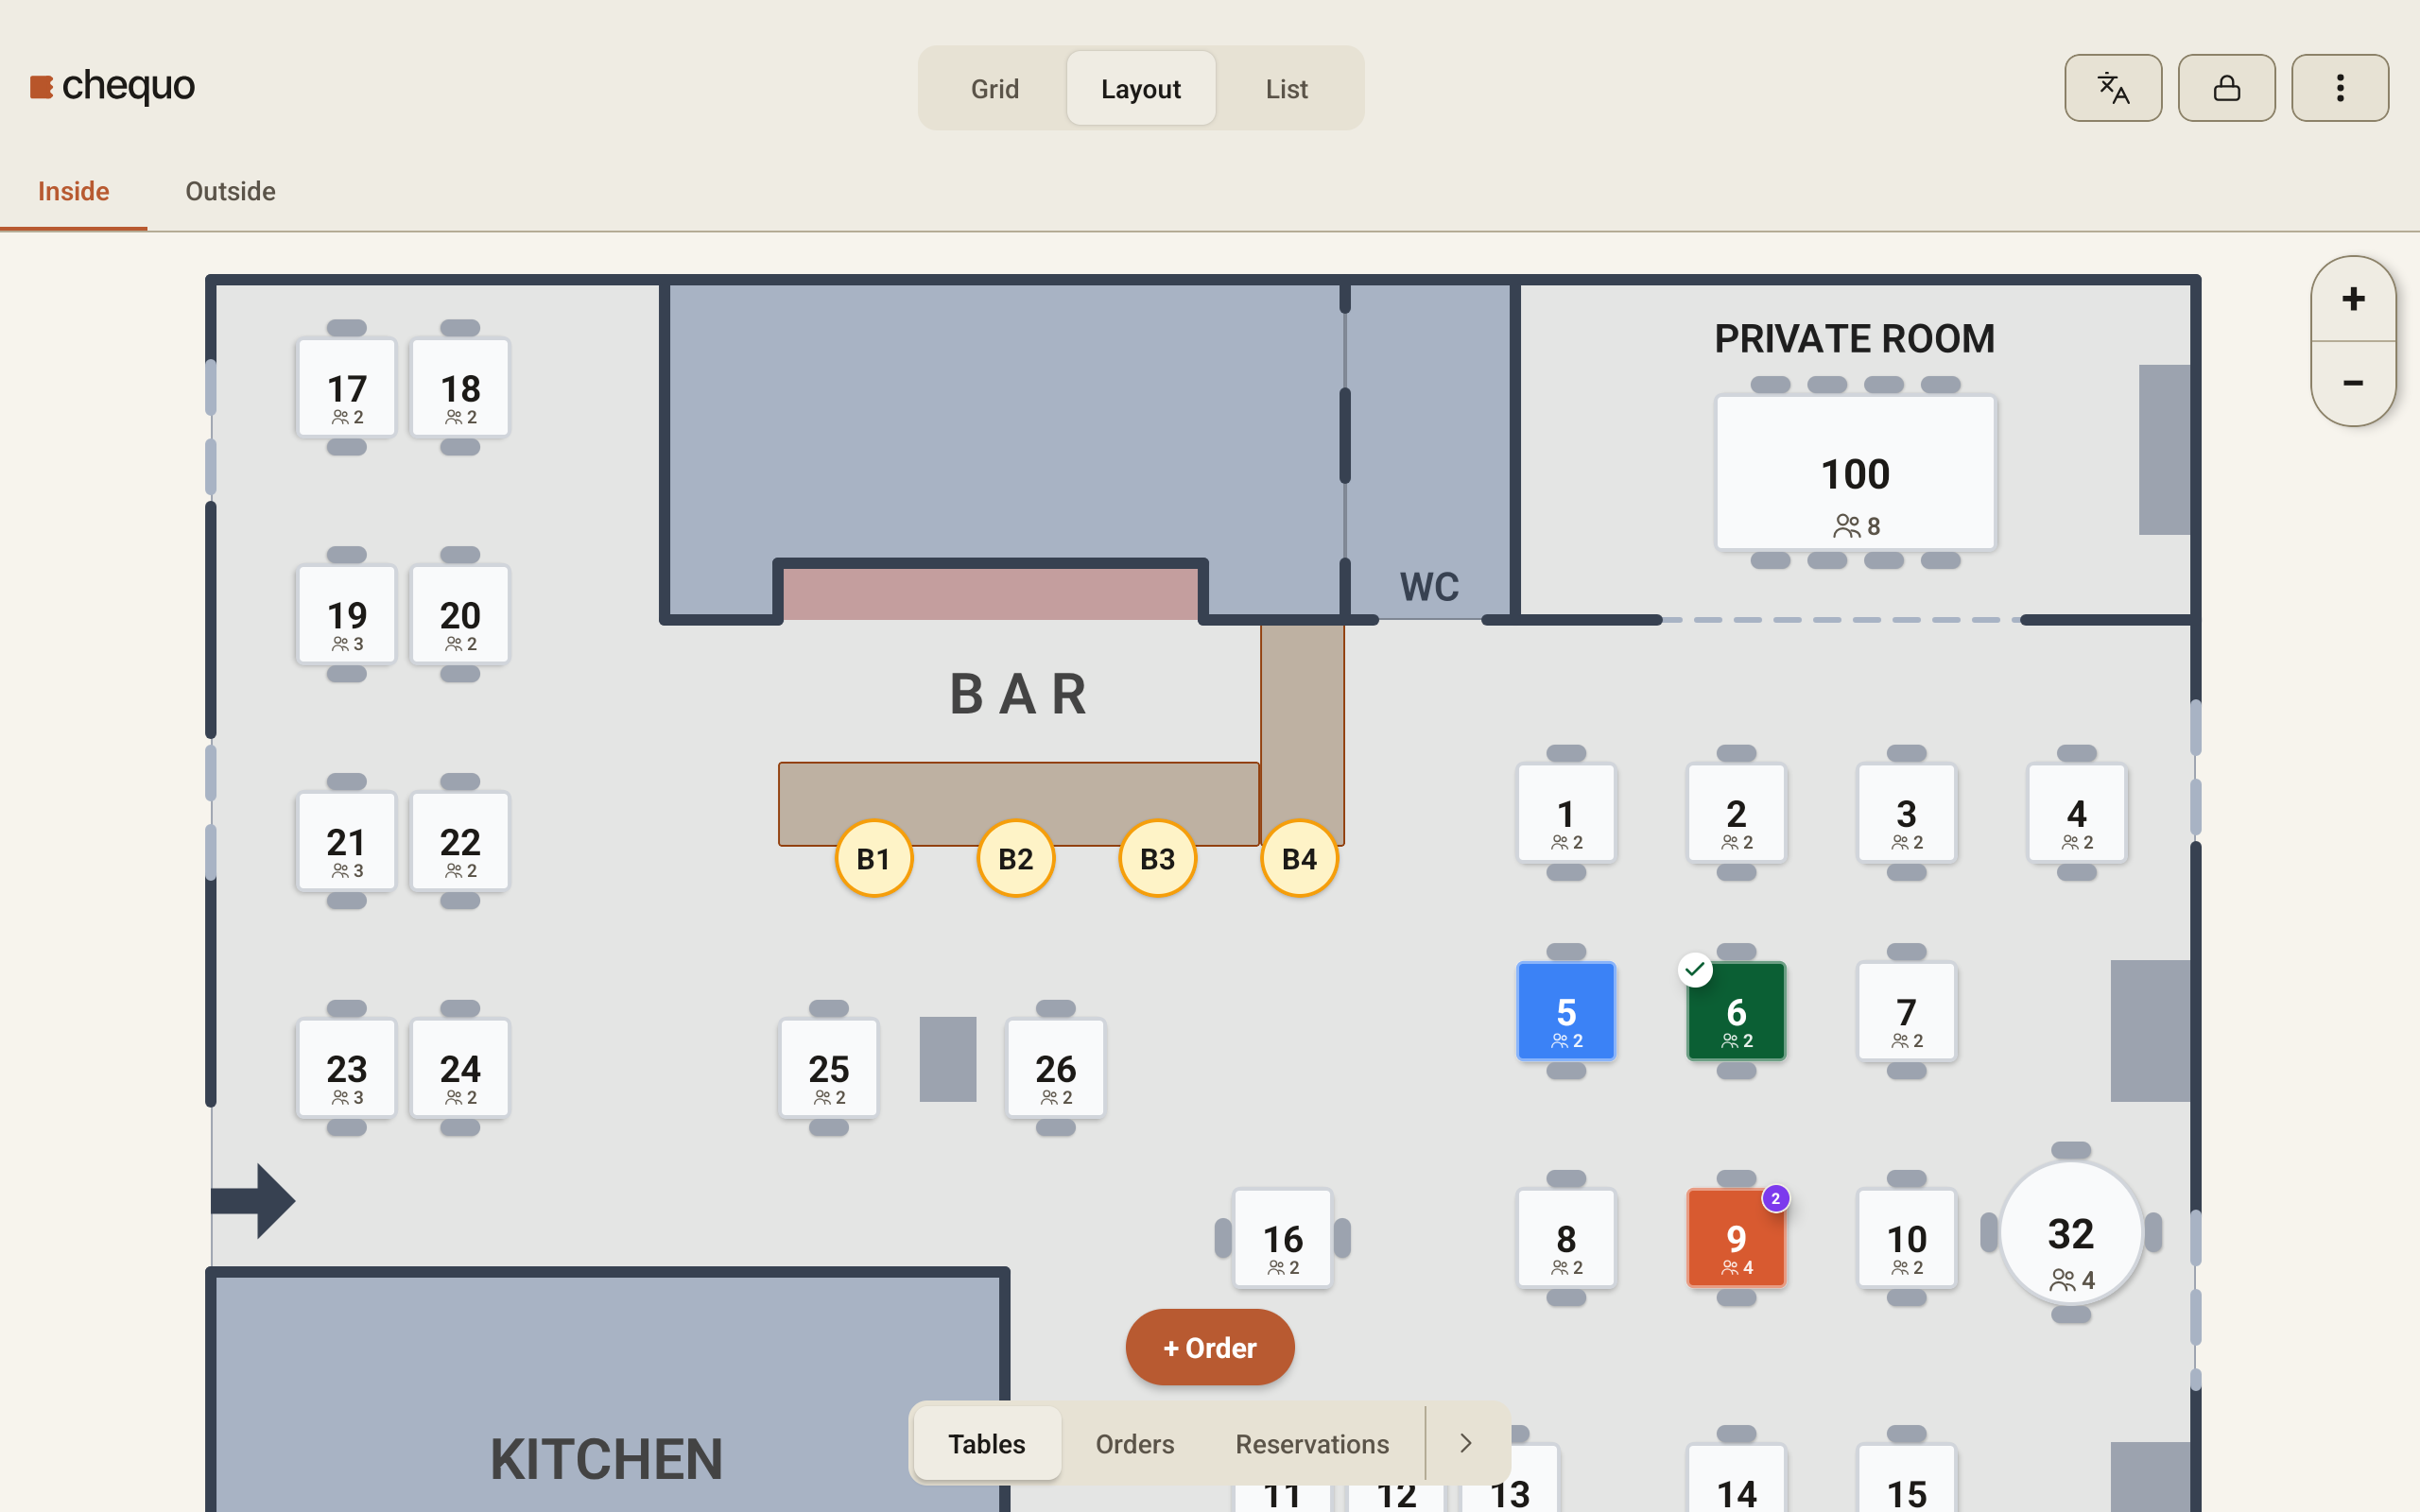
- Layout is the floor plan: tables drawn where they stand in the room, with their chairs. This is the view you start in. Drag to move around the room, and use the + and − buttons in the corner to zoom in and out. The app remembers your zoom and position for each floor.
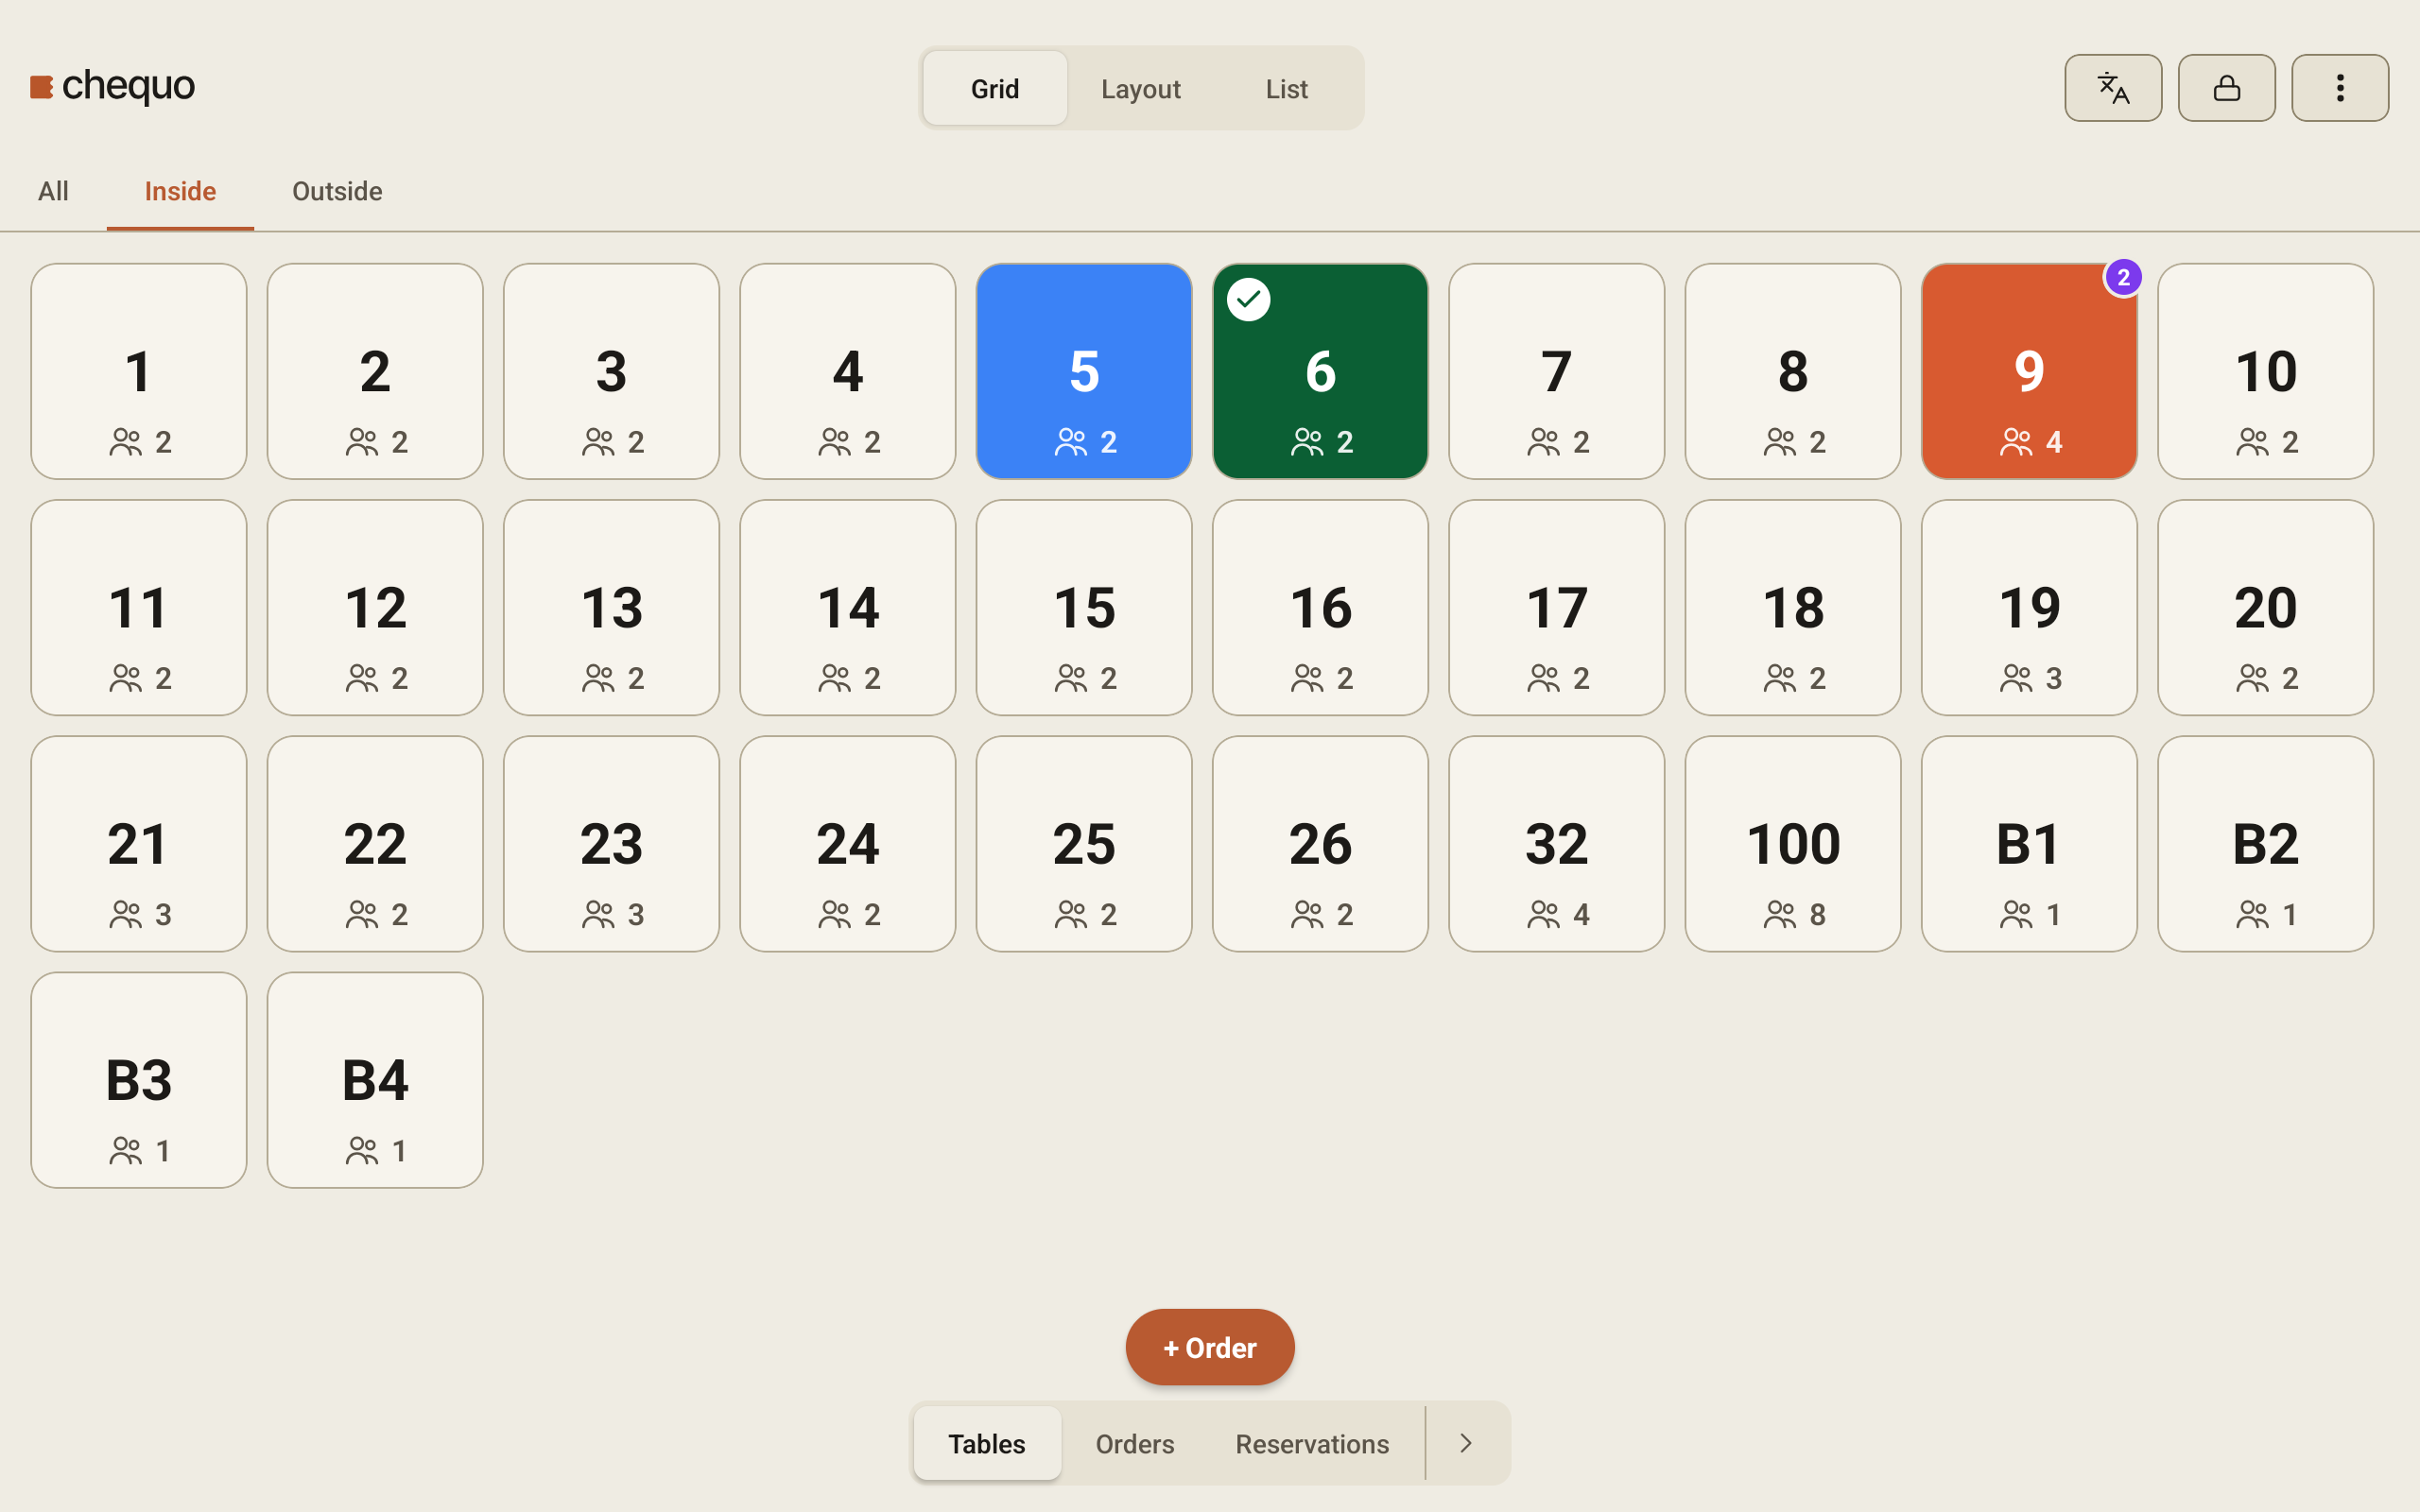
- Grid shows every table as a square tile, in table-number order.
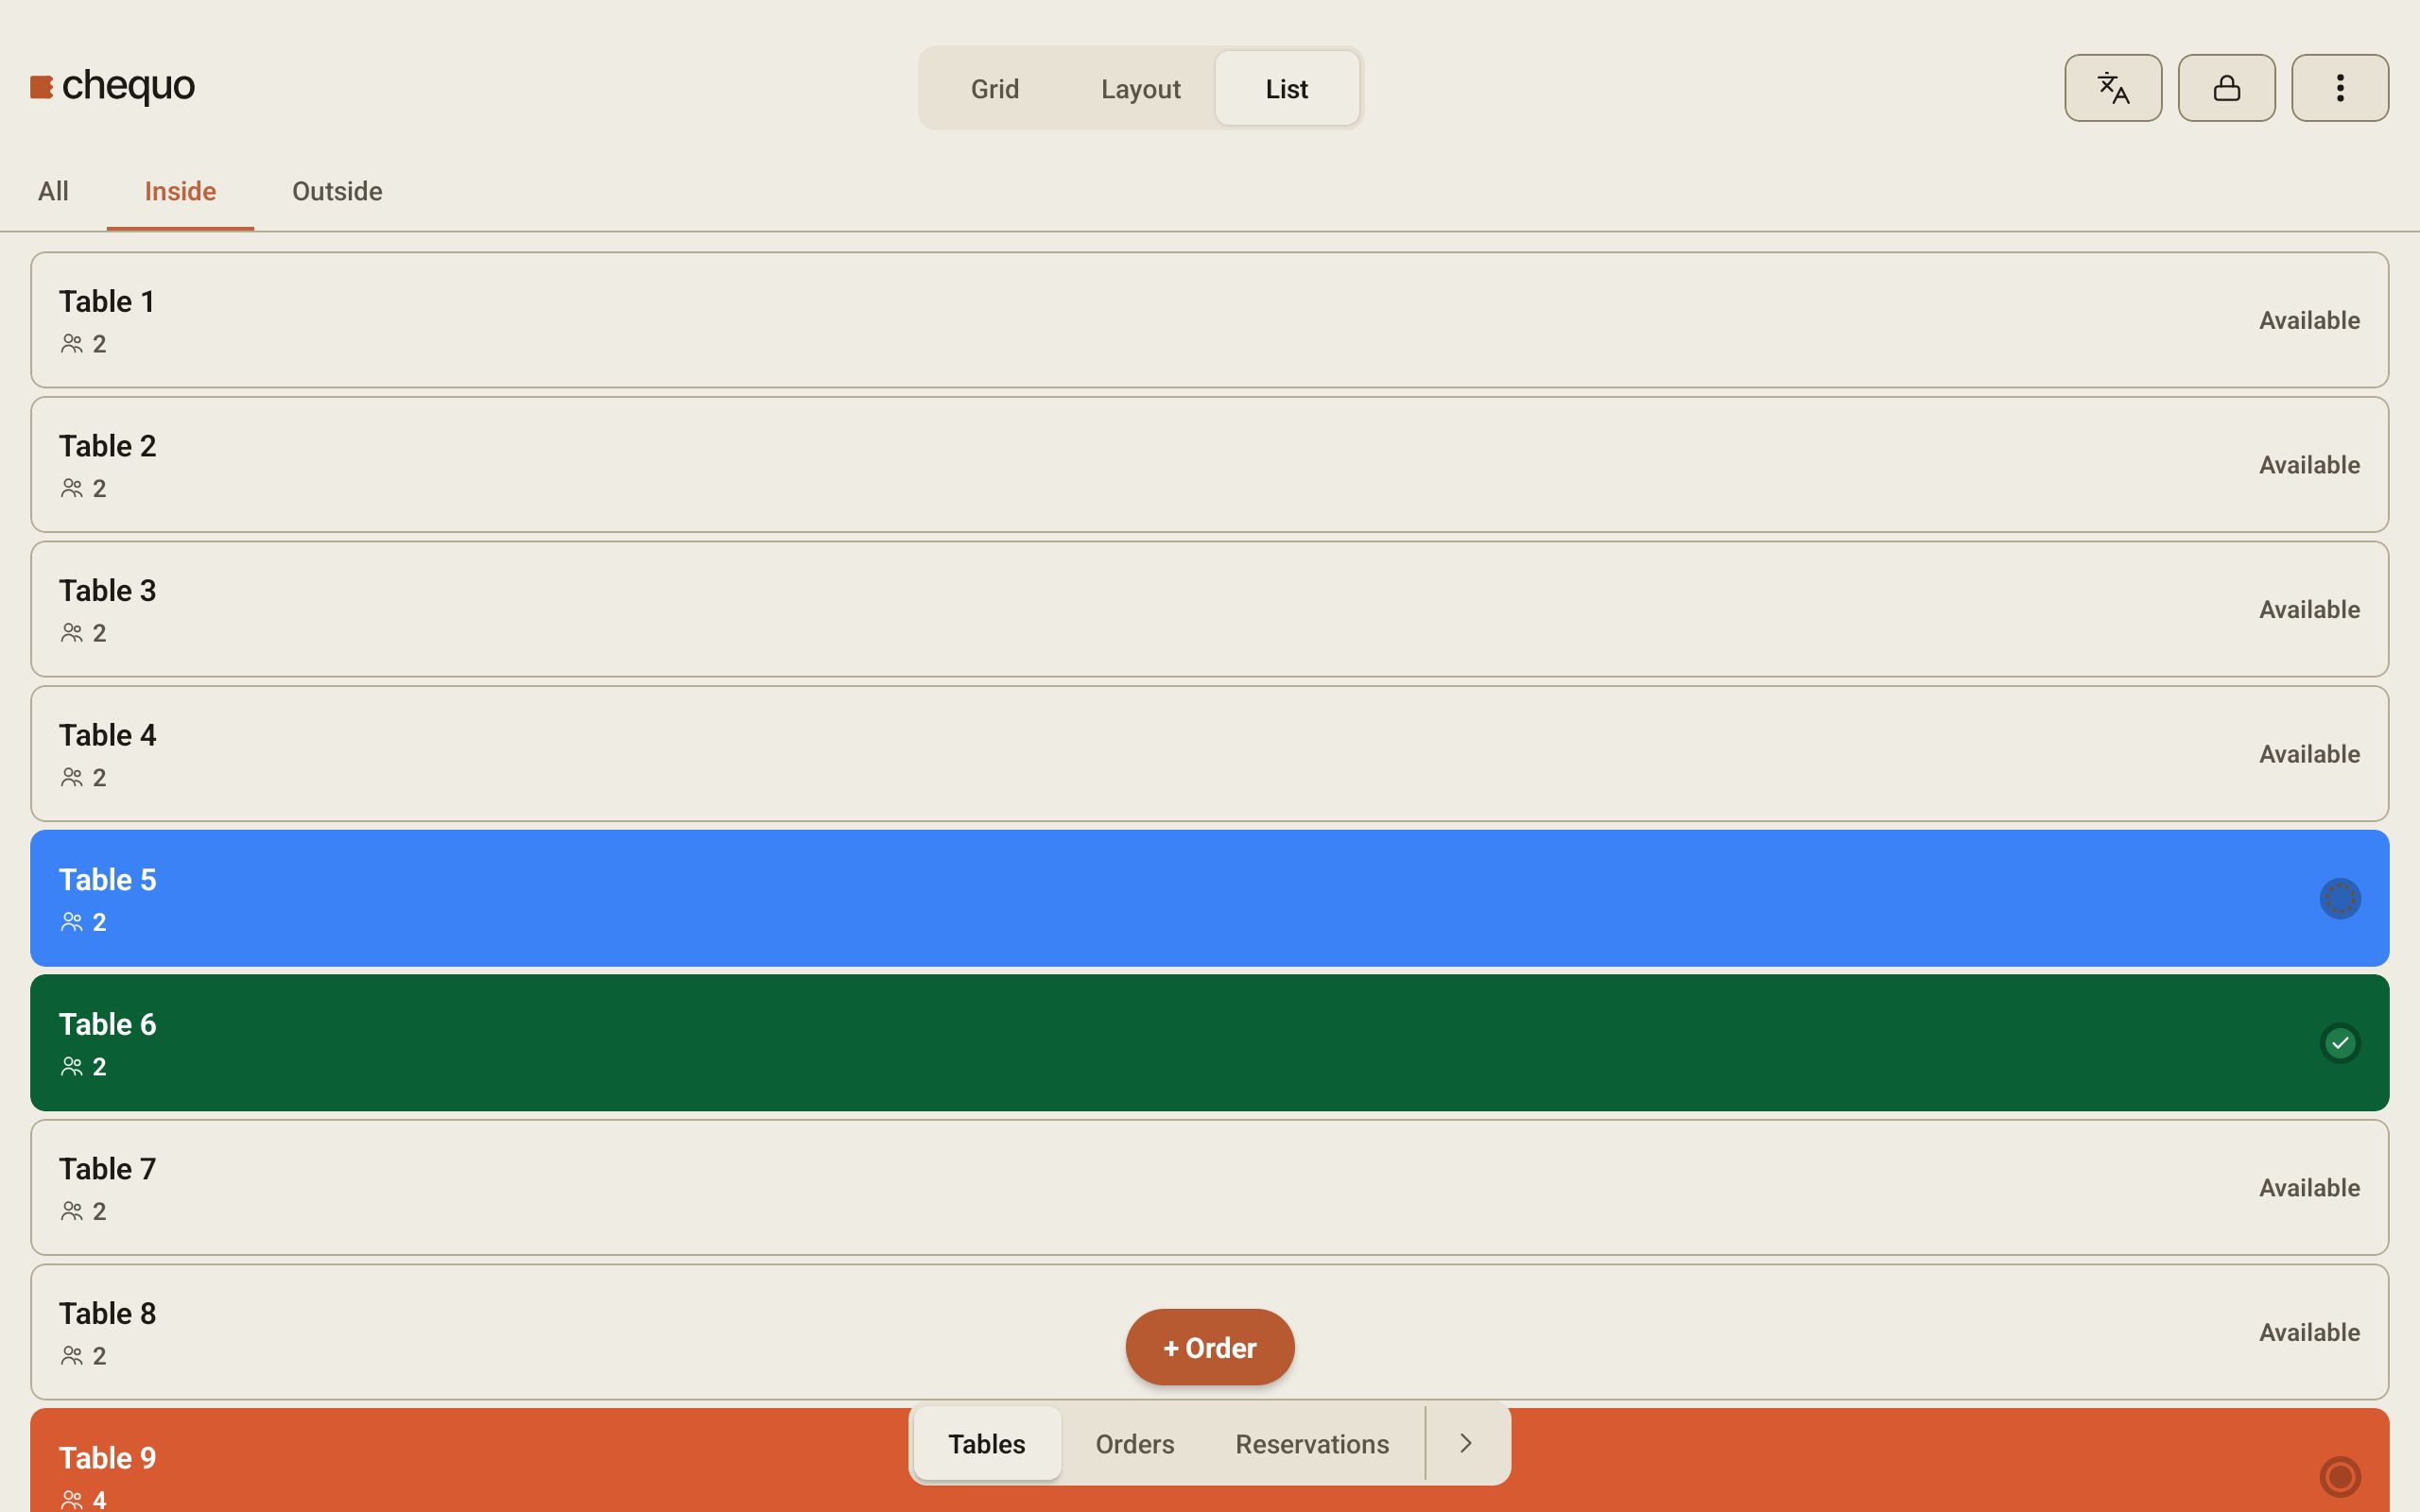
- List shows one row per table, labelled Table and its number (or Seat and its number for a bar seat), with the number of guests under it and its status on the right. A free table reads Available.
Switch floors
If your restaurant has more than one floor, tap a floor's name in the floor tabs to see its tables. The app remembers the floor you last used and opens on it next time you sign in.
In Grid and List view there is also an All tab, which shows every floor at once with each floor's name as a heading. All is not available in Layout view, because the floor plan shows one room at a time.
Read a table at a glance
- Free: a plain light table with no colour. Bar seats are pale yellow on the floor plan.
- Blue: the table has an open check, and nothing on it has gone to the kitchen yet.
- Orange: food has been sent to the kitchen and is being prepared.
- Dark green: some or all of the food is ready.
- Dark green with a check mark in a white circle: everything has been served.
Each table also shows:
- The table number, in the middle.
- A person icon with a number. On a table with a check, this is the number of guests on its checks. On a free table, it is the number of seats.
- A purple badge with a number in the corner, when the table has more than one check. The number is how many checks are open on it.
If your restaurant takes reservations in Chequo, tables with a booking coming up are striped:
- Purple stripes: a booking is due soon. A small purple tag shows how many minutes until it starts (on the floor plan, zoom in if you can't see it). In List view the row reads Reserved and the minutes.
- Red stripes: the booking's start time has passed and the guests have not arrived yet. The table is being held for them, and the red tag shows how many minutes are left before the hold ends. In List view the row reads Holding and the minutes.
Open a table
What happens when you tap a table depends on how many checks it has:
- No check: a new check opens on the table, ready for you to add items. See Taking an order.
- One check: that check opens.
- Two or more checks: a sheet listing the table's checks appears, headed Table and the table number. Each row shows the check's total, its number, who opened it and a red card chip while it is unpaid. Tap the check you want, or tap Add order to start another check on the same table.
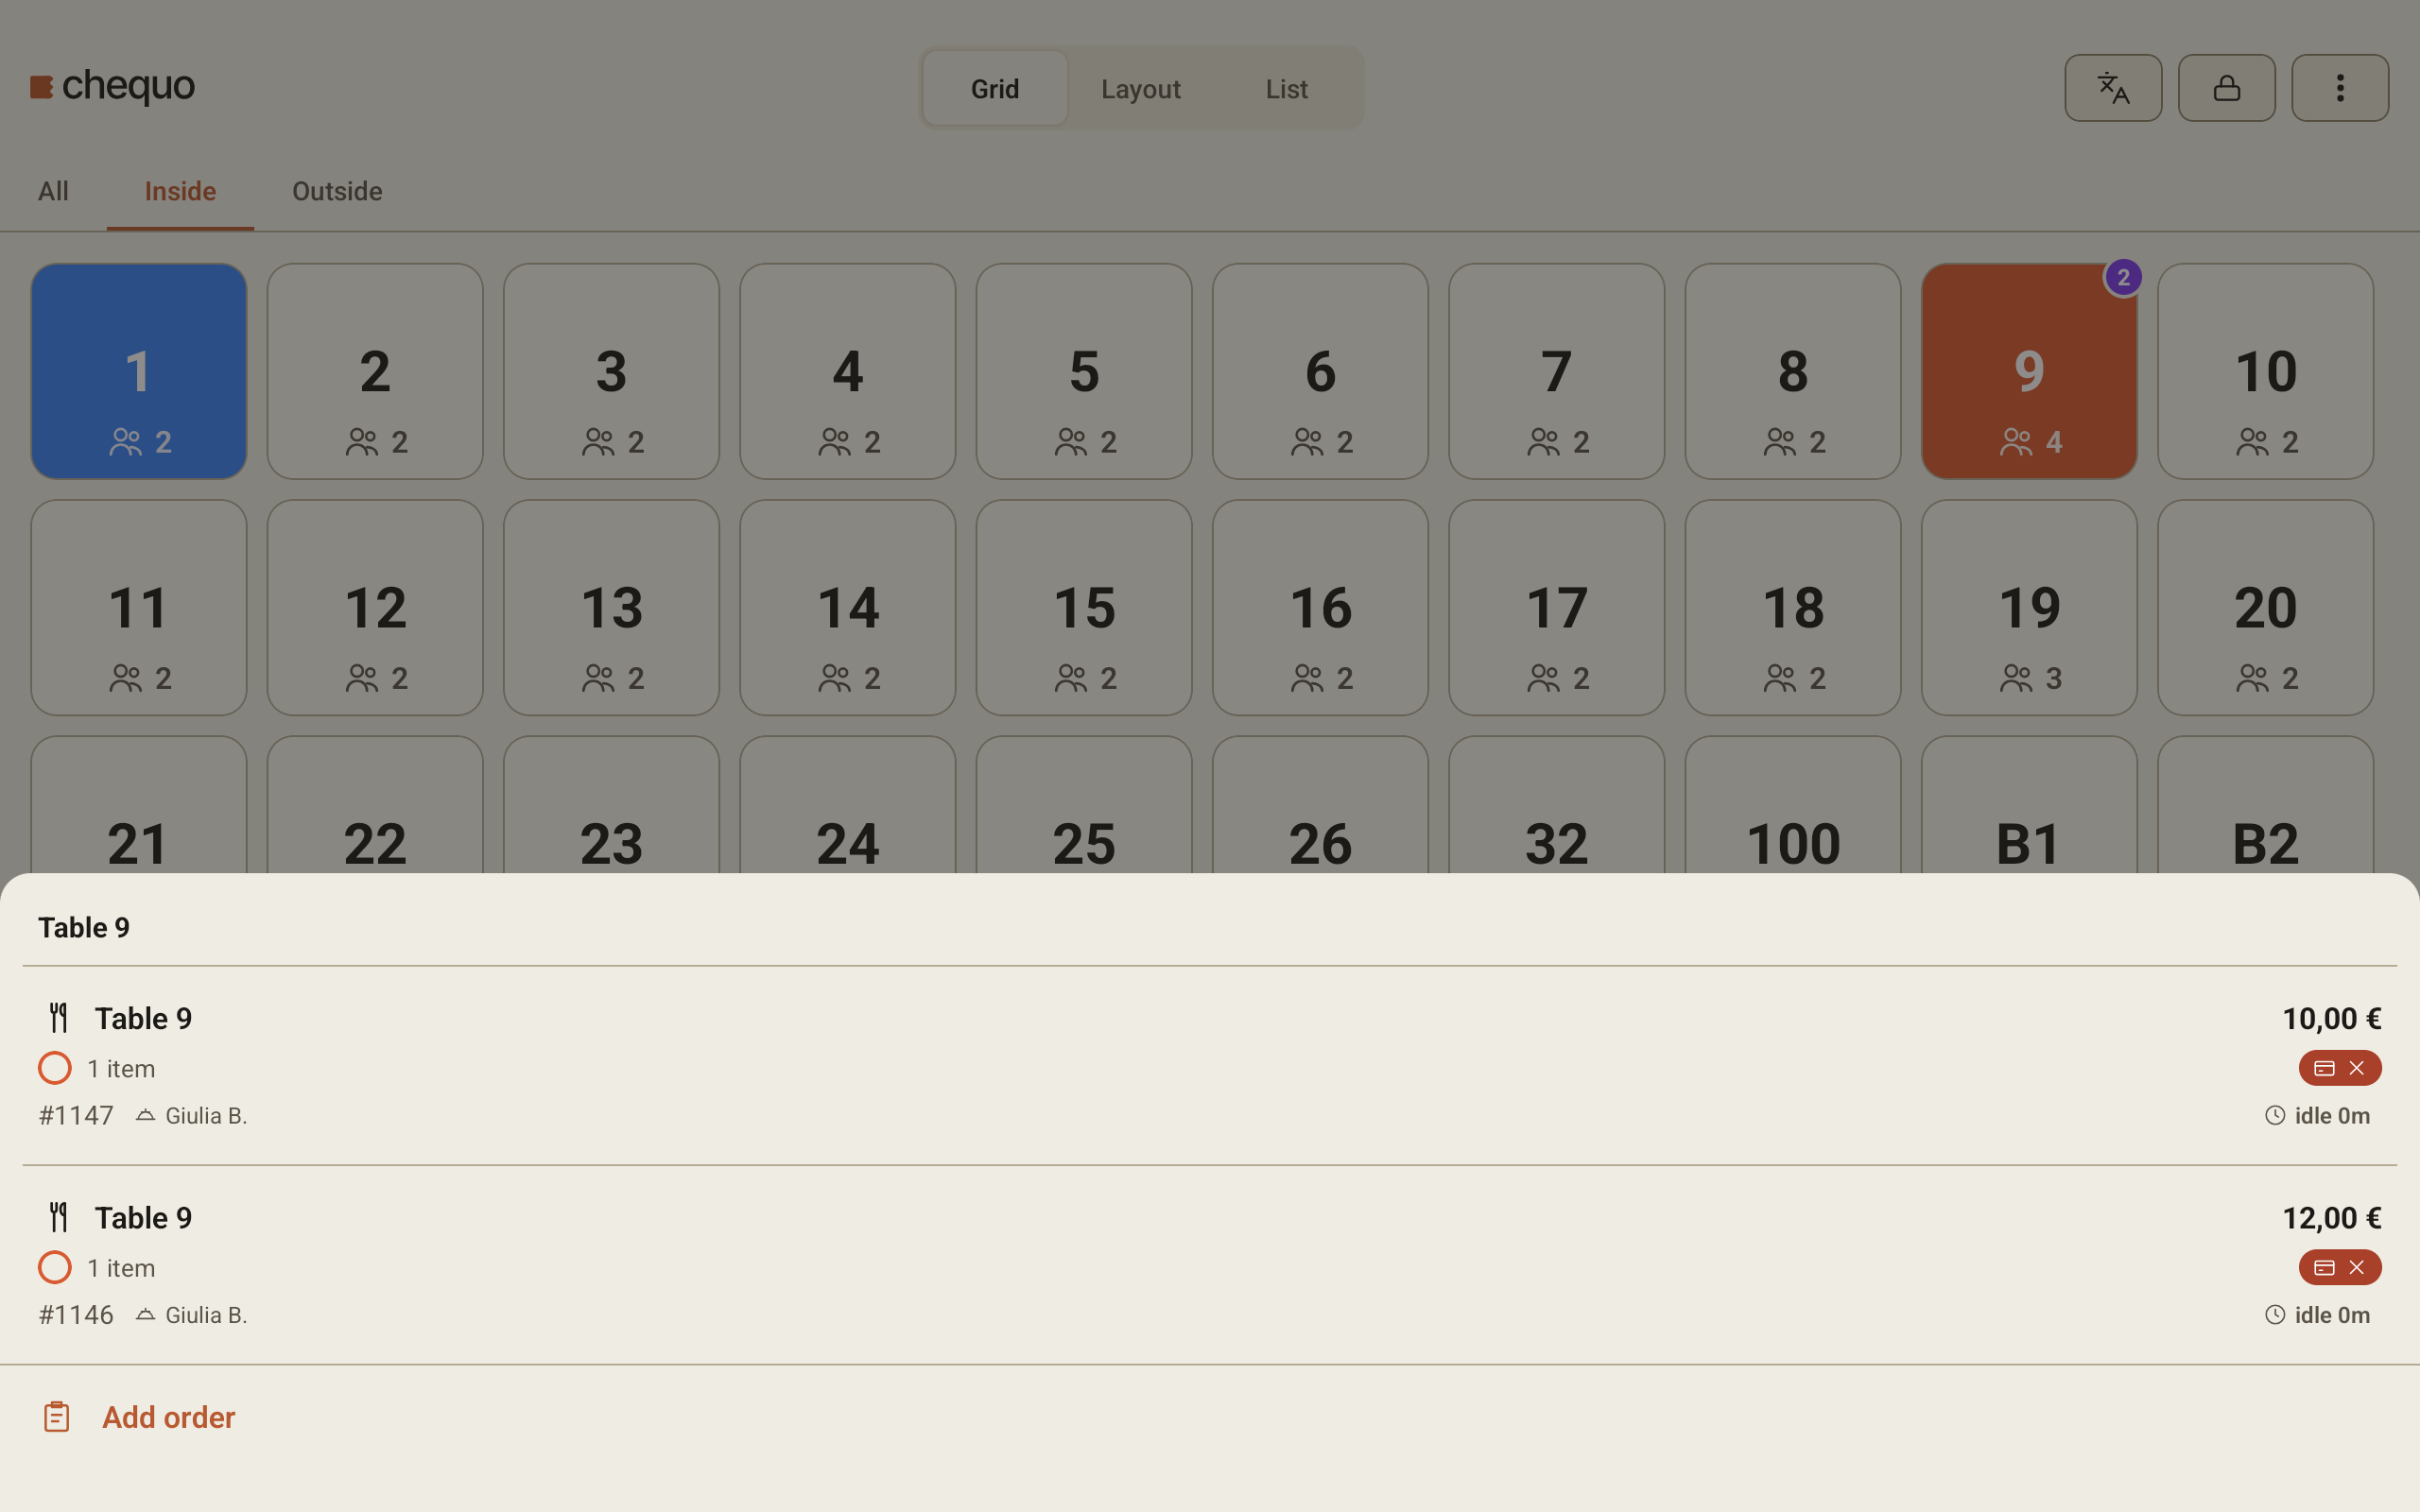
To start a second check on a table that already has one, press and hold the table. The list of its checks opens, with Add order at the bottom.
If a free table has a booking due soon, tapping it asks what to do first. The title says Reserved for and the guest's name. Tap Mark arrived & seat if the booked guests have arrived, or Start walk-in order to seat someone else there.
The navigation bar
+ Order, above the bar, asks what kind of order you are starting in New order. Dine-in takes you to the Tables screen to pick a table. Counter, Takeout and Delivery start an order that isn't tied to a table.
The bar itself moves you between the main screens:
- Tables brings you back to the Tables screen.
- Orders lists the checks in the restaurant. Open shows the checks still running and Closed shows the ones already paid, which is where you go to reprint a receipt.
- Reservations opens your restaurant's bookings. It only appears if your restaurant takes reservations in Chequo.
The small arrow at the end of the bar slides it off the screen if it is in your way. Tap the arrow at the edge of the screen to bring it back.
The three-dot menu
Tap the three-dot button at the top right to open the menu. Your name is at the top, so you can check who is signed in. The menu includes:
- Recently closed, which opens the closed checks on the Orders screen.
- Reload, which fetches the tables again. Use it if the screen looks out of date.
The three-dot button turns amber when the tablet has lost its internet connection or still has orders to upload. You can keep taking orders. The tablet saves them and sends them when the connection is back.
Change the language
Tap the language button (left of the padlock) and choose a language from Choose language. The app switches straight away. Your choice is saved for you on this tablet and does not change the language for anyone else.
Lock the tablet and switch user
Lock the tablet whenever you step away, so nobody takes orders in your name.
- Tap the padlock button at the top of the Tables screen.
- The tablet goes back to the PIN screen. The next person signs in with their own PIN.
Locking does not close or change any checks. Everything you were working on stays as it was.
When you sign back in with your own PIN, the app takes you back to where you were: the same check, the same Orders list, or the same floor and view of the Tables screen. If someone else signs in, they start on the Tables screen.
Your manager can also set the tablet to lock itself after a few minutes without anyone touching it. It locks the same way if the app has been in the background for longer than that time. Sign in again with your PIN to carry on.